How to open a xbox 360 without voiding the warranty

Hello everyone,
I will premise that I take no responsibility for anyone who tries this Tutorial. If the warranty seal is damaged, the warranty is voided.
OPENING THE XBOX360
First you must remove the faceplate: take a look at the face of the Xbox 360 and insert your thumb into the port that covers the two USBs on the right side of the unit. With your other hand squeeze the top and bottom sides of the faceplate, pull the faceplate out with your thumb.
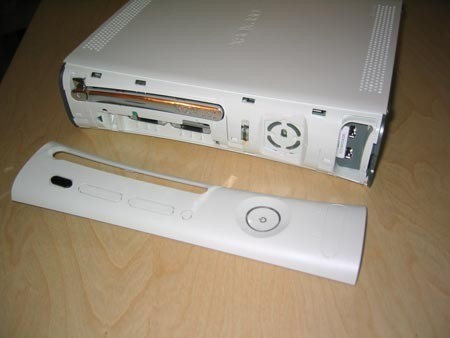

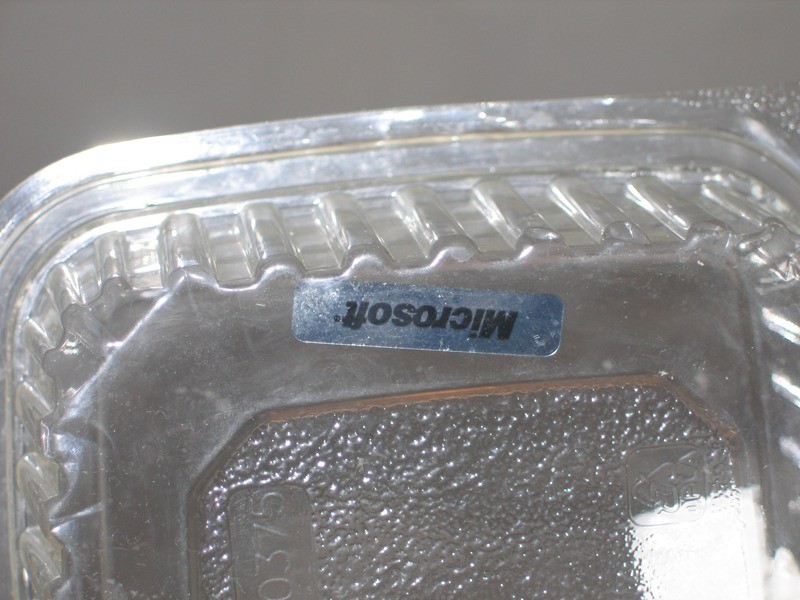
After the front plate is removed you will see the silver-colored "Microsoft" sticker covering an opening, that is the warranty seal that we will remove without damaging it.
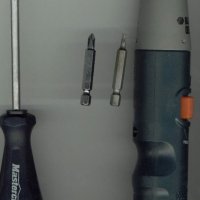
To do this you will need to equip yourself with:
- a very ordinary "hair dryer"
- a box cutter
- a container with lids where to store the sticker once it is removed
- some patience
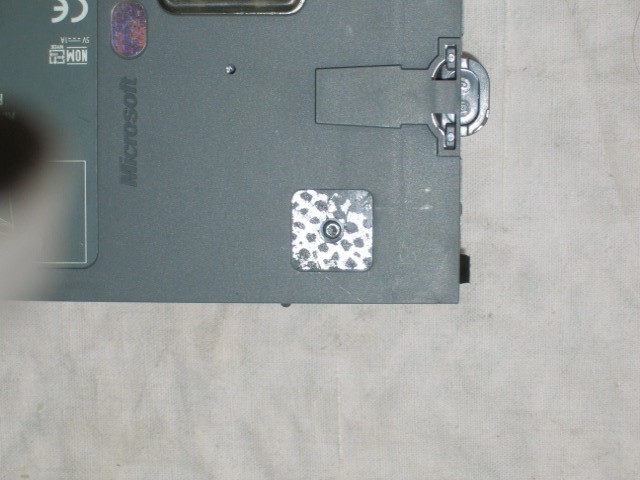
First of all, the Microsoft sticker (warranty seal) is not a normal sticker; when removed a part of the silver color will remain attached to the console; the picture below is AN EXAMPLE, it demonstrates the part of the sticker that remained attached to the hard drive of the xbox 360, so warranty voided!

In order not to ruin it, you will have to heat it with the "hair dryer": (in the picture below the sticker is positioned where you see the red line)
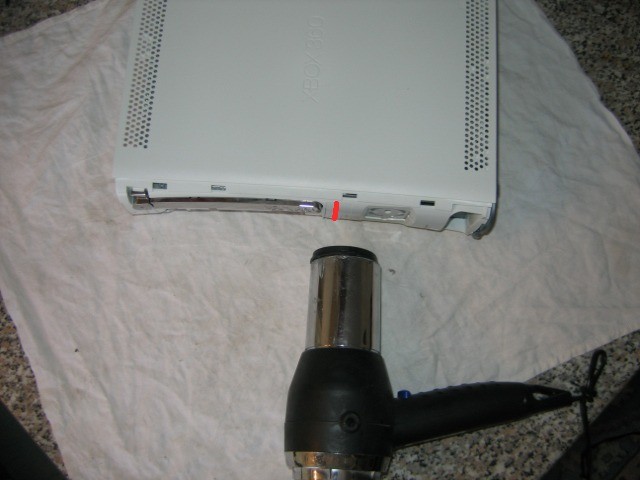

The adhesive needs to be heated VERY hot, the hotter it will be the easier it will be to remove, but be careful that if you heat the plastic of the console too much it will start to warp; it takes quite a long time before it starts to warp.
Once the sticker is "baked to perfection" turn off the hair dryer and try to remove it before it gets cold with the help of a box cutter or your fingernails if you have them long enough;
Now start peeling it off from one side, VERY SLOWLY, and you will see that it will come off without being ruined, once it is totally peeled off place it back in the plastic container with the adhesive side up:

Be careful because when the adhesive cools, it will regain its "adhesive strength".
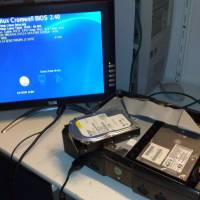
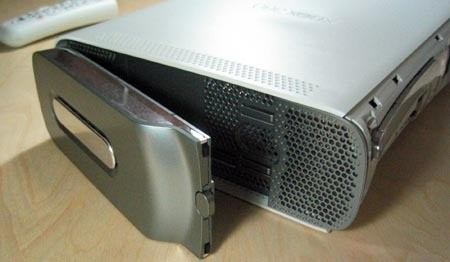
Now proceed to open the console, first remove the hard drive by simply pressing the button part:

We will now see the two sides of the console and a dark gray plastic; to remove it you will need a small screwdriver that can fit between the console's small holes so as to disengage the 6 feet that hold the "screen" attached to the white frame.
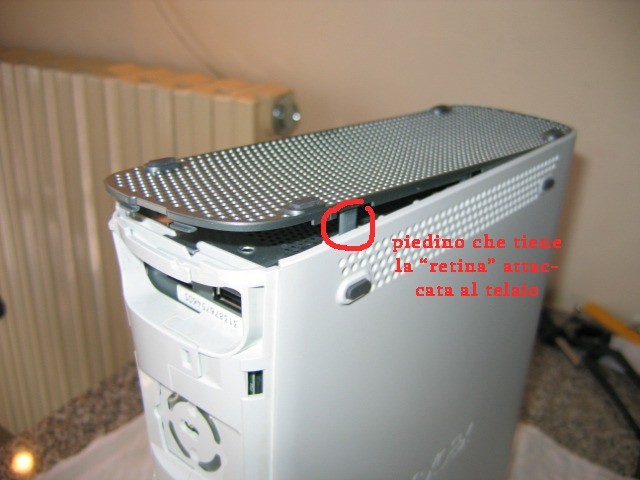

To release them, simply press down on the foot with the screwdriver and lift the "net" upward
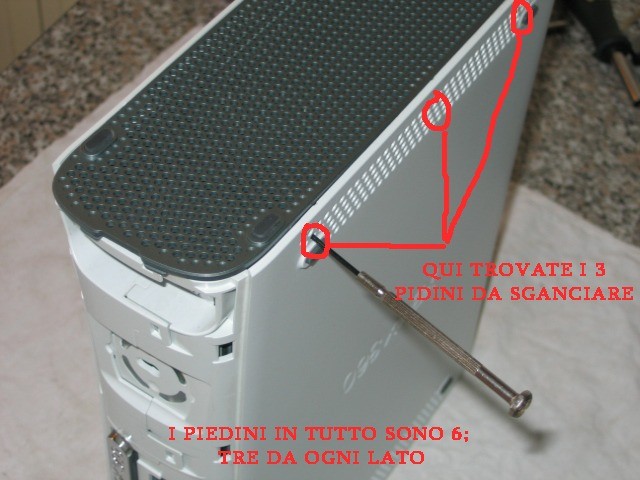

Perform the same operation on the other side of the console to remove the other part.
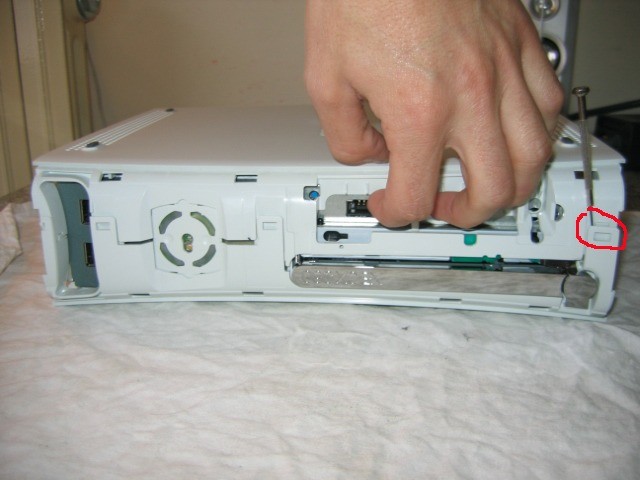
Now look at the back of the console and you will see 7 small slots
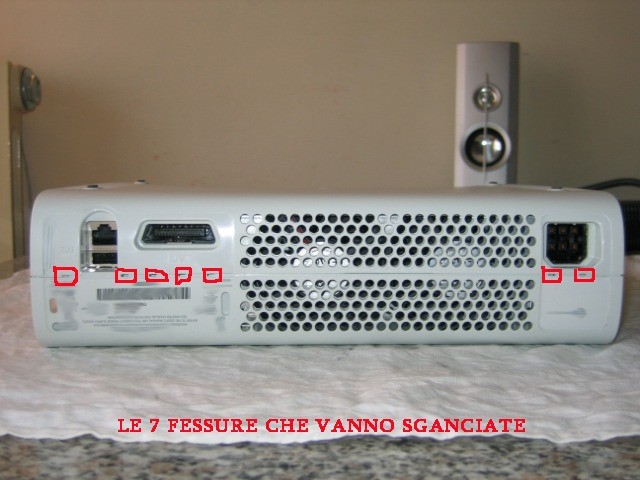

You will need to unhook the 7 lugs, pressing down with a very small screwdriver until you hear them make a "click".


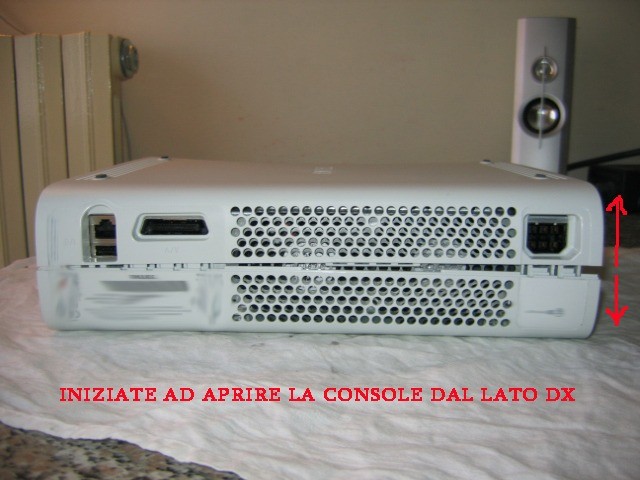
Start by unhooking the right side (where there are 2 next each other) and try to gently open the console:

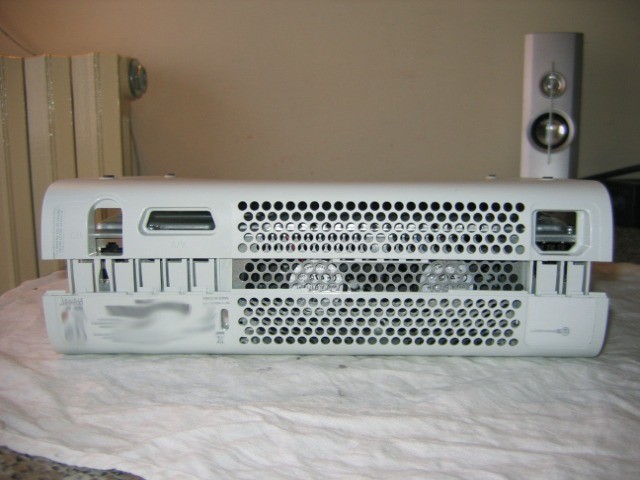
Eventually you will find yourself with the back of the console open as in the figure:

Now look at the front of the console and you will see the 4 "slots" to open:
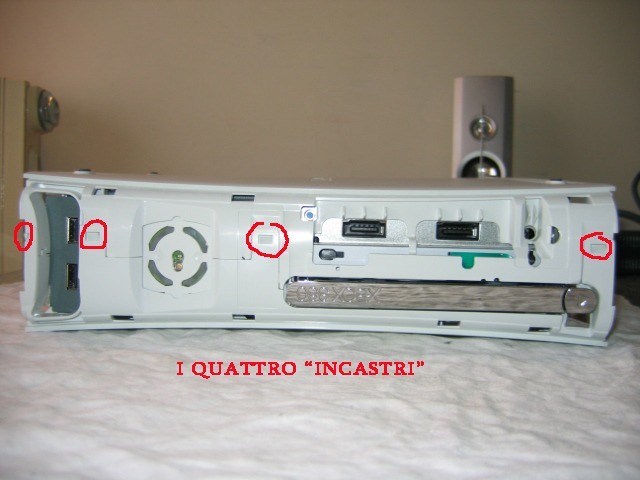

Always with the same screwdriver unhook the "slots" starting from the right and begin to open the console by putting one hand where the memory-cards are inserted:

At this point remove the top of the console:
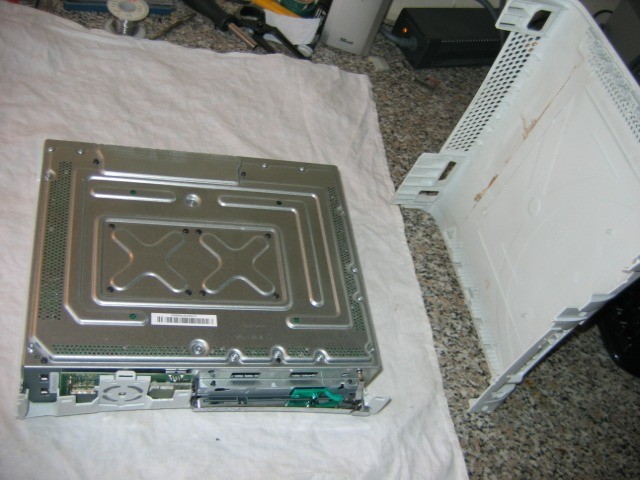

Now in front of you is the xbox 360 chassis; you need to unscrew the 6 longer screws that hold the bottom console cover still attached as shown in the picture:
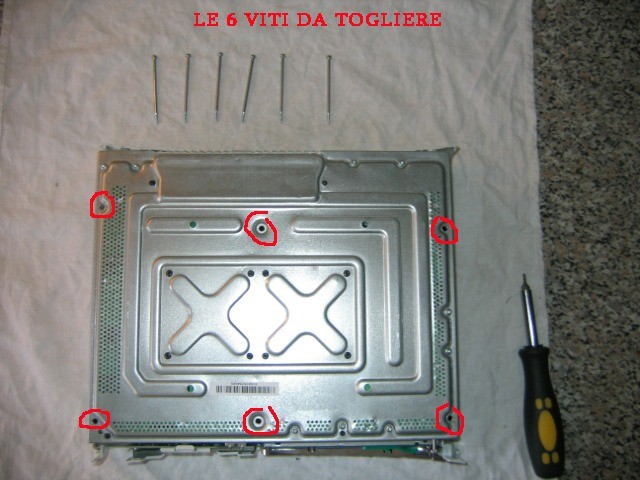

Once you have removed the 6 screws, you will need to turn the console over without having the chassis detach from the white plastic cover still attached:
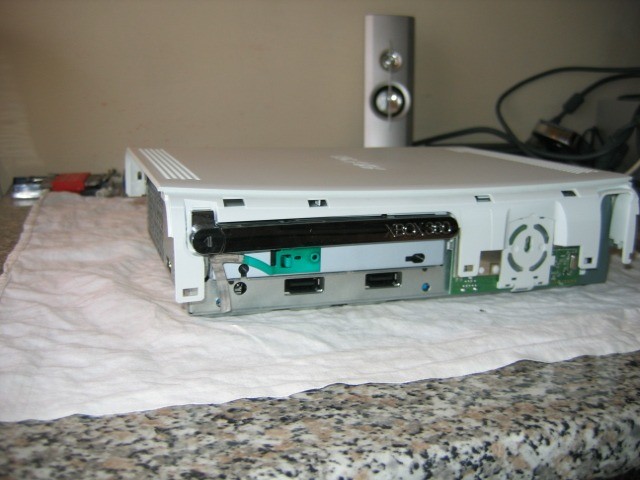

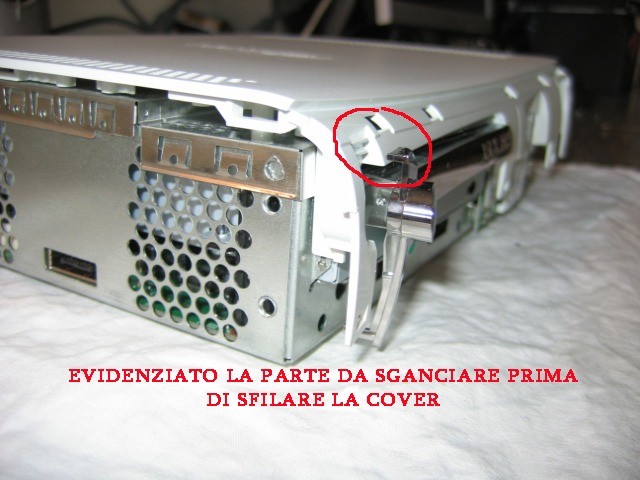
Now you can remove the white cover, paying attention to the "disk eject" button on the drive, which you will have to pull forward slightly to release it before slipping off the cover:

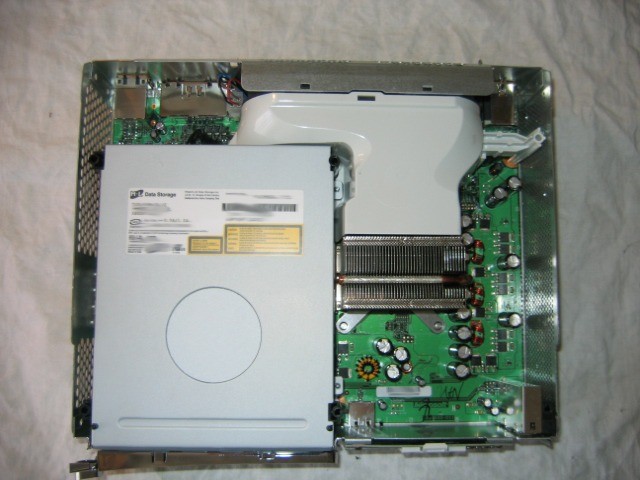
Now you can remove the white cover and "work" on your console still under WARRANTY

Mission accomplished :)