How to unhide files in R18 releases

This tutorial is meant to help you "unhidding" files in R18 releases. Why ? Because it's quite frustrating not knowing what's on your CD, and you might need these files for selfboot purpose, for example.
I found all this by myself, and noone helped me. I'm a poor lonesome DC lover.
So all credits go to ME !
I'll work on R18's release of "Vermilion Desert".
This release is a quite hard piece of work : when you browse your burnt CD, nothing appears ! I think this is a good example for you, but you can do this with any other R18's release whith hidden files ("Panzer Front", ...).
Here we go.
First of all, you have to make an image of your CD. Use original release, or backup an already burnt CD.
Then, you'll have to find the name of one existing file on your CD. If you can see some files while browsing your CD with windows explorer, then note one name ("0GDTEX.PVR" for example). With "Vermilion Desert", nothing appears so you'll have to hexedit your image and look for "SEGAKATANA". You should find IP.BIN. Here, the 1st file read is written (81 bytes after "SEGAKATANA"). In "Vermilion Desert", you'll find "1ST_READ.BIN".
Now that you've got one name, do the following :
1) go at the very beginning of your image
2) look for the name of your file ("1ST_READ.BIN"). You should find it a first time. You've found a "fake TOC" : it's the Table Of Contents that windows explorer shows. It DOESN'T CONTAIN ALL THE FILES, so leave it here.
3) look for a 2nd "1ST_READ.BIN". You should find the real TOC. Here, you can find every files contained in your CD.
Now, the hard part :
4) you have to find "CD001" a bit before this TOC. Go there, and leave your cursor here
5) go down until you find loads of "0" AFTER the TOC (so after all the files names)
6) select a zone between "CD001" and one of these "0" bytes (any of these can do the job; try to select one of the first ones...)
7) choose "COPY"
8) go at the very beginning of your image
9) look again for the 1st "1ST_READ.BIN"
10) look again for "CD001" a bit before this fake TOC
11) place your cursor on this "CD001". Be sure you are EXACTLY were you were when you copied the real TOC.
12) choose "PASTE". It will replace the fake TOC by the REAL one.
13) save and exit
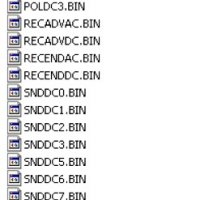
If you did all this right, you should be able to browse your image with any image tool, like "CDMage". But there's a little more thing to do to have a perfect image with no hidden files. R18 have hidden some files with another (much easier) method : ".associated" files.
13 bis) on your new TOC, look for hex value = "04 00 00 01 00 00 01". You should find this value before important files, such as "1ST_READ.BIN" and "IP.BIN".
14) change this value by "00 00 00 01 00 00 01"
15) save, exit and burn
Enjoy your fine release with no hidden files.