selfbooting 45000 LBA DATA/DATA images
Ok, I'm creating this guide in response to the fact there don't seem to be any guides on making 45000 LBA DATA/DATA images that don't involve burning the game tracks to a disc as an intermediate step. There's really no reason this should be necessary, and it creates a lot of coasters if you don't get in right the first time. So, why not just build the images manually and save yourself the trouble?

Before we start though, just a heads up. If your game has CD audio tracks, you're out of luck for now. This guide doesn't cover games with CD audio, and adding them with this method would be less than trivial. If you are desperate, or have a good deal of technical knowledge, you can read about how it could be accomplished at the end.
First of all, here's what you'll need:
-WinHex (or any other capable hex editor)
-Daemon Tools (Used to read images and play them in emulators, since opening the nrg directly won't work. Tested with version 4.08.)
-ripped copies of the files from the game (this guide doesn't cover ripping)
You'll also need the following tools which I've uploaded here:
-mkisofs
-dummy
-binhack (to generate a bootable IP.BIN)
-ipins (not mandatory, you can also hex edit IP.BIN into your image)
-nrgheader (just a file, not a program)
To start off you're going to want to put all your ripped game files in a folder, and name it SESSION2. Now you'll need to make a copy of your 1ST_READ.BIN and IP.BIN file somewhere else, and use BINHACK on it with an msinfo value of 45000 to make them bootable IP.BIN. Then delete the 1ST_READ.BIN copy, as with this method 1ST_READ.BIN doesn't usually need patching, and binhacking it will only screw it up, if it does anything at all. The only expetion to this is if you're modifying a previously binhacked 1ST_READ.BIN, which had it's LBA modified to be used with a different selfboot method. You should replace the old 1ST_READ.BIN with the copy.
For WinCE games which require other methods to crack, you'll have to look up a method of generating an IP.BIN for those games on your own. I don't have any to test this on myself.
The 45000 LBA method requires you to have two data sessions, and if you don't have 65MB to spare on your disc, you are going to need to put some files on the smaller first session. Don't worry though, this doesn't complicate things much. Once the image is created, the Dreamcast (and your computer for that matter) will read both sessions as one. So, with the exception of 1ST_READ.bin, you're going to need to pick files from your ripped game totalling as close to 65MB as you can get, and cut and paste them into a new folder called SESSION1. The remaining files will be left where there are in the old folder, SESSION2. Note that the maximum size you will have for SESSION2 on an 80 minute CD-R is 610MB. If that's not enough space you'll need to use a bigger disc, downsample, or split the game across multiple discs. It's also worth mentioning it will not cause problems if you split up the contents of a folder between sessions, as long as the path to the files remains unchanged.
Now we can start to build the image. First, copy mkisofs to the folder above the one where your session folders are, and run it from the command line with the parameters used in the following example:
mkisofs -C 0,0 -V (GAME_TITLE) -l -o SESSION1.iso SESSION1
Replace (GAME_TITLE) with whatever you want the CDs label to be, it really doesn't matter what you use as long as it's all caps, uses only alphanumeric characters or underscores, and doesn't contain more than 11 characters. But other than that, the sky's the limit. :P
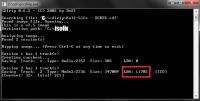
SESSION1.iso needs to be exactly 69,120,000 bytes for this to work, so you will need to right click on the file, select properties, and find out how big it actually ended up being. If it's more that 69,120,000 bytes you put too many files in it, and you're going to need to redo it. Assuming you have less than that, you will need to pad the file out to be the correct number of bytes. Run dummy from the included tools at the command line to create a file that is (69,120,000 - length of file) bytes long which we'll refer to as PAD2.
While we're at it we can also use dummy to create PAD1. This will always need to be 307,200 bytes, regardless of the size of anything else involved in this process.
Now we'll need to build the second session. The command for doing this will be:
mkisofs -M SESSION1.iso -C 0,45000 -V (GAME_TITLE) -l -o SESSION2.iso SESSION2
The only file we need now is nrgheader, which you can extract from the tools archive to the same folder as the iso images.
The last thing we do before building the image is to insert IP.BIN into the boot sector of SESSION2.iso. You can do this with either ipins from the command line, or by writing the contents of IP.BIN into the image at offset 0 with a hex editor.
Now, we can put everything together. Using the concatenate function of WinHex, or any other file concatenation tool you prefer, merge the files into a new file called GAME.nrg in the following order:
PAD1, SESSION1.iso, PAD2, SESSION2.iso, nrgheader
Yea, with NRG files the header goes at the end. I have a few theories as to why, but this guide is getting too long as it is. Anyway, we're almost done, but there's one last step. You'll need to open GAME.nrg in your hexeditor and scroll way down to the end. On the first line that starts with CUEX, make sure the offset it's on (usually displayed in the left collumn) ends with either 000 or 800. I'm pretty sure this will always be the case if you followed the guide correctly, but if it's not just insert some bytes with a value of 0 right before that line until the offset is corrected to end with one of those two values. Now, at both of the two locations where you can see the text says "HERE" on the ASCII text interpretter on the right, click on the "H". Then, starting from the location that became selected in the middle collumn, type the offset from the left collumn that is on the first first line that started with CUEX. The same one that had to end with either 000 or 800. Don't forget to type any 0's at the beggining, although usually with a files the size of iso's you won't have any.
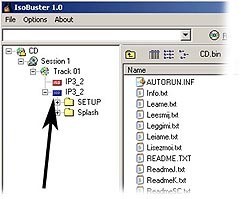
And finally, the moment of truth. The ISO should theoretically be bootable at this point, but there's only one way to find out. Use Daemon tools and try to mount the image to a virtual drive. If there are no errors, try opening it with Windows Explorer and see if all the files from both sessions are displayed on the disc. If they are congratulations, your image is correctly formatted. This doesn't prove it's bootable, but at least it isn't the structure of the image itself isn't the problem, so you know you followed the guide correctly. If you want to know for sure it'll boot before wasting a disc, you can use a Dreamcast emulator such as NullDC or Chankast to test it. Just remember that you must play it from the virtual drive. Opening the image will not work. Even if the game isn't compatable, you should at least see the usual liscenced by Sega screen if the selfboot was successful. If it displays as it should, the game should work on a real Dreamcast. If it doesn't, something with your IP.BIN is screwed up, and you'll need to find another way to get one that works.
One last note, games with more advanced protection (such as Sonic Adventure 2) will not work without additional cracking. But, the vast majority of games, including a few notable games that require cracking to work with the old AUDIO/DATA method, should work perfectly with this method.
---
For those of you who have a more advanced level of knowledge, I present the following. In order to use this selfboot method, an nrg header is required, but just using the canned version I packaged with the guide will be useless for games with CD audio. To tackle these games a bit more effort is needed. Here is the only public documentation on the nrg file format I could find. If someone want to use this to program a tool to generate nrg headers with more complex layouts, and possibly expand it to automate this whole process, then be my guest. As it is, I've got so much backlog to get through with my programming projects, it may be years before I get around to it.