Making your Dreamcast analog new again
by TuxTheWise

Initial comments
- This document was written by me to be distributed only by myself. If you want to put it on other site/forum, could you please contact me first?
- You can contact me searching for TuxTheWise in snesorama.us, segahub.org or dreamcast-talk.com forums.
- Fell free to ask questions or give your opinion, but please do it in this thread and not PM.
- This is not a guide for dumbs.
Warning:
The author of this text takes no responsibility for any damaged caused by anyone using the information of this guide. If your equipament stop working, explode or goes on fire, it's your responsibility, don't blame the author.
I don't really think this procedure is risky, but l'm just taking my ass out of line in case someone messes things up.
Why you need this guide?
Dreamcast controllers get old and analog directional gets bad. My two controllers' analog were terrible. The first one made a strange noise, and got hard to move at one direction. The second one got hard to move at all directions. In both controllers game play got affected a lot. As new controllers are hard to find (and expensive) nowadays, I tried to find a way to restore their quality. And I found it. Using the method described in this guide the analogs became like new again, and l'm not exaggerating. The improvement was so nice thatl had to write this guide and share the information.
Who is the brilliant mind that created this method?
Me, TuxTheWise. I are smart.
1. Starting
First of all, you need to know that you'll have to disassemble your controller. Here are general tips when working with any electronic board:
- Before starting the work, take your shoes off, and walk around a little without them. If possible, work without them, putting your feet in the floor. It may sound a joke, but with this procedure you'll uncharge the static voltage of your body and avoid breaking the circuit when touching them.
- Work on a flat surface. A table is highly recommended. lt may sound another joke, but I used to disassemble stuff on my bed LOL, so I know what l'm talking about.
- No hurry.
- Do not lose the screws, it's really a pain in the ass.
- Pay attention when disassembling, because you'll have to assembly it back and most guides (including this one) won't show you how.
Let's start. Unplug your controller of your console, take the accessories off (VMU, Puru Puru Pack, etc) and take your controller to your workplace.
2. Doing it
I had patience to take pictures, SO be happy.
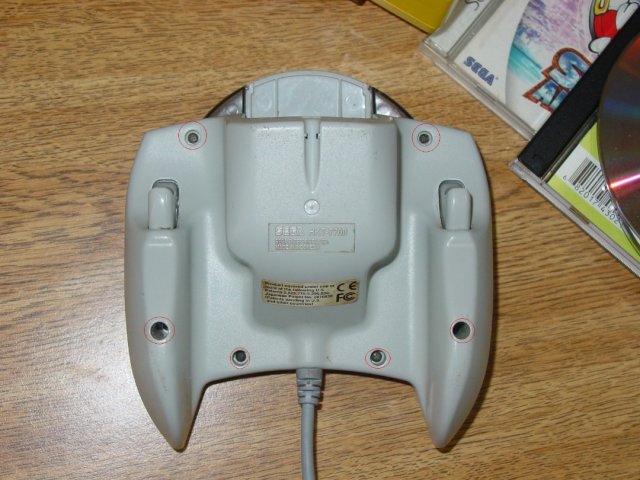
Start removing the 6 screws in the back part of your controller. Their places are marked with red circles in the picture:

Now you're able to remove the back part. Do it and you'll see the board:
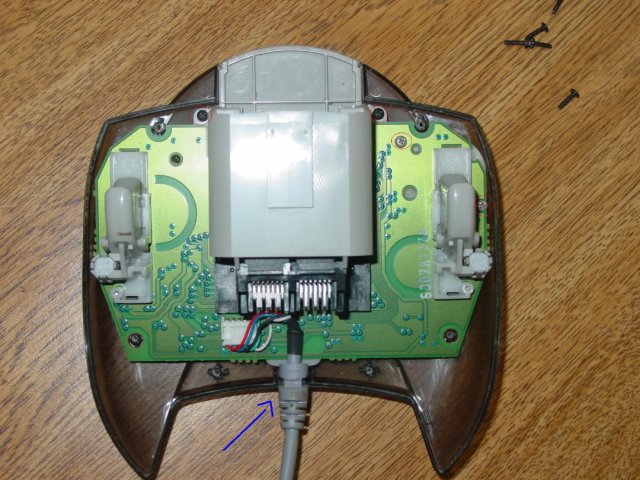

Now remove the other 4 screws shown on the picture above with red circles. Gently remove the cord from its place (blue arrow on the picture above). Now you're able to finish the disassembly of the controller:
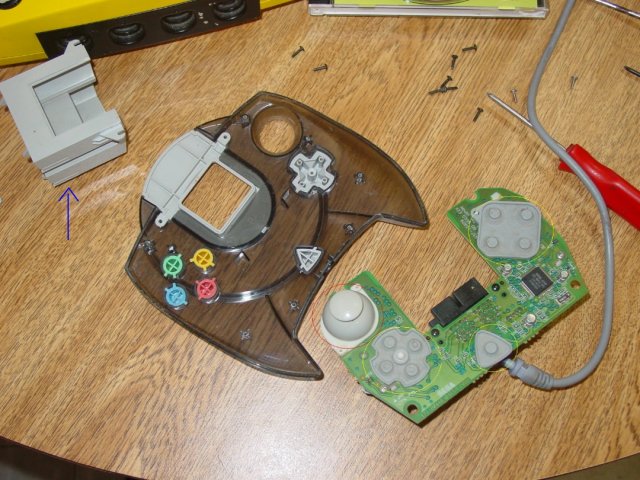

When removing the board, do it slowly and gently, trying to not remove the pads (marked with yellow circles). If you remove them now, it will be a pain in the ass to assembly the controller back. Also note that there is another part that were removed (marked with the blue arrow). When removing it, note how it's assembled on the circuit board and on the plastic base so it will be easier to assembly it back.
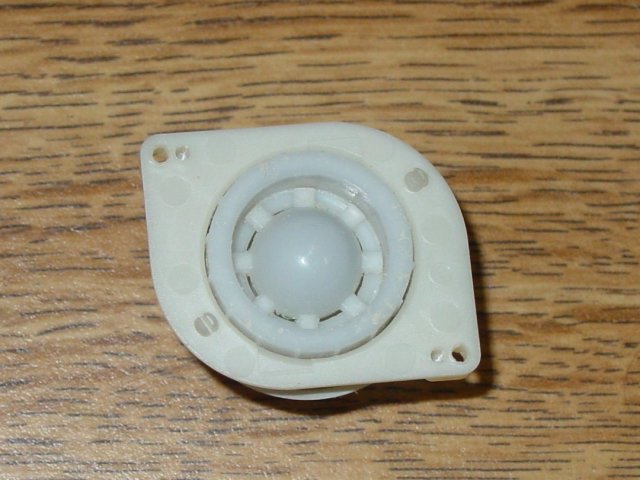
Now remove the analog pad from the board (red circle on the last picture), pushing it out gently. It will go out easily. Give it a closer look (sorry about the focus):
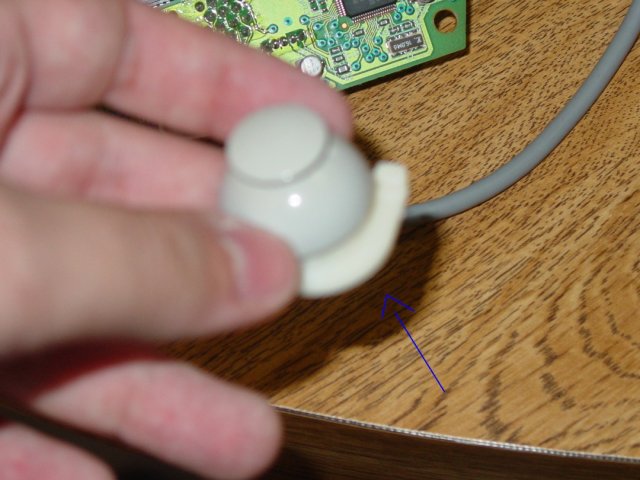

Don't worry removing it, it has no physical contact (it works using electromagnetic field). Also, don't worry about it's orientation, it will work fine on both sides. You see the blue arrow in the picture? There is a little plastic thing below the analog pad.
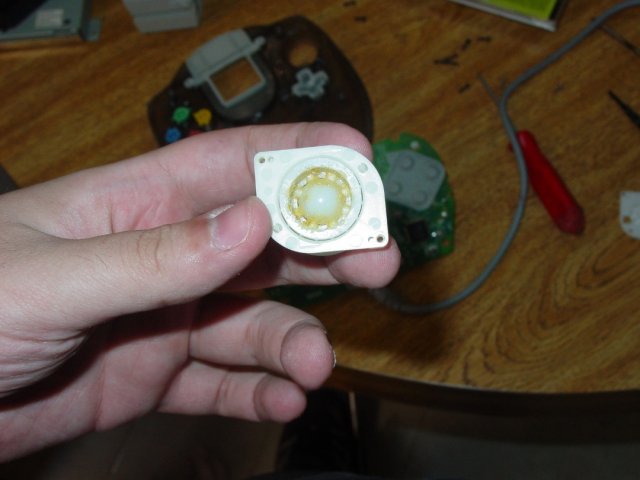
Remove it, and you'll see this:

There is the place where we wanted to get. Get some grease (I hope that's the right word), so we can lubricate it. I got some grease that my father use in his car. Other kinds should work too, because all we need is make that piece move easier. Also get a toothpick. I was out of them (LOL) so I just got one of those sticks used in barbecue.
Here is the nasty set:


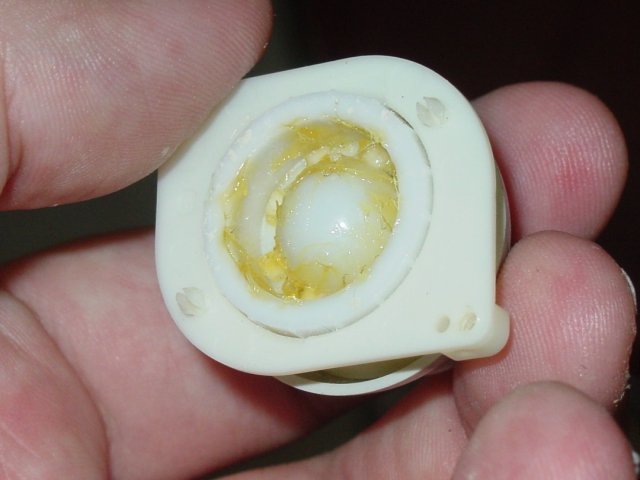
Now you need to lubricate inside the analog. You don't have to worry too much about letting an uniform layer of grease, just let it dirty with the grease and the movement of the analog will do the job. Don't forget to move the analog around, so you can put grease below the "teeth". There is no need to use too much grease. After you do the job, you will have something like this:


Now it's time to assembly the controller back. Go on, you can make it. Just be careful about those pads that I talked about earlier. They're not fixed on the board, and maybe they have felt during the disassembling process. Putting them back on the right position before assembling the controller back can be a pain in the ass, so be careful. The analog pad is not very fixed on the board, it may fall while you're assembling the controller too. Well, you'll have to figure out a method to put everything back to their places.
Before start putting the screws back, check if everything is assembled correctly. For that, press the board against the plastic base and press the buttons. If some button is stocked or hard, it means that some of those pads are out of position. Disassembly and put them right.
3. Conclusion
I hope you like this method, it really makes your controller work like new again. After assembling the controller, you'll notice that your analog is softer immediately. However, the fully effect will appear after some minutes of game play, because you'll move the analog and spread the grease all around the places.