Dreamcast Reset button
This mod is the one that’s most needed for the Dreamcast. Lots of commercial games have a soft-reset option, so that’s ok.

This mod is the one that’s most needed for the Dreamcast. Lots of commercial games have a soft-reset option, so that’s ok. But as nowadays more and more homebrew games are being released, they mostly lack this, and that’s why you’ll want to install this one: no more open/close or power up/power down, far easier is to push the little button!
Warning:
This mod is VERY easy to perform, but I expect you to have at least little soldering skills. Also, I expect you know how to safely disassemble the DC.
I cannot be held responsible for any damage you encounter while performing this mod.
I must stress to be careful with soldering irons and hot glue guns, as THESE CAN BURN YOU!
These are the things you'll need to perform this mod:
- 1 Dreamcast (PAL/JAP/US)
- 1 Philips screw driver
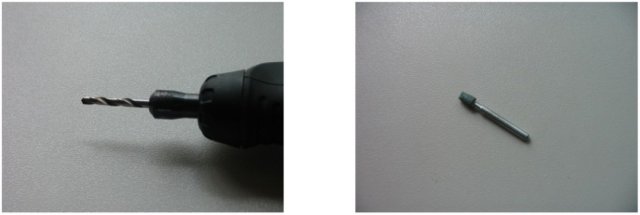
- 1 small push button (the same as the ones used for the Saturn shoulder buttons) - 1 Dremel (or very small drill the same size as the push button)
- 1 polishing stone for Dremel or similar
- hot glue gun
- soldering iron and some solder
- 2 lenghts of kynar wire (about 30 cm each to be safe) - 2 pieces of shrink tube (0.5 cm each)
You’ll have to solder 2 points on the bottom of the mainboard, so take out every piece of hardware. Begin with plugging in the soldering iron, as now you can disassemble the console and the soldering iron will have the desired heat when the disassembly is done.
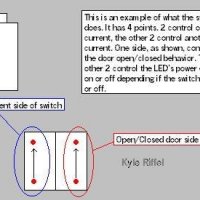
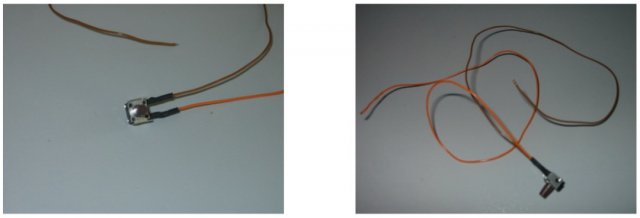
Now you have to strip the 2 lengths of kynar wire (on both sides), solder them on the two inner legs of the push button and cut of the two outer legs (if there are any, depends on model). Now take the two pieces of shrink tube, slide them on the two connected legs and isolate the connections by heating the shrink tube.
It’ll look like this.

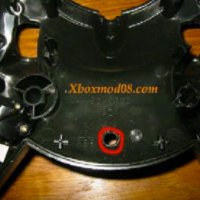
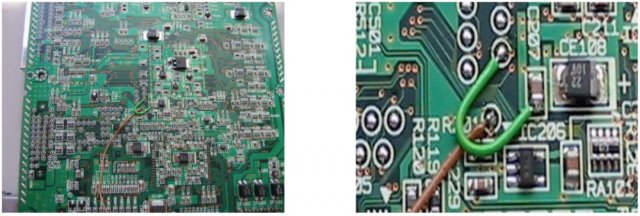
Look for IC 206, it’s in the exact centre of the main board. Next to the small triangle, there should be a connection spot, this is a testpad. Connect one of the desired wires to it.
Make sure to have the stripped connection not too long, so it doesn’t short out anywhere else! (Nevermind the green wire, both of my Japanese DC’s had this from the beginning, don’t know what its for.)

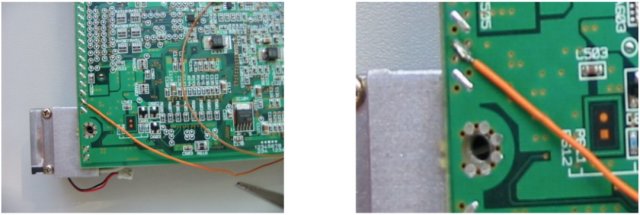
Now connect the other wire to a ground near the fan, this is the most convenient spot in my opinion. Make sure NOT to take the connection beneath the one that is connected in the pic, because the shielding will block the way (where the screw is placed).

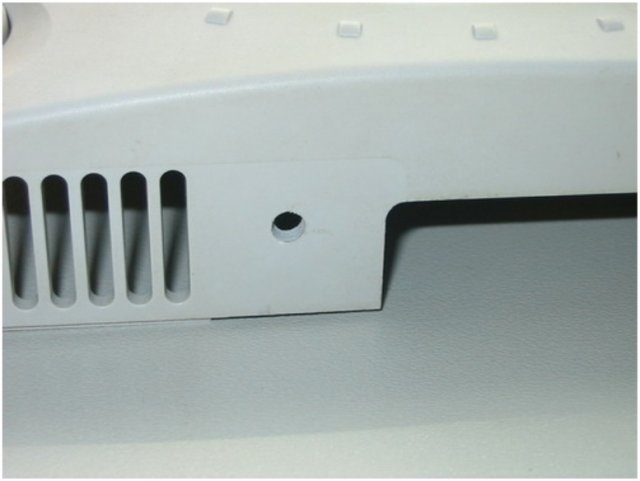
Now take the Dremel with drill, and have the little polishing stone ready for use to widen the hole.

The best place for the button is in the exact centre of the square right next to the cooling fan.
The result should look like this.

Now take your hot glue gun and warm it up. Test if the button fits and doesn’t jam, so try it out a couple of times, it should make a clicking sound like usual. No worries if the hole is a little bit too wide, it’s better than trying to push it in and it gets stuck...
Glue the button in, make sure the wires come out the same as in the pic.
Just hold the button by pushing with one index finger, so the button is all the way in and then glue around the button. Just keep it there for a couple of seconds, the glue will harden within a while. Don’t try to glue yourself to the casing! Try out the button to check if you still hear the clicking sound.


The hard part is over.
Reassembling the DC:
Tape up the two wires on the bottom of the main board, just at the edge of the board.
When navigating the wires, try to get them in the corner, so they come out of the gap in the shielding (but remember the screw, so don’t get them trapped underneath the shielding). Tuck away the rest of what’s left of the wires so it doesn’t get in the way of other components: eg fan, led... and close up as usual.
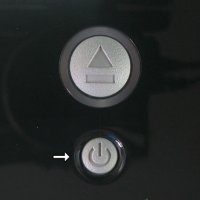
The final mod should look like this.