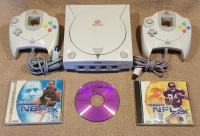
Instructions to burn Dreamcast games
By ~kronos~

NERO BOOT DISK
The best and fastest boot disk is the Nero utopia boot disk….Attached is a .zip file that contains a “image .nrg”.
All you need to do is download the .zip file and open it with winrar. (I’ll be submitting the new beta version of winrar so it will be at your fingertips).
Extract the image.nrg.
Start Nero 5 or better and select the image where you placed and burn it.
No dummy files just the image and burn.
STEPS TO BURN
TOOLS NEEDED:
The files needed or programs should be on astalavista I’ll check and make sure, and if their not they will be there by the time you read this.
Diskjuggler
*Fireburner v1.xx (x=any value [0-9]
*WinRaR
*ISOBuster
*DummyFile.exe
Nero Burning ROM v5.xx or better will do.
{*=programs are aready in Winrar file ready to go}
The games you download will obviously be .rar files
To open .rar files, you need WinRaR. to create a folder to un—rar your games into.
Highlight all the contents of the file that make up the game and extract them to a folder. It may take a minute or two. You will now have a .bin file and a .cue file and sometimes a Unpack.exe…or a .cdi image. {Depends on the game.}
If there is a Unpack.exe, double click it and it will unpack all the music…read step 1. If there is no unpack.exe, read on. If there is a .CDI image, read step 3.
Check the size of the .bin file. If the .bin file is very small, read step 2, if it’s rather large (over 400MB) read step 1.
Step 1.
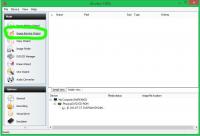
Open Fireburner and select Visual Cue Burner/Binchunker and right click in the main window and then browse for your .cue file. Then set options to Eject CD and Close session. Leave multi-session, use write 12x and Test Burn unchecked. (not active) and then burn and wait for the CD to eject and it’s ready to go.
Step 2.
Assuming your .bin file is small, you will want to make a dummy file, so the data for the game is pushed to the outer edge of the CD, making the game load faster. To determine the size of the dummy file, take the size of your .bin file and subtract it from the amount that the disc can hold. So if you download a 300MB file, 700-300=a 400MB dummy file. To make it, use DummyFile and place the dummy file in the same folder as the .bin and .cue. Leave a little room for some error for the size of the dummy file. You may not need a dummy file if the music tracks take up the rest of the disk…to be absolutely sure on how large to make the dummy…you will want to load the data into the burn program and see exactly how much space is left on the disk when you burn it.
Now use ISOBurner and open your .bin file. This should examine the .bin file and break it down into the files that it represents. Now highlight every file in the right window and then right click. A menu will pop up and then click extract. Choose a folder to extract the files into. Now move your dummy file into that folder, adding it to the folders you extracted from the .bin. Now the whole size of that folder should be equal to how much your disk can hold. Within 20MB is fine.
Now open up Nero, select CD-ROM (ISO) and check the following options:
Mode 1
Disk at once
2 windows should open..a CD window and a browse window. Find the folder that your dummy file and other game files are in. Now move every file in your folder, that holds the dummy and other files into your burning window. So now you have various folders, files, and a file called dummy.bin in the window of the cd.
{that your about to burn}
Now what you do is select every file within the cd window, except the dummy.bin, and right click it. A menu will open and at the bottom it will say priority. Change the priority to high. Do this to every file, but when you get to the dummy.bin file, you want to classify it as low priority. Burn it and you’ve burned an enhanced game.
Step 3.
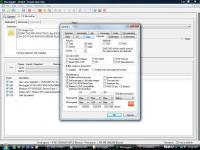
If you unrar the files and get a .cdi image..you will need to open Diskjuggler. When it opens, select the “image to CD burn” option. When you get your source window, click on the source file icon and it will open a file browse window. Find your .CDI image and select it. The path should now appear in the source field.
To the right of the source window is the action window..select the write option, not the write and verify. Select the number of copies and what speed to do it in…1x takes about 45 minutes.
Below the source window, there is a CD device icon and it will eject the CD tray of the selected devices. Load your blank CD into the tray. Hold “CTRL key” down and click the icon again to “hands free insert your disk” This clears the cache of the burner and helps the device from getting errors…….
Put in the boot disk into the CD let it load, then put in your game…and your done. :)