Star Trek: Judgement Rites (Solution)

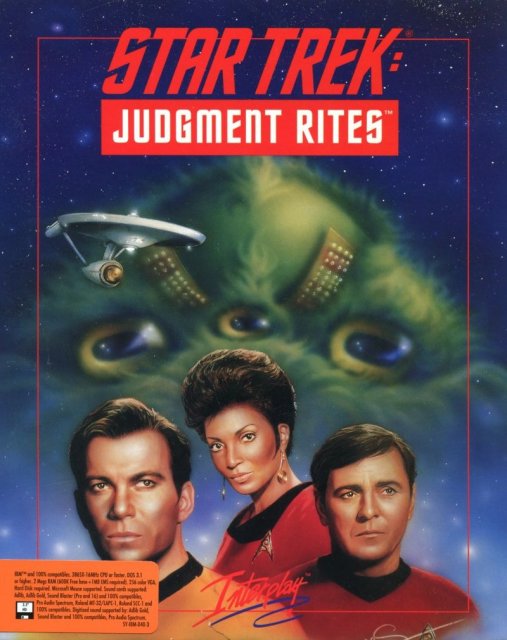
Solve for Star Trek: Judgement Rites, revision #1
A JOINT production by Patch, Guildmaster, and Elminster
Typed by Patch
Solved by Guildmaster (in 10 hours), Patch, and Elminster
If you can get 100% on some of the missions that I didn't, please email me (Patch, hamell@cs.pdx.edu) with corrections so I can update this solve. I suspect that most of the problems are the choices made when talking.
Mission 1
Federation - 100%
When talking to James Munroe, use choice 2. In the station, use choice 3. When Bredell's face appears, use choice 1. In the brig, talk to Menao Sheme, choice 2, 3, 1, 2. He lets you out. Get tricorders, communicators, and phasers. Go to Crew Quarters. Use medkit on man in bed. Get karate dummies. Go to Executive Quarters. Get filter. Go to Computer Room. Stun Technician. Use Spock on chess board. Make moves of choice 1, 2, and 3. Use both tricorders on machine on left. You now have the files on Bredell. Go to Transport. Use filter on teleporter. Use dummies on teleporter. You're now in Security. Kirk stuns all 3 guys. Use Spock on north and east walls to disable communications tracking and force field, then on the chair to disable gas traps. When the guys wake up, talk to Kamend (red hair). Use choice 1. Use the science tricorder on him to show evidence. Go to Central Control. Use medkit on Assistant to cure his allergies. Use Spock on north wall to disable back-ups and communications network, and on the east to disable weapons control. Go to Docking Bay 1. Surrender. Have Spock sabotage both systems on the left side. Go to outside of Bredell's quarters. Use Spock on the wall to give Kirk the code. Go inside. Use choice 2. Stun him. Get book. Get bookmark. Use science tricorder on bookmark. Use Kirk on book. Get dart board. Use Spock on control panel (2188 is the code). Go to Special Projects. Kill the monster. Use Spock on west wall to disable tractor beam.
Mission 2
Sentinel - 100%
Use Spock on green panel to open door. From this point on, every room has multiple doors with green panels. I will label them as door 1 through door N (N = number of doors in room) from left to right. Enter door 1. Enter door 2. Pick up all 5 items on the floor (interface cable, display control, cube, switch, and interface card). Get plastic and badge from the bins on the right. Use the bade and plastic on the machine in the upper left. Use Spock on the machine. You now have a battery. Enter door 1. Use the battery on the machine on the right. It is now charged. Enter door 1. Back in the main room now. Use the display control and the cube on the machine in the center of the room. When asked if you want to respond to the system and also lower the force fields, reply yes. Choose the correct shape. Enter door 3. Use the switch on the machine on the left. Enter door 3. Use the machine on the right. Stun the Balkosi that eats the nugget. Click the use icon on the Balkosi to take him to the medical room. Use McCoy on the Balkosi and on the machine on the left. Enter door 2. Enter door 1. Enter door 1. Use Spock on the 3 green panels on the machine on the left. You get to see yourselves as 3D holograms. Use the interface card and cable on the machine on the left (the pillar part). Use Spock on the pillar. Tell him to shut the system down.
Mission 3
No Man's Land - 62%
Use Ellis on the door. Get stick. Open crate. Get a bottle of Schnapps. Pour Schnapps on big pile of straw. Use stick on pile of straw. Use Spock on guard to knock him out. Leave. Talk to Ellis (choice 2). Talk to guard that shoves old man (choice 2). Then click use icon on the guard to punch him out! Use medkit on old man. Talk to him. Enter shoppe. Talk to boy. Ask about broom, food packages, and rope to get them. Use science tricorder on the clock. Leave. West. Use food package on dog. Use medkit on dog. It is now cured of rabies. Enter school. Talk to guard (choice 1). Use science tricorder on chalkboard. Talk to teacher (exhaust all choices). Leave. Enter building on right. Talk to one-armed man (exhaust all choices). Use broom on floor. The one-armed bandit gives you some money. Leave. West. Use science tricorder on soldier. Use medkit on soldier. Talk to soldier (choice 3). Leave. East. Enter tavern. When Kirk talks to the guard, use choice 1. Gretel pulls out a shotgun. Use McCoy on the kegs to drug them. Give letter to Gretel. Enter back room. Use money on table. After winning, talk to man in green suit (choice 3). Leave. Leave. Enter Shoppe. Use money on boy to buy the clock. Leave. West. Enter Armory. Get rifle. Use Spock on commander (guy in chair) to perform a Vulcan Mind-Meld to get the safe combo. Use Spock on safe. Get TNT. Use rope on commander. Use McCoy on commander to wake him up. Talk to him (choice 3). Use rifle on him. Get transfer papers. Use McCoy on the commander to knock him out. Leave. West. Talk to soldier (choice 3). Leave. East. East. Enter Tavern. Enter back room. Give transfer papers to green suit. Talk to green suit (choice 3). Leave. Talk to Superintendent (man on left, choice 3). Get letter. Leave. West. Enter school. Give letter to teacher. Leave. East. East. Put chalkboard, locket, and clock in the biplane. Use TNT on biplane. When talking to Trelane, use choice 1. Talk to Ellis. Talk to Trelane again (choice 1, 2). At the World War 1 scene, talk to Trelane (choice 1, 1, 2, 1).
Mission 4
Light and Darkness - 85%
East. Use science tricorder on satellite dish, control box, and rocks that are to the left of the middle of the satellite dish (you have to click on this exact spot). Use communicator. West. Use science tricorder on satellite dish and control box. Use communicator. Use Spock on control box. West. Use science tricorder on satellite dish and control box. East. East. South. Enter building. West. Talk to Vizznr (choice 1, 1). East. East. Talk to Azrah (choice 2, 2, 1, 1). Get petrie dish. West. West. Use Spock on keyboard. Talk to Vizznr (choice 2, 2). Get petrie dish. East. Use stun phaser on gree goo that is on the right tube. Use light dish on left tube. Use dark dish on left tube. Talk to Ensign Jons (choice 1, 3, 2). Use dark dish on left tube. Use Jons on the left machine, then on the right one. Get green petrie dish. North. Use green dish on slot in the machine. Talk to Ciccisa (choice 3).
Mission 5
Voids - 82%
Once you get to the bridge shot, click on the turbolift. You can't get out! Talk to every person. Use Spock on the science deck (lower left side). Use him again to try and teleport. When he asks if he can teleport, say yes (choice 1). Uh oh! He got zapped and it's a little dancing bean! Use Sulu on the science deck. Click on the turbolift. At the Turbolift Reference Panel, click on Auxiliary Control. Enter the room. Use the medical tricorder on the creature. He zooms you out of the room! Enter the turbolift. Go to Sickbay. Enter the room. Talk to McCoy. He gives you a magic stinkbomb! Leave. South. Go to Engineering. Enter the room. When Scotty talks to you, use choice 3. Put stinkbomb in the atmosphere processor (boxes on wall on right). Use Kirk on the left machine (life support). Use Kirk on the internal sensors (red wall). Use Kirk on the panel of lights that is directly to the left of the right chair (another one of those exact spot bullshit things). Leave. Enter turbolift. Go to Transporter Room. Once in the dimension, you see the Vurian jacking off or rubbing his ass on the ground ... I dunno. Talk to him and exhaust all choices. East. The Savant is in the fountainhead. When it talks to you, use choice 1. Get pouch. West. Use pouch on big pile of blue rocks. East. East. Talk to Spock and exhaust all choices. West. Talk to Savant (choice 3, 1). Talk to Savant (choice 1, 1). Use the pouch into the fountainhead. When the Savant is talking to you, use choice 3, 3, 1.
Mission 6
Museum Piece - 100%
Walk North, East, North. You get called back to talk to the Curator. Get lance from knight, silver tray and decanter from table, and bottle of Cognac from display (to the left of the door). Get the note that was under the bottle. Read it (this is the security code). Use Mr. Scott on the control panel 3 times that zapped the curator. Use Kirk on the desk in the lower left corner. Use Chekov on the knight. Leave. Use Mr. Scott on the laser (to get capacitors) and on the big machine on the right (to get wire and cable). Look at the note you found earlier (code is VVSOP2123). South. Enter code. Get the magnetic clamps, and use Mr. Scott to get the ceramic panel. North. Use both capacitors on the Aurora Generator to charge them. Get the capacitors. South. Use capacitor on robot. Use Mr. Scott on robot to get red wire. Use the take icon on the robot to get the capacitor. North. Click on north door and enter security code (you can't open it). Talk to Mr. Scott. You now have a plan. Use both capacitors, magnetic clamps, red wire, cable, and lance on the Aurora Generator to make a launcher. Use Chekov on the Klingon machine in the lower left corner. Once you get back, take the capacitors. North. Get gas canister. Use Mr. Scott on old transporter and communications panel. North (enter security code). Take a crystal. Use Mr. Scott on the probe and on the Barney machine. Use a capacitor on Barney. Tell Mr. Scott "Yes, use the juice." Use Mr. Scott on Barney so it will open the probe. Use Mr. Scott on the probe. Use silver tray and decanter on probe. Use capacitor on probe to charge it. Once charged, get capacitor and silver tray. South. Use crystal, silver tray, and capacitor on communications panel. Use it. When talking to Lachians, use choice 4, 3, 2, 1, 1, 1, 1, 2, 1.
Mission 7
Though This Be Madness - 100%
Welcome to Retard City! East. East. Use Spock on chess board. West. West. West. Give bear to fat retard. Get blocks. Use Uhura on retard king then talk to him (choice 2). Click use icon on light panel (little box above fat boy's head). Click use icon on open light fixture to get light tube and wire. North. Click take icon on plant tube that is northernmost on the left side. Use metal keg on the machine. Use kill phaser on metal keg. Use blocks on metal keg (if you want to know why, go west from where you got the light tube and use the blocks on the machine on the right side). Use kill phaser on metal keg. Get metal keg and then use it on the plant tube you took it from. Come and go from the screen a couple of times until there is red fruit on the plant. Get red fruit. South. West. Talk to woman (exhaust all choices). Give fruit to her. She wants you to give it to her son, and you can now talk to him. East. East. East. Give fruit to kid. Talk to kid (exhaust all choices). You want to get him to show you his secret place (yuck!). Get rotten fruit. Click use icon on sleeping king to grope his ass. Use either choice on him, and he will leave. Get blanket. West. West. West. Talk to woman. Click use icon on food replicator. Get box. Use rotten fruit on machine on right. Use meal box on same machine. You now have a dosed up box of food. Give dosed box of food to woman. East. North. Get fruit. North. Use medical tricorder on woman. Use Spock on woman to perform the Vulcan Mind-Meld. Lots of dialogue. North. East. East. Give fruit to Tuskin (afraid guy). Use stun phaser on Rackaback. Talk to Gormagon. Walk towards secret opening. Use light tube on Klingon with gray hair. Use connectors on rightmost machine (Spock will hook them up). Then Uhura will plug in the wire. Lots of dialogue ... use choice 2 to let the Klingons speak first to Puzzlewitt. When it's your turn, exhaust all choices. Once done, get the paralense. Use paralense on the north machine. Exhaust all choices of the library. One of the choices makes Kirk ask it a question and it answers and makes a magic portal open up. Red hair Klingon wants to be a dick. Use Spock on him to knock his old ass out. Walk into portal.
Mission 8
Yet There Is Method In It - 100%
Once you get to the funky outerspace scene, talk to the green dude. Tell him you are ready to take his tests. Talk amongst yourselves on every question ... DISCUSS. To answer a question, click the talk icon on the alien, use choice 1, click use icon on person who is the answer, then click use icon on the alien. At the first question, the answer is Uhura. Second is McCoy. Third is Spock. At the fourth question, click the talk icon on Kirk. Use choice 2, 3, 1. Talk to the alien. Tell him you have your answer, then use choice 3 (both of us). The alien is confused. You get teleported to his ship. Lots of dialogue. Talk to the alien on the far right. Use choice 1 (I accept the paralense in the name of the Federation). Use paralense on Klingon (choice 1, then 2). The Klingon destroys them both ... trust engenders trust.
You have now past Star Trek: Judgement Rites! Jolly time! Lalala! Monkey treats are on the house! Woo woo! You're ghostin' us mutha fucka ... I don't care who you are back in the world, you give up our position one more time, I'll bleed ya ... real quiet ... leave ya here.

