How To: Keep Your Kids Safe In Ubuntu
In this article, I will explain the steps I used to create a user account in Ubuntu for my six year old nephew's use. While this configuration is particular to his needs, many of these considerations would apply to anyone configuring an account for use by a child.

Written by Peter Durrill
As my nephew has become more learned, and can generally be counted upon not to accidentally destroy something as fragile as a home computer, I have allowed him supervised access to my computer. He mostly uses it to play some of the games I have installed for him, or to access the websites of his favored television networks, such as pbskids.org, and sproutonline.com.
However, he has reached a level of proficiency where he seldom needs my help. While I would prefer to stay there with him and continue to supervise directly, I simply don't have the time so, in this article, I will explain the steps I used to create a user account in Ubuntu for my six year old nephew.
First, I needed to create a separate account for him to use. In GNOME, I went to System > Administration > Users and Groups. After I entered my administrator's password, the Users settings window opened. I clicked on Add User and and the New user account window appeared.
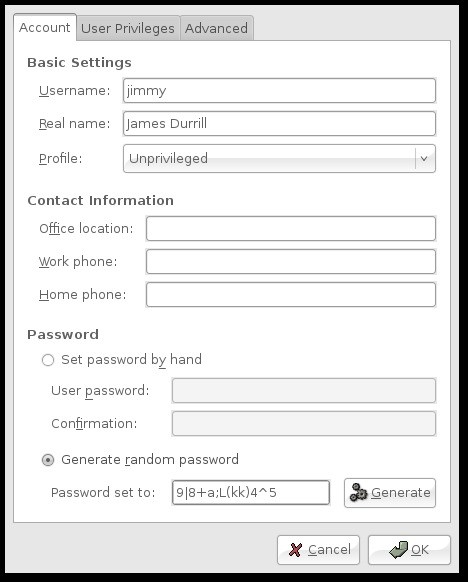

On the account tab, I entered the username I want the account to have, and the real name. I chose to set the account to unprivileged and left the contact information blank. For the password, I generated several passwords until I had one that seemed complex enough. Unfortunately, the random passwords don't include any special characters, but they can be added directly into this field. This would be nearly impossible for my nephew to remember. Fortunately, that won't be a problem, but more on that in a moment.
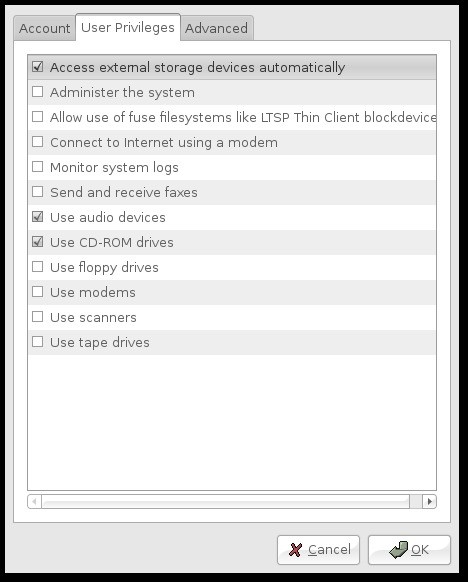

Next, I went to the User Privileges tab (below) and added the privileges I wanted my nephew to use:
- Accessing external storage devices automatically
- Use audio devices
- Use CD-ROM drives
With nothing on the advanced tab needing my attention, I clicked OK and then closed out of the User settings window.
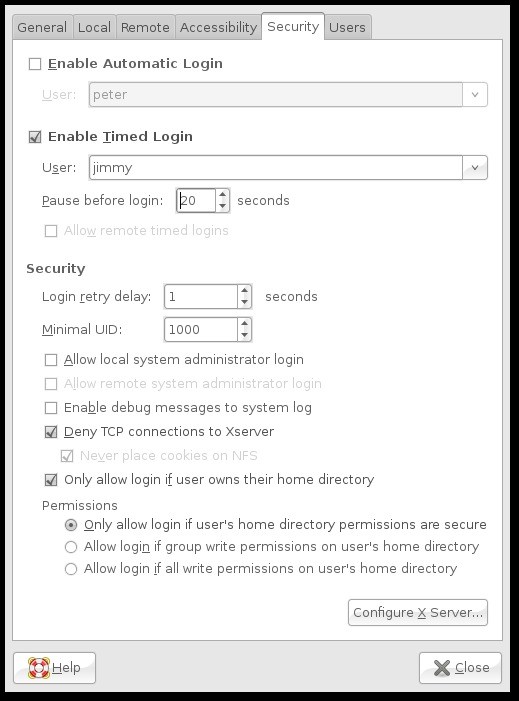

Before logging out of my account, I went to System > Administration > Login Window (left) to configure the GNOME display manager. In the Login Window Preferences window, I went to the Security tab. There I checked the Enable Timed Login box, selected my nephews account in the drop down menu, and set the timed login delay to 10 seconds. This allowed me to use a very secure password, without making my nephew memorize it. With that done, I closed out of the login preferences and restarted my machine before testing the timed login.
My main objective in preparing his account was to make it easy for him to use. I wanted to simplify as much as possible. I can always add to the complexity later. The first thing I changed was to open the workspace switcher preferences and set the number of workspaces to one. Then I removed it from the panel all-together. I also removed the "Quit..." applet.
As a general rule, I wanted to avoid clutter, but I mainly wanted to make it easy for him to find what he wants to use, whilst avoiding the things I may not want him to use, so the next item on my agenda was the menu. I considered just adding launchers to the desktop and doing away with the menu altogether, but there are far too many programs to make that an optimal solution. So, I opened up alacarte, the menu editor included in Ubuntu, and started cutting away.
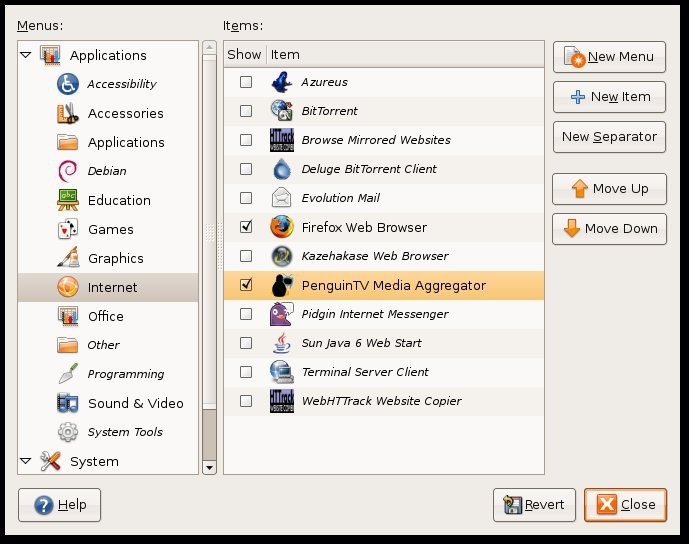

There are many sub-menus in the default install, and precious few applications I feel he would find useful. My choices here were rather specific to my case, but essentially I removed the majority of the preferences, the entire administration menu, and all entries for programs that I did not install specifically for his use-- with the exceptions of common items like the Text Editor, Calculator, and Firefox.
While the "Search for Files" menu entry is available through the places menu, I wanted to make searching more easily available, so I added the deskbar to the top panel and set the layout to entry in panel on the view tab of the deskbar preferences. I also disabled many of the extensions under the Searches tab, leaving only:
- Files and Folders Search
- History
- Web Bookmarks
- Web history
- Recent Documents
The idea being, again, to limit the amount of information he has to process.


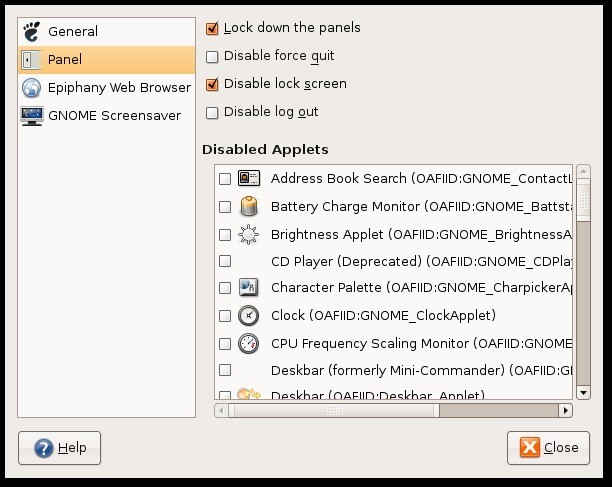
Having configured the panels to my liking, I ran Pessulus, a lockdown editor for GNOME. While Pessulus is not installed in Ubuntu by default, it is available from the Ubuntu repositories. I don't expect my nephew to actively attempt to bypass the restrictions I have placed on his account. Honestly, I would go so far as to encourage it. So, despite Pessulus' many options, my needs here are simple. Switching to the "Panel" section in pessulus, I checked two options, Lock down the panels and Disable lock screen (below) then closed the lockdown editor. Hopefully this will prevent the all-to-common "missing" panels and applets, bane of new users and tech support alike.

As a final step, I ran gconf-editor and navigated to apps > nautilus > preferences in the left hand pane and checked desktop_is_home_dir (below). This will change the desktop directory from /home/jimmy/Desktop to just /home/jimmy. While there is some disagreement as to whether this should be a default gnome setting, I certainly think it is appropriate for my particular situation.


The primary piece of software I want to configure is Firefox. There are many valuable resources for students on the web. Not to mention (with Flash and Java installed) the nearly endless variety of games. However, there are many more things to be found out in the wilds of the internet. With that in mind, I will follow up my usual round of simplifications with a particularly strong form of "parental controls".
In addition to that, I have installed an ad-blocker. While there are many valid arguments against using disrupting advertising service, I have far more pressing concerns about young impressionable minds being bombarded by commercialism.


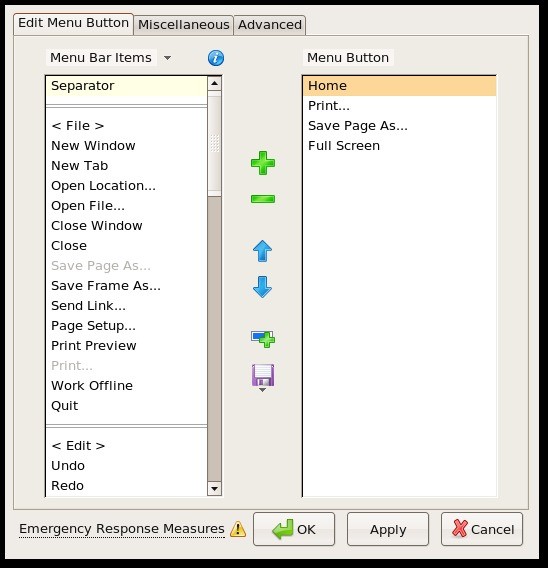
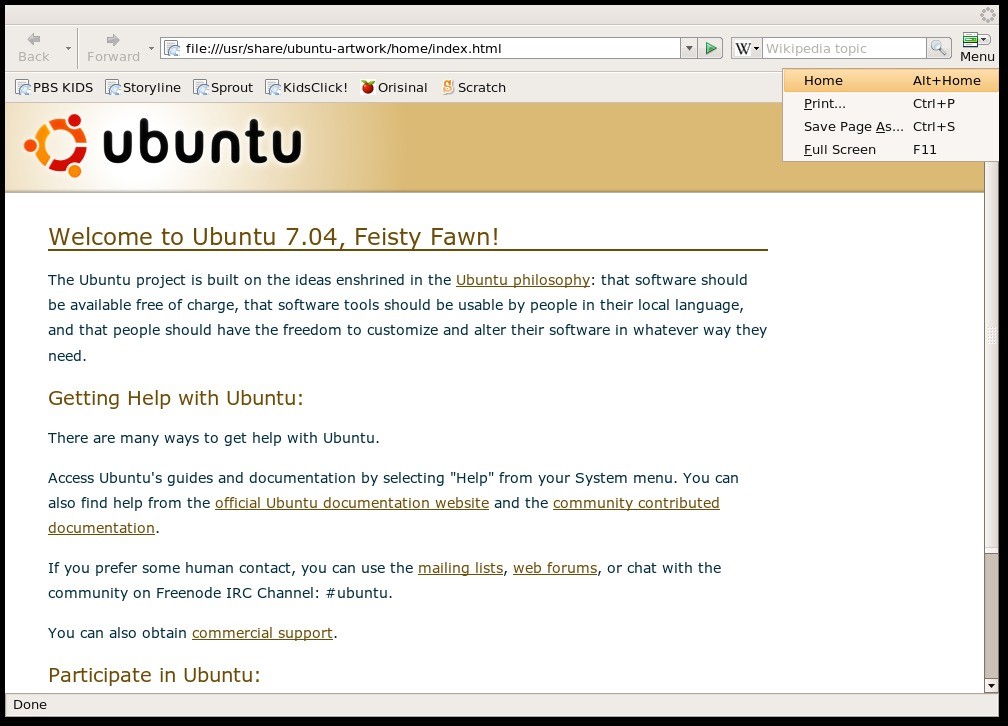
Now, as I said before, one of my primary goals with this whole process has been to simplify user interfaces. To this end, my first action in Firefox was to remove all but the forward and back buttons in the navigation bar, as well as un-check use small icons in the Customize toolbar window. Once I was satisfied with the menu, I searched the Mozilla add-ons page for an extension called Personal Menu and installed it. The most current version as of this writing is 3.0.5.
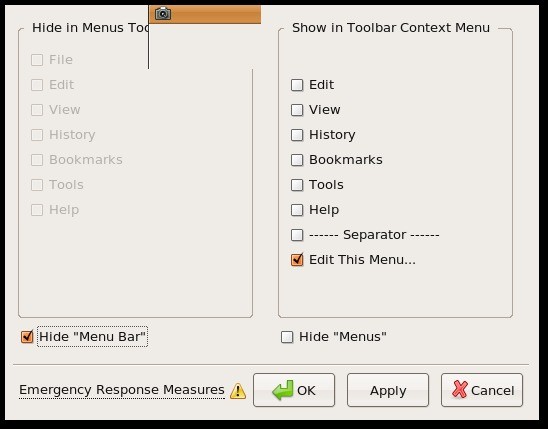
After restarting my browser, I opened up the preferences for Personal Menu. Personal Menus is a great extension for simplifying the interface, it allows you to create a menu button for the navigation toolbar, move items from the standard menu bar menus (File, Edit, View, etc) into your buttons menu, and then hide the menu bar. So, after adding my choices from the standard menus, I placed the customized menu on the far right of the navigation bar, with the search entry field just to its left. The items I chose were fairly standard:
- Home
- Save Page As...
- Full Screen
With the exception of Save Page As... none of these items are available on the standard page context menu.

As I have said before, I don't anticipate my nephew actively attempting to bypass any restrictions I place on his account.

That reason allows me to simplify my approach to limiting his internet access.
After shopping around, I found the solution that I was looking to use: a white-list.

Most "parental control" solutions either use a blacklist, which is a list of forbidden web addresses, or a combination of a blacklist and a content filter that searches the contents of requested pages for certain key words. There as numerous disadvantages to these approaches: many words that are used as profanity can also have valid uses; blacklist creators could never hope to catalogue all existing pages, much less the massive quantity of new pages created every day; on top of those very real problems, there is the problem of the creator's prejudice towards what pages should be blocked.
Fortunately, I can make those kinds of decisions myself. By choosing a white-list solution, I can pick what pages I want my nephew to access. Any page that is not on the white list is blocked by default. As my nephew's interest grows, I will have to investigate subjects that he is interested in and allow access to those I don't find acceptable. While this does involve more effort on my part, it does ensure a better understanding between us.
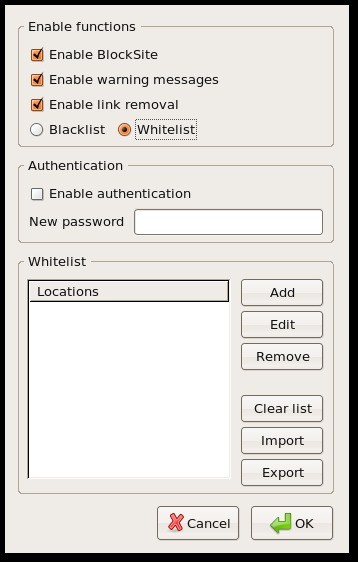

The plugin I used for this is called BlockSite (left), and is also available at the official Mozilla Firefox add-ons page. BlockSite has a very simple interface and allows both blacklist and white-list based blocking. Wildcards are supported, so by adding *wikipedia.org/* you can access all pages on every sub-domain of the wikipedia.org site. If you feel the need, you can add a password, which must be entered before accessing the BlockSite preferences. However the whole extension could be disabled in the Add-ons window, so that's not a terribly effective solution.
For troublesome sites, try looking for proxy or firewall information. For example, I wanted to add the website for the StorylineOnline.net website, which offers videos of professional actors reading children's books. The site loaded fine, but the videos would never play. On the help page, I found the reason. It turned out to be that the videos were hosted by a site with a different domain name. After adding that to the white-list as well, they all played without issue.
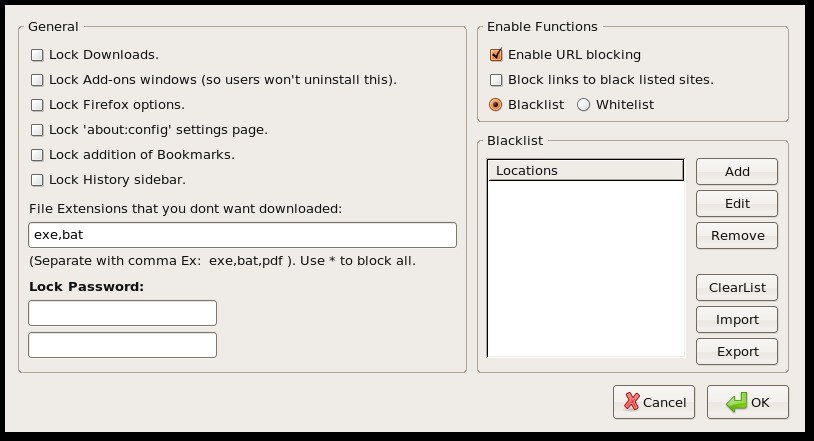
For anyone who might want a slightly more secure solution, there is PublicFox, which looks to be a mashup or extension of BlockSite with some additions that will allow the password protection to be extended to other items like the browser Preferences, about:config page, and the Add-ons window. I tried this for a while, but the constant password entry pop-ups don't offer a terribly friendly experience.
Used in conjunction with Pessulus to disable the command line and prevent running Firefox with the -profilemanager switch, this could offer a decent lockdown solution. Again though, there is always a way around restrictions, assuming you know the way. In this case, the user would simply have to access their profile directory and edit a few text files to disable the extension.

That's it for my setup. In the future, if my nephew begins to mirror his uncle's downloading habits, I may have to recreate his account using disk quotas. For anyone interested in setting up such a feature, it might help to refer to this post by Aysiu on the Ubuntu forums here: http://ubuntuforums.org/showpost.php?p=2692744&postcount=10. If he ever seems to develop unhealthy computing habits, such as spending entirely too much time in front of it, gnome already offers a solution. Under Keyboard Preferences, in the GNOME preferences, there is a tab labeled Typing Break. Typing Break can be set to lock the screen after a certain amount of time, which is adjustable in increments of one minute, from one to one hundred thousand minutes. If it comes to that, I'll have to set gdm to login to my nephew's account automatically, and memorize his password. Regardless, I think this is a good start.
Since this is my personal computer we are using, I saw no reason to install Edubuntu, but I did install basically all of the educational software available in the repositories, as well as one that is not: Gutenpy, A catalog browser and text reader for Project Gutenberg, which I highly recommend. While it does not have an Ubuntu specific .deb file available, I have used the Debian package available at http://gutenpy.sf.net/ with great success.