Philips DVD Caddy swap out process

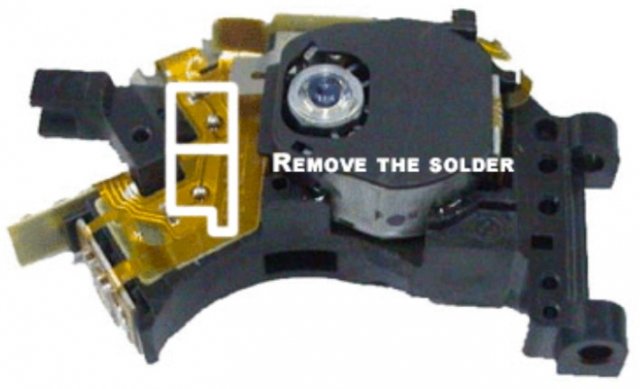
Ensure that the two solder dots have been removed per the picture. Use solder braid and a solder iron to remove the solder points. Be careful not to touch the ribbon cable directly with the solder iron.

Power up the xbox and eject the CD Tray, with the tray ejected unplug the power so that the tray remains open.
Remove the DVD Drive from the Xbox
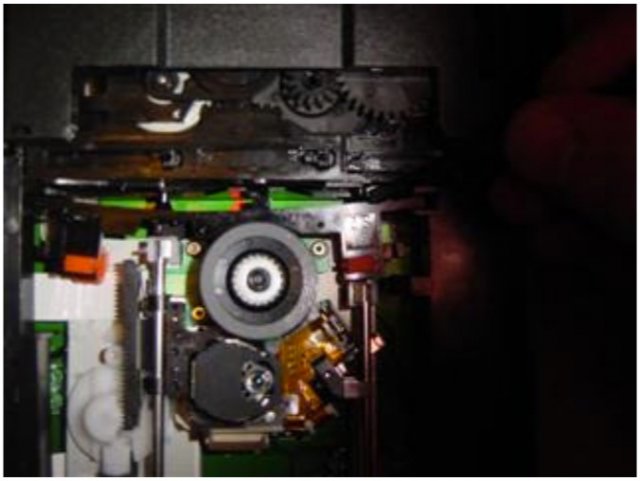
Remove the metal case on the DVD by removing the 4 philipps head screws
Take both the upper and lower cases from the plastic and PCB inner, this exposes the DVD tray, DVD caddy and PCB control board.
Look at the bottom of the PCB board and unplug the two ribbon cables from the CD caddy by pulling forwards (gently) on the two brown locking bars.


Looking at the top of the drive through the tray slide the caddy to the main spindle and disconnect the ribbon cable from the caddy by pulling forwards on the brown lock bar.

This next stage is quite tricky. Be very careful on the pressure that you exert. The DVD caddy raises up and down as the tray closes and opens, it does so by a series of physical cams those push the caddy up and down as the tray moves in and out.
You can clearly see the faceplate attached to the caddy in this picture.
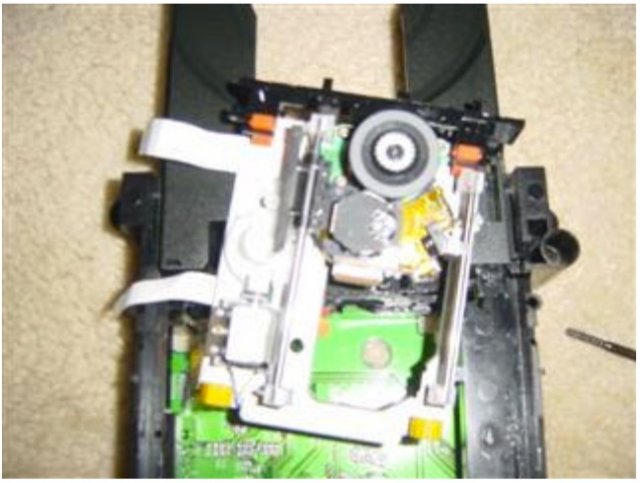

There are two pegs and two slots that lock the faceplate that causes this raising and lowering to happen. The pegs lock into slots in the main mechanism and must be realized for the caddy to lift out of the Drive mechanism. Once released the face plate lifts straight up disconnecting the two yellow grommets (ensure to look how high they are mounted) from the main unit releases the entire mechanism to allow it to separate from main unit and be replaced.
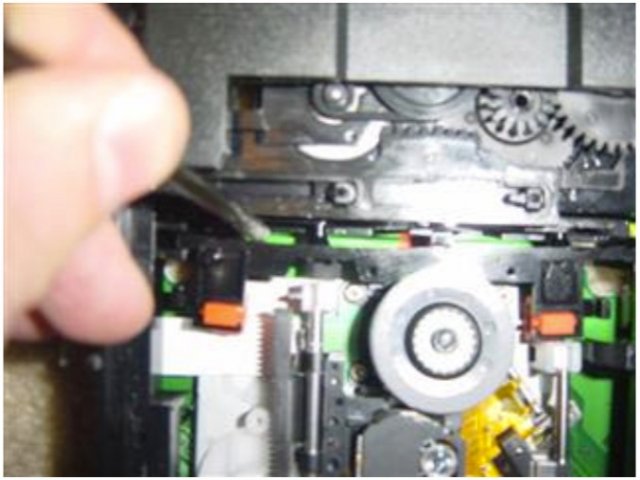
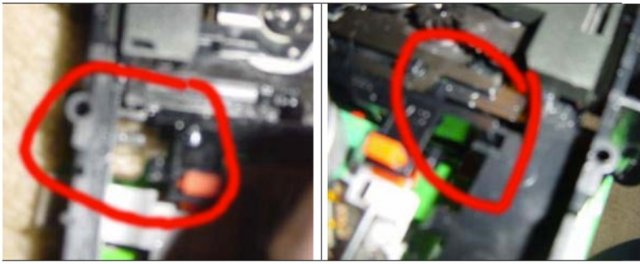
To separate the pegs from the slots insert a thin screwdriver at the points shown and lever the pegs out. The face plate will not snap but only needs to move approximately half a centimeter out from each side.


Disconnect the faceplate by releasing the red grommets. And connect the faceplate to the new caddy.
Once removed you can directly insert the new caddy in to the mechanism just get it in don’t try to connect anything at first. Feed the ribbon cables through the sides of the main unit in preparation to reconnect.
Connect the two yellow grommets. Ensure that yo u reconnect them at the same height as the original unit’s ones. Now take the face plate and slide the left and right ends into the slots as shown, press firmly down to relocate the pegs into the two slots.
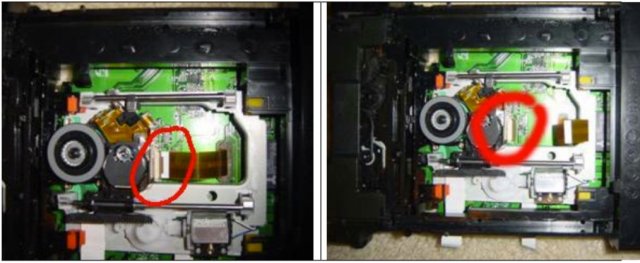
These two pictures show the slots on the left and right hand side, align the faceplate over the slots and slide in a little way. Make sure you don’t move the cdtray or any part of the outer mechanism. The slots/pegs and holes will all align nicely.

To get the faceplate back into the mechanism you need to force it. It doesn’t take a lot of pressure at all to do this, use a small flat bladed screwdriver to flex the faceplate so it can slide down into the slots. Once its low enough down the pegs will align with the holes in the tray and the whole unit will snap back into place.
Reattach the ribbon cables by inserting the ribbons carefully (ensure not to touch the ends of the cables). Once located push the brown lock bars closed. If the ribbon is secure you should be unable to pull gently on the cable and have it pull disconnect.