Loom (Solution)


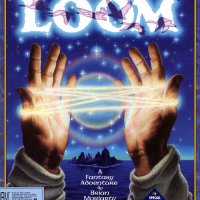
LOOM
- Introduction, Exploring, Learning Drafts
- Leaving the Island, Waterspout, Crystalgard, Getting into the Tower
- Shepherds, Dragon, Pool, Staircase
- Rusty, Forge, Mandible
- Closing the Holes, Dead One, Endgame
LOOM: Part 1
In LOOM, nothing you do will kill you, and you won't get "stuck" because you missed a clue elsewhere. So there should be no need to save your game unless you want to quit and take a break, or you feel more comfortable having a saved game position.
Be sure to keep a pencil and a piece of paper handy at all times to write down the "drafts" (musical spells) you hear in your adventure. The "Book of Patterns" contains a lot of spells you won't hear or need. You will only need the following spells (list these on your piece of paper): Open, Empty, Dyeing, Night Vision, Straw into Gold, Twisting, Invisibility, Sharpen, Terror, Sleep, Healing, Reflection, Confusion, Silence, Unmaking, and Transcendence. Note that Open and Transcendence are the only spells which are pre-printed in the Book of Patterns. Write their drafts on your paper now.
Examining objects is done by placing Bobbin next to (or in front of) the item and pressing ENTER (keyboard users), double-clicking (mouse users), or pushing the button (joystick users). If the item is something Bobbin needs, he will automatically take it.
The Book of Patterns also contains the copy protection for the game. At the beginning you'll be asked to select your level of play. "Practice" means that you will see both notes used for the draft; "Standard" means that you'll only see the notes displayed on the Distaff (magic wand used for casting the spells); and "Expert" means that you'll only hear the notes -- you won't see them. After choosing your play level, you'll be asked to select the proper musical symbols which relate to one of the guilds (this is the copy protection). After entering these, the game begins.
Opening with an impressive musical score, LOOM begins with you, Bobbin Threadbare, sitting alone at the top of a lofty crag with nothing to keep you company but a tree with a single leaf. Touch the leaf and it falls to the ground. (This does nothing significant: It's just an introduction to how things work in the game.)
Leave the crag toward the left and keep going until you come to the village. You won't have to worry about traversing that precipitous mountain trail (there are no arcade sequences in LOOM). Just point (or use the arrow keys) in the direction you wish to go, and you'll go there.
Go down the path to the tent on the left and enter it. Head to the right of the screen, examining the tapestries as you go until you come to the Great Loom. The game takes over here. You find yourself eavesdropping on a disturbing conversation between three of the Master Weavers and your surrogate mother, Hetchel.
After the weavers have subjected Mother Hetchel to a heinous spell, been transformed into swans, and flown away, you'll see that one of the weavers has dropped his Distaff. Go to it and pick it up. Then, go to the egg, and cast the Open draft on it.
The egg hatches and Mother Hetchel -- not exactly a picture of her former self -- comes forth. She explains to you what has happened, what you must do, and that if you ever lose the Distaff, she'll come to your aid if she can. So saying, she flies away leaving you quite alone. Go to the Great Loom and examine it.
Leave the Hall of the Great Loom (left) and keep going until you're back outside. Go back up the path to where it forks, and go to the left. You find yourself in a forest, and the trees all seem to have holes in them. Examine each of the holes (there are four). In them you find owls that each hoot a single note, but one of the holes is empty. (Don't write these notes down yet.)
Go to the left one more screen to the cemetery. There, you find the missing owl fast asleep atop a tombstone. If you try to examine the tombstone, you'll find the owl's tail feathers are covering up the words on it. To the left is a tangle of thorns. If you look there, you'll see the blinking eyes of a rabbit. Go to the thorns; the rabbit leaps out, the owl wakes up, swoops down, grabs the rabbit (poor thing!), and flies away. Now, examine the tombstone. (Try weaving the Open draft on the tombstone.)
Go back to the forest (right), and examine the holes again to hear the Night Vision spell; write this down on your paper. Leave the forest, go back to the village, down the path, and into the first tent on the right. You can see a pile of gold here, but little else because it's so dark. Move around the screen until you see your eyes and the word "Darkness" in the item display (bottom right corner of your screen). When you do, weave the Night Vision draft. Now, you can see what's in here: a spinning wheel and a pile of straw. Examine the spinning wheel to hear the Straw into Gold draft, and write it down. Practice the draft on the pile of straw.
Leave the tent (left), go one screen right, and enter the tent to the far right. This is the tent of Mother Hetchel, and it's filled with interesting things. First, go to the table and examine the book. It's the Book of Patterns she let you look through, and you automatically take it. Next, look at the flask sitting on the table. Oops! You knock it over, and liquid dye is making a mess on the floor. Well, you can't help that (and you can't set the flask back upright), but you do hear another draft when you look at it. This is the Empty draft; write it down.
Now, go to the bubbling cauldron and examine it. It plays the Dyeing draft; write it down. Remember that the Dyeing draft only works on wool. Looking around the rest of the room, you see piles of undyed material. Practice the Dyeing draft on the material. The rest of the material and clothes in the tent are mere window-dressing.
Leave the tent (up), go to the left back to the Sanctuary of the Elders, and continue to the left to the pier. On the pier are four sea gulls. Examining any of them causes one to sing the Open draft to you. Now, what do they want you to open for them? Looking around, you see a tightly closed clam sitting on one of the rocks. Go to it and cast Open on it. The clam springs open, and one of the hungry gulls begins eating breakfast. In gratitude, it warbles another thread (musical note) for your drafting. (NOTE: If the gull does not sing a note, go back to the Hall of the Great Loom, examine the Loom, and you will get the note.)
LOOM: Part 2
You've explored everything there is, but Mother Hetchel advised you to leave the island as quickly as possible. But how? There are no boats available, and you haven't learned a draft of Travel. Now, what did that tombstone say? Something about opening up the skies? Right! Go back up to the crag (where the game began) and examine the sky. Now, weave the Open draft on the sky. Good grief! Scrambling quickly out of the way, you barely avoid getting sizzled by a bolt of lightning; instead, it strikes the tree, breaking off one of its limbs, and sending it sailing...literally! You see the limb land in the water and float to the foot of the pier.
Leave the crag (for the last time), go back to the pier, and jump off the end into the water. After you spit the water out of your mouth, point to the branch. You'll automatically swim to it and climb aboard. The game takes over here, floating you out to sea. You notice the gulls accompanying you on your voyage (the reason for this is never explained). Suddenly, your progress is halted by a huge waterspout. Examine the waterspout to hear the Twisting draft and write it down.
Twisting? This thing doesn't need further twisting; rather, it needs untwisting. Here's a new twist (no pun intended) on your draft weaving. Play the Twisting draft backward (this reverses the draft's influence, as is true with all the drafts!). Cooperatively, the waterspout untwists itself and disappears, leaving the way open.
Continue as far left on the waterspout screen as you can, then travel north to the shore. When you're on dry land once more, you shake yourself off, and are given another thread (musical note). Travel north up the hill. You find yourself walking along a narrow path through the forest overlooking the city below. (Don't go to the city just yet.) When you get to the point where the path goes left or down, go to the left.
Before you can take another step, four shepherds mystically appear before you. As they do, you hear the Invisibility draft in reverse (don't write it down yet). They're rather amused by your wizardly appearance, but before they'll let you continue on the path into their land, they demand that you do something to impress them. Try as you might, nothing you conjure seems to satisfy them. (You'll need to examine the shepherds to cast a draft on them.) Leave them (right), and as you leave, they begin to disappear. This time, you'll hear the Invisibility draft in its proper form; write it down. Go down the path to Crystalgard, the city of the glassblowers.
Entering the city from the back is a little difficult, for the door seems to blend with the rest of the building (everything is transparent). At the bottom of the stairs (which lead down from the mountain path), go straight to the right, then angle upward to the northeast. You will find yourself inside a glass museum of sorts, and you'll see what appears to be a crystal chalice sitting on a pedestal. Go up the stairs, and at the landing, head toward the left side of the screen (don't continue to the right at the top of the landing). Now, head back to the right. You should find yourself outside a crystal monolith-looking structure. Enter the crystal and examine it. You'll be transported to the front screen into another crystal structure (on the same side as the chalice).
Exit the structure. As you do, one of the glassblowers (Master Goodmold) approaches and greets you. After several moments of discussion, he takes his leave of you. Go to and examine the chalice. Master Goodmold returns, tells you it was carved from a single diamK, then leaves once more. You can't do anything with the chalice except fill it (play the Empty draft backward) and empty it. Leave this area (right), and you'll enter the glassblowers' cemetery. Examine the tombstones if you wish.
You can't do anything with the graves, so leave the cemetery (weave your way through the graves to the front door at the middle of the screen), and go back outside. Now, enter the door in the tower (see the men working up there?). In the tower are two men talking, a sphere, and another of those teleporting crystals. Go into the crystal. Just as you're about to enter it, you notice the men, and hide to eavesdrop on their discussion. Bishop Mandible is asking when the sphere will be ready and how far into the future it will allow him to see. Finally, their conversation ends, and they leave the area.
Now, go back up the stairs, to the right, and back into the crystal. Zap! You find yourself in the tower where two men are sharpening a scythe. They see you, stop working, and make grumbling remarks about unauthorized persons interrupting them. Before you can explain your presence, one of the men beams you back to the room with the sphere.
How are you going to get past these two and on with your quest? If only you could become invisible. Go back outside to the front of the tower, examine the men, and weave the Invisibility draft on them. Go back into the tower, and enter the crystal. This time, the men (whose vision you've blurred) can't see you. Listen to their conversation and examine the scythe. You hear the Sharpening draft; write it down. Now, go to the bell on the left of the screen and examine it. Poof! You wind up right next to the sphere. Go to it and examine it three times. When you do, you see several future events, and hear the draft of Terror; write it down. Exit this area by examining the bell to return to the tower, then examine the bell on the right to return to the first crystal structure.
That's all you can do in Crystalgard. Leave the city and work your way back to the steps leading up to the mountain path, and go back to where you encountered the shepherds.
LOOM: Part 3
Now, you'll show those shepherds something amazing! When they reappear, examine them, and weave the Terror draft on them. You suddenly take on the appearance of a fearsome dragon -- the shepherds' worst nightmare! In a panic, they take flight, leaving you free to travel their realm, and you learn another thread.
Travel west (left) to the pasture. Here, you see a sleeping shepherd and his grazing flock. Examine the sheep. They become disturbed by your presence and leap over the fence. As they do, you hear the Sleep draft, except it's reversed, so what you're really hearing is an Awaken draft. Write this draft down in both its forms. The draft wakes the shepherd who admonishes you for disturbing his sheep. As he herds them back over the fence, you hear the Sleep draft in its proper form.
Leave the pasture by going around the fence and to the left. You soon find yourself outside a cottage; enter it. Start looking around the cottage, and a shepherdess introduces herself as Fleece. She thanks you for coming so quickly. Obviously, you (or someone from the Mages' Guild) were expected. She explains their flock is being ravaged by a fierce dragon, they have a quota to meet (10,000 sheep have been ordered, but by whom?), and they won't be able to meet it unless you can help. After this explanation, you notice a lamb in a straw manger. When you examine it, the shepherdess explains its mother had been carried off by the dragon soon after giving birth, and it's quite sick. She tells you she's tried to heal it, but has been unsuccessful. You hear the Healing draft (write it down), but you notice it has no effect on the ailing lamb. The poor thing is destined to languish (you won't be able to heal it even after you learn the next thread).
Leave the cottage and go into the midst of the flock that has been gathered. How can you save it from the hungers of the dragon? Camouflage! Weave the Dyeing draft on the sheep. They turn green (wool only, remember?), and blend perfectly with the grass upon which they're grazing. And just in time, too, for here comes the dragon. Swooping down from the sky and seeing no sheep, it grabs the only thing that stands out in all that green: you!
Up, up into the air you go, tightly grasped within the dragon's might talons, until it reaches its lair. When it releases you, it's surprised to see its dinner has turned out to be something other than mutton. Then it curls up on its bed of gold, looted from Crystalgard's coffers, to contemplate you.
Imagine that: a bed of gold! Okay, it's not fair play, but you want to help the shepherds any way you can, right? Weave the Straw into Gold draft in reverse. The gold obligingly becomes straw; the dragon is amused at your folly, and warns you to return it after you're finished playing. Now that it has a proper bed, cast the Sleep draft on the dragon. Soon, it's nodding off and snoring little puffs of flame. Uh-oh, one of the flames touches the straw, which conveniently ignites, and the dragon's tail suddenly catches fire! With a surprised roar, it takes flight from the cavern. After the straw stops burning, you see a cavern which was previously hidden behind the dragon; enter it.
Wandering out of the dragon's lair (top), you find yourself in a bewildering maze of passages in the dark. Go as far to the right as you can; when you see your eyes and the word "Darkness" on your screen, cast the Night Vision draft. There, that's better. Follow the path to the right, down, and back toward the left. Suddenly, you lose your footing and slide down the side onto another set of paths. Follow these, and soon you'll find yourself exiting through what appears to be a dead tree.
Before you is an underground pool. Examine the pool and you hear the Reflection draft; write it down. If you're wondering what might lie beneath the surface of the pool, weave the Empty draft on it. The water recedes, and you see a sphere like the one in Crystalgard! Go to the sphere and examine it three times. When you do, you see three more future events. What can they mean?
Leave this area (if you want to, you can refill the pool) by walking to the right side of the precipice, then back to the left (behind the tree). You find another path leading down (the screen doesn't display it), which you follow until you come to the exit from the caverns. When you exit the cavern, you find yourself at the top of a treacherous winding staircase. Examine the spire, then weave the Twisting draft in reverse. There, that will make your descent a lot easier!
LOOM: Part 4
At the bottom of the stairs is a cemetery and a sleeping boy. Examine him and weave the Sleep draft in reverse on him. He wakes up, tells you his name is Rusty Nailbender, and explains he was sent to find wood to stoke the fires of the blacksmiths' guild, but had been unsuccessful in his search. He takes you to the edge of the cliff and shows you his city, The Forge, then returns to resume his nap.
You can examine the tombstone if you want, but do go down the path (on the next screen to the right) to The Forge. As you approach the drawbridge, a guard comes out, sees you're a stranger and not one of the guild members, and says the gate will always be closed to you. Try as you might, you cannot convince him to pass you through. When he leaves, go to the gate and weave the Open draft on it. After the gate opens, enter the threshold; you're soon ejected and sent on your way. If only you looked like one of them.
Go back to where Rusty's sleeping and weave the Reflection draft on him. Mere moments later, Rusty looks like you, and you look like him! Now, you'll get past the blacksmiths. Go back to The Forge. This time, the guard recognizes you, says Stoke is looking for you, and opens the gate. Enter the threshold and look around a bit. There's a lot of activity here, but you've got a date with destiny. Head to the back, go right, then come forward and right to Stoke's forge.
When he sees you, he's livid with rage that you should come back empty-handed except for that worthless stick (your Distaff), which he grabs and tosses into the fuel box. Oh, what will you do now? Your Distaff's in imminent danger of being incinerated, and your quest is unfulfilled. Stoke, who's still in a fit of pique, grabs you and locks you in a cell saying your father will hear about your laziness. There's nothing to do except curl up on the straw, wait for Rusty's father to come give you a lecture (and possibly a spanking), and worry about your Distaff's fate.
It's been a long day, Bobbin. The soft straw soon lulls you to sleep. While you're sleeping, the game takes over, and several important things happen. First, Rusty (who looks like you) is found by the dragon which, bent on revenge, blasts him to a cinder with its fiery breath (poor Rusty!). You wake up in the cell and notice you're no longer disguised. Something must have happened to him (right you are, Bobbin!).
The next scene shows Stoke throwing your Distaff on the fire. As he does, the scene cuts to Rusty's ghost rising from his skeletal remains and entering the land of the dead. As he enters, Mother Hetchel comes flying through the small rip. As she flies about the area, she sees oddly shaped smoke coming from the chimnies of The Forge. In a death-defying dive, she rushes into the chimney, down to the forge, and plucks the Distaff from the embers! Meanwhile, back in the cell....
As you're standing there contemplating Rusty's fate, you hear a scraping sound, and see your Distaff being pushed under the door. Get the Distaff, weave the Open draft on the cell door, and leave. Hoping Rusty's not been caught napping by one of the smiths, you attempt to help him. Weave the Empty draft in reverse on the fuel box, and it's soon filled with a good supply of wood for the forge. That should get Stoke off Rusty's back.
Go down the stairs, and you enter a room filled with the mind-numbing noise of a smithy pounding a sword. Also here are the other swords he's forged, Rusty's father, and your old friend Bishop Mandible. Try as you might, none of your drafts work (it's too noisy). Examine the two men talking, and soon you can hear what they're discussing. Mandible has ordered 10,000 swords (along with the 10,000 sheep) to arm his army. War? Nailbender ends the conversation by addressing the smithy, asking him how soon he'll be through forging the last of the swords. The smithy stops hammering (at last!) and says it's almost done. Examine the sword and weave the Sharpen draft in reverse on it.
Your efforts have postponed the completion of Mandible's terrible plan, but they have also brought you to his attention. You're suddenly surrounded by guards, taken into custody, flown (via Air Dragon) back to the tower of his cathedral/fortress, and locked in a hanging cage. Here, you're forced to hear his plot in all its hideous detail, and learn of your importance to it. Mandible plans to use your knowledge of the Distaff to tear a hole in the pattern separating the land of the living from that of the dead. His army of 10,000 is to consist of a legion of the dead who, under his "guidance," will rule the world.
Cob, Mandible's henchman, says you don't look so dangerous, but Mandible says a weaver with a distaff is unstoppable, and suggests Cob watch you closely. Weave the Open draft on the cage. When it opens, leave the cage. Mandible (a trifle triumphantly) grabs the Distaff from your hands, and says thanks to you, he knows the draft to tear a hole in the pattern! Oh, Bobbin, what have you done?
Knowing you're helpless without the Distaff, Mandible leaves. Cob tells you not to touch anything. Look around the room and examine your fellow prisoner. Hmmm, it's hungry. Too bad you don't have your Distaff, or you could fill its tummy. Approach the sphere, and Cob stops you reminding you you're not to touch anything. The game takes over here, and Cob offers to let you look into the sphere if you'll let him look under your hood. Despite your warning, he looks anyway, and he and his just desserts catch up with one another. (Depending on which skill level you're playing, you will either see Cob's death in all its gruesome detail, or the scene will switch to Mandible, who complains about it being difficult to concentrate with all that screaming going on.)
LOOM: Part 5
Now that Cob's out of the way, you're free to examine the sphere. Do so three times and you see three more future events, this time more disturbing than the others you've seen. Now, leave the chamber through the door in the front of the room. Out on the balcony, you find Mandible who continues to gloat that you're just in time to watch him launch his plan to rule the world. Before you can stop him, he points the Distaff at the heavens, weaves the Open draft, and tears a huge hole in the pattern.
A dreadful apparition comes forth that looks for all the world like the King of the Dead. After hearing Mandible's syrupy words, the Dead One ends Mandible's hopes (and life) with the Confusion draft (write this one down), and considers how nice it would be to have this side of the pattern for his own. He calls forth his "subjects," and drifts away to begin his terrible rule. You're alone again, so grab your Distaff, and start thinking of a way to get out of this place. Wander back into the prison chamber, and you see that the hungry creature has escaped (somehow). Where can it have gone? Out on the balcony, you see a shadowy figure skulking along. Go back to the balcony. Uh-oh, looks like you're about to be invited for dinner! Better back away from it before you become the first course! As you do, you fall from the balcony and feel yourself being tugged through the opening in the pattern.
Turn and weave the Open spell in reverse on the hole through which you just drifted. How many other holes have been torn in the pattern? Many!
Drift off this screen to the left as far as you can. You will see other holes along the way, but don't enter them just yet. At the far left and upward, you see a hole with a shimmering light coming from it; enter it. What a beautiful place this is, and look: It's filled with swans! Could this be where the weavers came after they were transcended? One swan in particular seems to draw you to her. Examine her, and pay close attention to the poignant tale you hear. At the end of Cygna's story, she tells you to go forth and right the damage that's been done.
Leave this scene (right), drift to the right, and enter the first hole you come to. You find yourself back in Crystalgard in the glassblowers' cemetery. And here's Master Goodmold, dying on the ground. Cast the Healing draft on him, and he tells you to save your spells for the dead. He then pulls himself up on one elbow and tells you all that has happened. Soon, he falls back to the ground, dies, and disappears. With sorrow, you look around and see that all the beautiful glass has been warped into odd shapes. Nothing to do here except leave through the hole, and close it.
Drift off to the right and enter the next hole you come to. The Army of the Dead has decimated the shepherds and their sheep. Weave the Healing draft on them. They revive, thank you, and go about their business. That's all you can do here, so exit back through the hole, and close the it. Now, drift to the right, and enter the last hole.
What a dreadful scene. So, this is what happened to Rusty! As you're standing there, Rusty's ghost floats over to you and angrily tells you about his fate. Feeling that you can do little for him, you turn to exit back through the hole. But as you do, Rusty rushes to block you. Examine Rusty's skeleton, and weave the Healing draft on it. In a twinkling, he is resurrected! He thanks you for bringing him back to life, then asks you to help him by resurrecting his guild brothers. You have much to do, though, and after you tell him so, he leaves. Exit the cemetery through the hole, and close it. As you do, you receive another thread for your distaff.
Now, you're ready to face the King of the Dead. Drift all the way back to the left and enter the Shore of Wonder. Drift off the swan screen to the left. You see a hole leading into your island's cemetery. Enter it, travel right all the way to the Hall of the Great Loom where this all started, and examine the Great Loom. Suddenly, the Dead One, wielding the Scythe from Crystalgard, chases Mother Hetchel into the Hall.
She says you must weave the draft of Unmaking and destroy the Loom before the Dead One learns how to use it. You explain to her that you don't know the threads to weave Unmaking, and Mother Hetchel tells you to listen carefully. But before she can utter one note, the Dead One weaves the Silence spell on her; write the spell down. He tells you how helpful you can be because of your knowledge of the Loom's drafts. All you need to do is instruct him in the Distaff's use, and you will become one of his valued advisors. When you're back in control again, weave the Silence draft backward on Mother Hetchel. Flitting about, she once again tries to tell you the notes. This time, the Dead One casts the Confusion draft on her, and she turns into a roast swan dinner!
Weave the Confusion draft in reverse on the swan dinner, and Mother Hetchel is restored. She starts flying about the room, and this time, the Dead One utterly destroys her. The last of Mother Hetchel -- a single feather -- floats to the ground. The Dead One turns to you and demands that you begin instructing him in the Loom's mysteries.
Examine the Loom and you hear the draft of Unmaking. Weave it on the Loom, and the Loom is unmade beyond use, and a huge hole is torn in the pattern. Cygna flies forth, praises you for having put the Loom beyond the Dead One's evil use, and you get the final note for your Distaff.
Exit the Hall of the Great Loom through the hole. As you do, the Dead One hurls the Scythe after you. Now, you may weave the Transcendence draft on yourself.
The game's ending is so lovely, I won't spoil it for you in the walkthru. Hopefully, the loose threads in LOOM will be tied together in a sequel.
LOOM is published by Lucasfilm Games and distributed by Electronic Arts.


