PLAYSTATION GAMEX 14-PIN CHIP FOR AN 52-PIN QFP PSX

Installation of the GAMEX PSX Mod for an 52-pin QFP PlayStation
Removal of the PSX cover
- Turn unit over and remove the 5 screws.
- Turn unit right-side up, and lift the cover off.
Removal of the laser housing
- Disconnect the ribbon cable by pulling straight up on the black connector. This will release the cable, which can then be removed, by pulling straight up.
- Disconnect green connector (3 grey + 1 white wire) by pulling straight up.
- Disconnect collection of rainbow colored wires by pulling straight up.
- Lift off laser housing.
Removal of the controller/memory card housing
- Remove the 5 screws holding the thin metal bracket in place.
- Lift off the bracket.
- Disconnect the ribbon cable by pulling straight up.
- Lift off the controller/memory card housing.
Removal of the heavy metal bracket
- Remove the 5 screws holding the bracket in place.
- Lift off the bracket.
Removal of the circuit board
- Remove the 3 screws along the top edge.
- Lift off the circuit board.
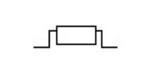
Mounting the GAMEX 14-pin chip
- Carefully bend the the pins of the chip so they are parallel with the chip. Now when the chip is placed right-side up, the profile is much lower.


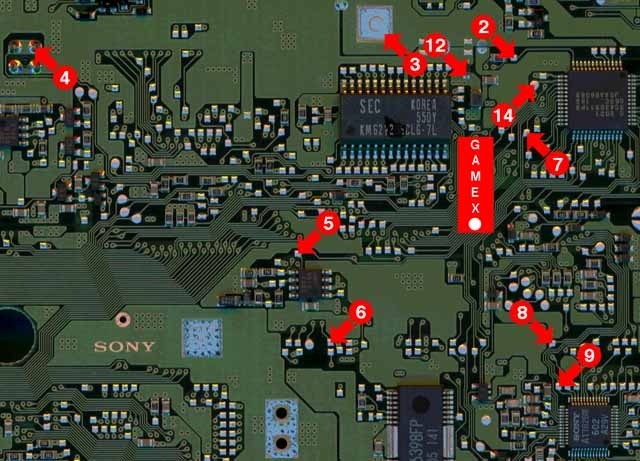
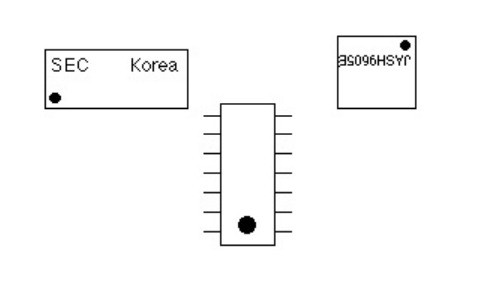
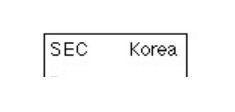
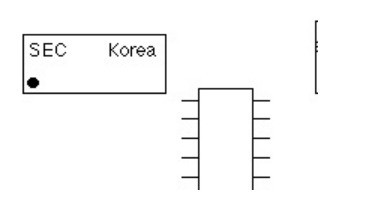
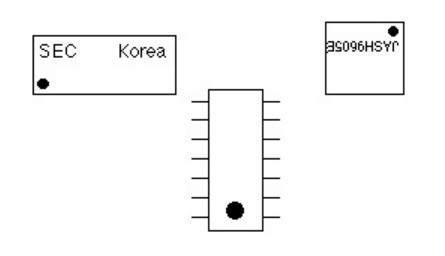
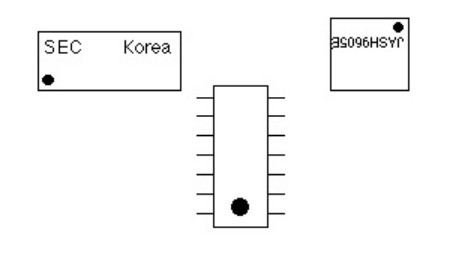
- Locate the area near the upper right corner on the back-side of the board. You will see 2 large chips. One, an SEC Korea chip and the other, the 52-pin QFP. The instructions that came from the chip manufacturer specify an 52-pin QFP chip (JASH9605E). This number is not correct. In this case, all 52-pin chips are the same. So, if you have an 52-pin QFP, this mod should work for you. The pins on this chip arenÕt numbered, but they follow convention. While looking at the chip, so you can read the writing on it, the pin on the far left along the bottom edge is pin number 1. Count up as you go along the edges of the chip, in the counter-clockwise direction. This will place pin 52 just to the left and up a bit from pin 1. If this is confusing, look on the front of the board, many of the chips have their pins numbered there.
- Carefully glue the GAMEX chip upside down between these two chips. (A small bit of silicone works nicely, but its your call).

Making the connections between the GAMEX chip and the PSX PC board
Relevant pins of the 14-pin GAMEX chip

2 - pin 13 of QFP 3 - GND
4 - Door switch
5 - pin 17 of QFP
6 - pin 2 of 082B
7 - pin 18 of QFP
8 - pin 25 of A1782BR
9 - pin 24 of A1782BR
12 - VCC
14 - pin
15 of QFP
Key for subsequent diagrams

Pin 2 -> pin 13 of QFP
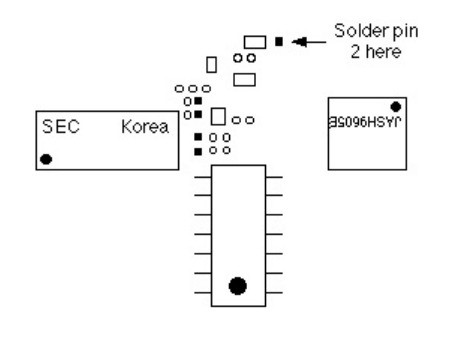

Pin 3 -> GND

Pin 4 -> Door switch
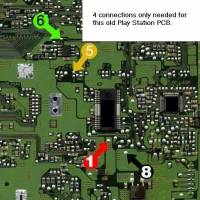
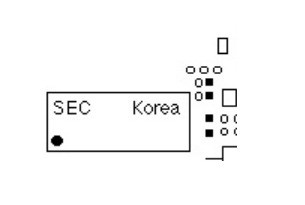
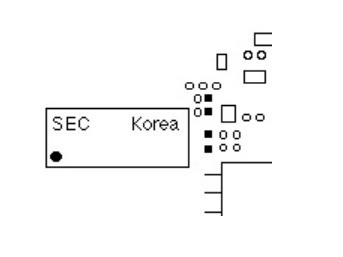
About 3 inches left of the SEC Korea chip

Pin 5 -> pin 17 of QFP
Just to the left of, and about 1.5 inches below the SEC Korea chip.

Pin 6 -> pin 2 of 082B
Just below that same chip.

Pin 7 -> pin 18 of QFP

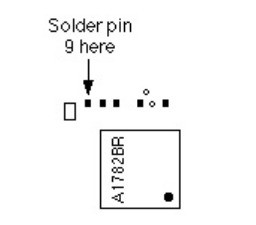
Pin 8 -> pin 25 of A1782BR
About 2 inches below the QFP

Pin 9 -> pin 24 of A1782BR
Just a bit lower.

Pin 12 -> VCC
The mysterious Sanyo chip. This is the trickiest one. There are 2 black chips above the GAMEX chip. A small one above a larger one. You want to solder to the lower portion of the smaller chip.

Pin 14 -> pin 15 of QFP

That's all there is to it. Be sure to insulate the GAMEX chip from the metal plate on the bottom of the PSX. Now, just reverse everything you did to take this thing apart, and you're done. Fire it up and play your imports without having to swap ever again.
© Scott Johnson