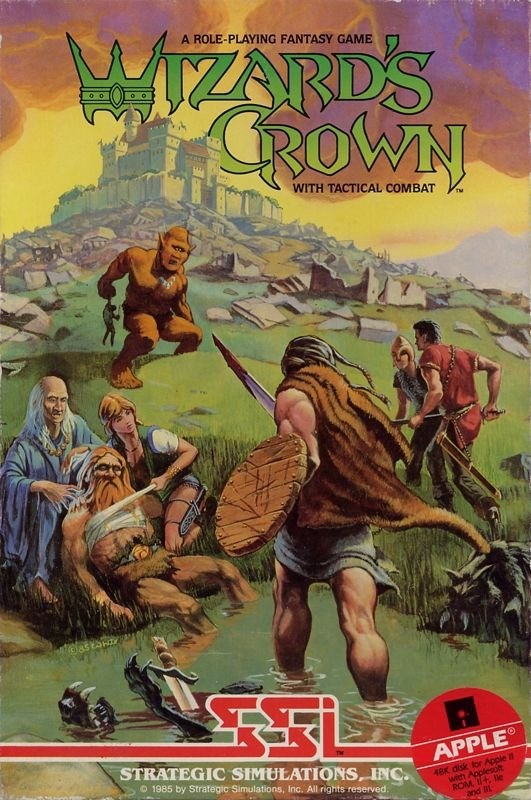
Wizard's Crown (an Apple IIe RPG) Walkthrough

Copyright 2000 Andrew Schultz
Version 1.0.1 5/8/2000
This walkthrough is copyright 2000 by Andrew Schultz. It is part of my contribution to efforts to preserve classic Apple games. Please do not redistribute for profit without my permission, as this FAQ required an investment of my time.
Wizard's Crown copyright 1984 SSI, Inc.
My page for miscellaneous info. on this and other classic Apple games is at:
http://www.geocities.com/SoHo/Exhibit/2762/games/games.htm
Outline
- INTRODUCTION
- IN TOWN
- MARKETPLACE
- NORTH OF TOWN
- RUINS (GENERAL)
- DUNGEON STRATEGIES
- THIEVES' GUILD
- OLD THIEVES' GUILD
- LEVEL 1
- LEVEL 2
- GOZAROTH'S MANSION
- LEVEL 1
- LEVEL 2
- LEVEL 3
- THE PALACE
- LEVEL 1
- LEVEL 2
- LEVEL 3
- LEVEL 4
- LEVEL 5
- LEVEL 6
- WHAT NEXT?
- CHEATING
(Begin FAQ proper)
INTRODUCTION
You must venture into the ruined city south of Arghan and defeat Tarmon, who has terrorized your city with the help of the Wizard's Crown.
IN TOWN
Remember to SEARCH when you seem to come across an interesting place. Otherwise, you won't be able to enter any buildings. Note also when your location description changes (i.e. "City" to "Poor area" or "Marketplace" it is a good idea to search.
Generally, combats are tougher and more frequent at night than in the morning. Just warm up at first. Thugs aren't too bad if you don't face a bunch at once. Stop by the temples (near north and south gates-- restore karma) and taverns (restore morale, get advice) and the inn (spend the night) frequently. Remember that all gates close at night, and shops are closed too, so if you're stuck outside of town you're out of luck. The THIEVES' GUILD is on the east side. Get acquainted with the town first, though. The three-by-three block of white squares to the north is a good place to sell, and to the west of that, there is a group of thugs chasing a girl. Attack them and she will tell you to visit her father's mansion north of town. Do so, but start out early in the morning.
Skills to build up quickly include haggling (just one player--trade valuable gems to him so that he can sell them!), search (to find more valuable gems) and karma (because if you're like me, you always seem to try for one fight too many...) Two should know cure disease/poison in case one is killed.
MARKETPLACE
Within the inner wall is the marketplace. There are many good places to visit. In the northeast corner, they will increase an item's magic charge for 50 gold if you can wait a day. You must have gold pieces (exchange money in the center, where the location has a TYPO "many shops") as otherwise your cash will not be accepted. The armory is also south of the market, and training (the only place to cash out your experience) is to the east. The park (green area) has an old man that tells a different story each day. Search for him where the road goes through the park.
NORTH OF TOWN
On the road, never attack approaching merchants. It won't go over too well with the townfolk. Off the road, there are a lot of wild animals. Just remember in the northwest, there is a potion shop, and in the northeast, there is a mansion. The father of the girl you can rescue in town is there. Accept the sword--+2 broadsword, and although you'll find better, this is an excellent magic weapon to start with. Beware of the tavern--it gives good advice, but you may be stuck outside of the town at night, which is at best an inconvenience, as monsters are more plentiful at night.
RUINS (GENERAL)
Generally, the farther south you go in the ruins, the tougher combats are. Especially tough are the combats in the far south grassy area-- excellent places to build up a party for the final combat, and that's before you get there. In temples, the word "SHALPA" will allow you to enter and restore karma/rest. Only the inn will restore magic power, though. There are three areas to find in the ruins--the old thieves' guild, Gozaroth's mansion, and the palace.
I consider the ruins to have six sectors: northwest, northeast, west central, east central, southwest, and southeast. When the disk loads, you have changed sectors.
There'll be a lot of fights you'll need to gain experience. Quick combat is most useful, and probably you will want to have several attributes at 250 or close before meeting Tarmon. They are the weapon you use, karma/spell power, and life force (if you can hack all the combat), in approximately that order. Improving strength to 16 so you can wear plate mail is not a bad idea in the meantime. With your money, enchant items that have magic besides "+1," i.e. a storm flail.
DUNGEON STRATEGIES
Mapping is not terribly tough. If there is a spot you cannot seem to map, try to walk on (use the 12345678 movement square) or examine the walls around it.
When looking for items, you should be aware that many chests, when opened, will leave seemingly useless stuff (moth-eaten clothes)--this is just part of the detail the authors try to add to the game.
For dungeons in general I recommend not having any party member following the leader. It's just too cumbersome, and you can flee easily enough in combat. However, changing the leader is often a good idea if your leader is low on power (you need to open stubborn doors somehow!)
Remember that you cannot save the game in dungeons. Be sure to exit immediately when you find an important item, because if you die, you'll have to re-set and re-solve the dungeon.
THIEVES' GUILD
This is in the middle of the poor area of the city, on the east side. There's really not a lot to do here although you can buy some magic stuff and even visit the master thief. He'll tell you where the old thieves' guild is (14 east of the entry to the ruins. It's marked distinctively--looks like the thieves' guild--in case you forget.)
OLD THIEVES' GUILD
LEVEL 1
There is nothing special on the first level apart from the well you need to descend to get to the second. Be sure to bring along 50 feet of rope.
LEVEL 2
On the second level there are important clues and a very important item. In the third cell, there's a clue, and in the fifth, there's an emerald key, which is critical for getting certain places. You also find the location of Gozaroth's Mansion. There's some assorted treasure as well.
GOZAROTH'S MANSION
Gozaroth's is in the west central sector of the ruins, due south of the gate to the city. Be sure to have the emerald key or you won't be able to get very far.
LEVEL 1
One-third of a Golem Staff (useful for beating Golems) is in a pickle barrel.
LEVEL 2
"Don't let maids clean up the school room!" Search the fireplace there for the second part of the golem staff. Also a clue that the master's cloak is covered with acid.
LEVEL 3
Search the chest full of sticks two times to find the third part of the staff--with all three parts in one person's hand you can form the Golem Staff. A cloak you find is a trap as per the clue on level 2. Gozaroth is waiting in the southwest. He tells you the Ward Word is Robin and also tells you about the Ward Pact Demons (susceptible to only one of BASH, CUT and THRUST damage--determined at random) Ward Pact Demons are found on the first level of the castle.
THE PALACE
The palace is in the southeast section of the ruins. Gozaroth gave you a word to use at the palace gates. You'll need to use it in conjunction with the key.
Be sure to bring 150' of rope, or you'll have to backtrack when you get to level 6.
LEVEL 1
Search the room east of entry to find a map.
LEVEL 3
This level contains an invisible maze. You got the map on level 1 and can ready it with both hands to view it, but I'm including it below the paragraph as a spoiler. "+" indicates where it is safe to step and "x" indicates lightning (heavy injury but no bleeding) will strike you there. Zeros are inaccessible squares, and "p" indicates a pillar the computer suggests that you examine. It's imperative that you have one active character and no followers. Otherwise you can't be sure what sort of damage your followers will sustain.
NOTE: The computer will indicate if there are blank squares you can't step on.
Carriage returns below to avoid revealing total "spoiler."
000000000+000000000000000+0000
0+++++0x0+++0x0x00++++++0+++x0
0+0x0+++0+0+++0+00+0000+000+00
0+00000+0+0+000+0++++x0+++++00
0+0x0+++0+0+0+++0x00x00x000++0
0+0+++0+0+0+0+00000000000000+0
0x0+0x0+++0++++++++++++++++0+0
0000x00+00000000x+x0+x0000+0+0
0++++0x++0+++0x000000000x0+0+0
0+00+000+++0+++++++++++0+++0+0
0+x0+0x000000000+000+0+0x0+0+0
0+00+++++++++++++0x0+0+000+0x0
0+000+0000000000x0+++0+++++000
0+0x++++++++++0000++0000x0+0x0
0+00+00+00+00+0x+++0000000+0+0
0+x0+x0+x0+0x+00x000000000+++0
0000000000+0000000000000000000
LEVEL 4
There are magic doors here. The pillar on level 3 was a basic code for how to get certain doors to open. The code is below:
Open Close
N ...C ....
E O... C.OC
S CO.. OO.O
W OCO. ..O.
H OOCO ....
F CC.C ....
What does this mean? These are the combinations for being able to open/close a door. It says whether, respectively, the status of the North, East, South, and West doors required to open said door. For instance, to open the West door, the North and South doors must be opened, and the East door must be closed, and the West door's status doesn't matter. However, to close the West door, the South door must be open.
H and F stand for hidden and far doors. The hidden door is two west of the south door. The far door is south of it. Between the H and F doors is vital information.
Technically, you can just open the west door, walk through the oppressive hallway (damaging your morale hugely), and get to Tarmon. However, you'll still need to know a WORD (see below) to get the crown itself.
Opening the west door is hard enough. A walkthrough is below, with extra carriage returns to prevent spoilers. If you get stuck, there is always a way out. Look for where you are in the walkthrough, or try to get there.
Action  |Status (NSEW)
--------+------------
Open N  |OCCC
Open E  |OOCC
Close N |COCC
Open S  |COOC
Close E |CCOC
Open N  |OCOC
Open W  |OCOO
Open E  |OOOO
Close S |OOCO
Open H  |OOCO
Close N |COCO
Open S  |COOO
Close W |COOC
Close E |CCOC
Open F  |CCOC
LEVEL 5
There's a tough fight here, but other than that, you just go from the southeast to the northwest and down to level 6. The rubble is irrelevant.
LEVEL 6
Tarmon taunts you again...but now that you are in the Garden of Life, why not drink from the stream (examine it)? It'll heal you for the upcoming battle. Stand inside the contraption on the north wall and examine to the north. If you've got 150 feet of rope the north wall will open up and you'll meet Tarmon.
Unless you've byte-edited the disk, Tarmon will prove a tough proposition. You can't touch him with magic weapons or yours will disintegrate, so have someone attack him with a sharp weapon. The other demons are tough but not impossible. Once you get past them, refresh your characters again by drinking from the stream.
Examine the square a couple squares west of the table. There's a keyhole, where the emerald key fits. Ready your emerald key and hit O to open. You will be asked your name--tell them what you learned on the fourth floor (it's in WORD SPOILERS below too) or you'll be killed. Once you get the Wizard's Crown, back-tracking is not hard. Beware, however, that on the first floor you will be attacked by demons that break from statues in the palace's entry room.
WHAT NEXT?
Lots of fights. Ready the Wizard's Crown, of course, Be sure your characters are plenty good and stop off at a temple and pray, etc. if you have to. Go north as quickly as possible because you will probably get a fight every other move at least. Also, be sure that it is morning when you start out (or use time in a temple) because you do NOT want to be caught by a bunch of monsters at dark.
Once you get in the city with the crown, there's a two-page blurb acknowledging your achievements and a side note saying you may be able to import your characters into a planned sequel--that sequel happens to be called "Eternal Dagger." In the meantime, you can loot the ruins if you feel like it.
WORD SPOILERS
(white space below)
- The word "SHALPA" gets you in temples in the ruins.
- The word "Robin" combined with the Emerald Key lets you in the enclosure that leads to the castle.
- The word "Dorval" is required to take the Wizard's Crown.
CHEATING
The bluntest form of cheating is to run through the Palace, fight everyone, reboot, and run through it again when there are no monsters there. You sustain a lot less damage that way.
I haven't fully sharpened up the cheating on the Apple. However, critical character data is below for each slot (A-H):
Offset   |Attributes
---------+---------------------------------------------------------------
0014-0019|Strength, Dexterity, Intelligence, Max/Current Life, Experience
001f-0020|Current Power/Maximum Power
002c-002d|Maximum Karma/Current Karma
0033-0048|Various character skills
004a-0050|Various character skills
A: F620
B: F6C0 (note: To edit anything after F6FF, start at F500 and not F700.
In other words, subtract 200 from F6C0+offset)
C: F560
D: F400
E: F4A0
F: F340
G: F3E0 (note: To edit anything after F3FF start at F200 and not F400.)
H: F280Examples: Say you wanted to set character E's attributes all to 250.
Pull out a hexadecimal calculator and...
F4A0+14=F4B4
F4A0+19=F4B9
So bytes F4B4 to F4B9 in your hexadecimal editor should become FA (250 in hexadecimal)...
Repeat for the other offsets in the table.
However, say you wanted to set character G's skills to 199. 199 in hex is C7. But since the Apple reads "tracks" of 256 bytes backwards, F200 and not F400 is immediately after F3FF, so 200 hex must be subtracted.
So...
F3E0+33=F413-200=F213
F3E0+48=F428-200=F228
So you would change bytes F213 to F228 to C7. Also you could change F22A to F230 to C7 and that would take care of all your abilities. To change your max/current power you would have to modify bytes F200 and F3FF. This is one of those "border cases."
NOTE: editing this way may destroy your characters' abilities to pray (i.e. they can't). I think I tripped something I should not have and can't figure what. So be warned--byte editing can backfire. But also note that I won the game fairly easily with these changes, almost never sustaining life-draining damage from monsters. But if you want to be prudent, check praying ability after each byte you change. I'm a bit too busy to do it, but if you can, please mail me!
Versions
- 1.0.1 5/8/2000 Oops! Forgot the text version of the invisible map to level 3. Added brief dungeon strategies.
- 1.0.0 4/23/2000 Initial version completed, with cheating techniques.
Credits
druadic@cs.com for the maps which made my walk-through MUCH easier (strangely, he didn't have the level 3 map--but it exposed secret doors quickly for the other levels.) Kahei at Kahei.com for a marvelous hex editor that allowed me to concentrate on the puzzles.


