Phasmid Preservation Techniques (part 2)


This will help us position the insect without it moving all over the place. Next I use some more pins to hold the insect in a straight line, so when you move a leg it doesn't pivot on the main pin.
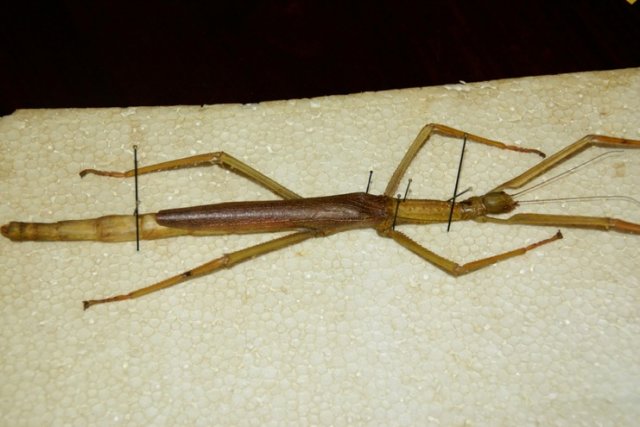

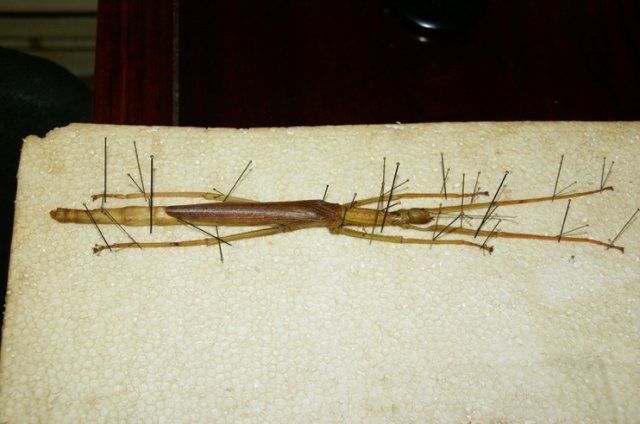
Next, position the legs so that the insects is as close to symmetrical as possible. Don't put the legs too close to the body, but not so far apart the insect takes up loads of room. On the right rear leg I've laid the pins almost flat so they won't catch on the wing.

Now let's get that wing out! I use the setting pins for this. Carefully slide the pin along the hind-wing until you can easily lift up the elytron (fore-wing).
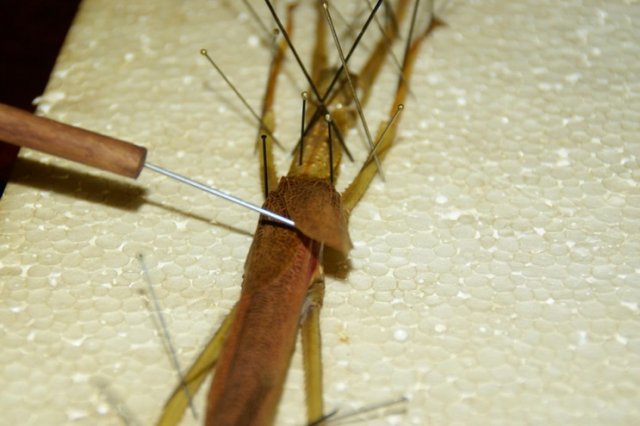

Hold it out with the setting pin. Next, carefully slide the pin up the abdomen so that you can lift out the hind-wing. Hold it out with the other setting pin so it doesn't sit back down. Both wings should now be out.
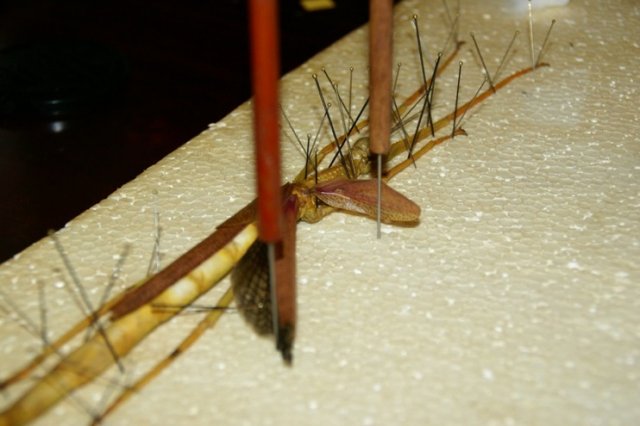

Using a pin, manipulate the elytron until it's in a decent position, usually at 90 degrees to the body. For the hind-wing, cut a strip of paper and stick a pin through each end. Carefully move the hind-wing until it's at 90 degrees to the body and hold it down with the paper / pin arrangement.


You're done! All you need to do now is put a label near it and wait for it to dry. Then move it to a cabinet or diplay case and give it a proper written label. An example would be;
Diesbachia tamyris (Westwood, 1859)
Captive bred
Det. M.L.T. Bushell
Or..
Mnesilochus rusticus (Brunner, 1907)
Coll. Silau Silau Trail, Mt Kinabalu NP, Sabah
25 - viii – 2001
Det. M.L.T. Bushell
This label should be placed on the pin underneath the body. The Det. simply means "determined by", so you know who to blame if it's wrong.
I hope this has been useful to people!
Alternative ways to preserve insects:
With some insects, preservation by this technique is impractical, such as they're really thin. In this case it's best to dry them out as fast as possible. One way is in the airing cupboard, or left in the sun. The problem with the "sun" technique is that it can bleach the insects, so cover them with a sheet of newspaper. Another way is to pickle them in a jar of pure alcohol, but this can take up lots of space when you get lots of them.
The other way I use is with Formaldehyde. This can be really, really, really dangerous, so you have to be EXTREMELY CAREFUL. Formaldehyde is extremely toxic and flammable, so be ridiculously careful, especially when using a syringe full of the stuff. I usually only use this with thin ones when there's not any other way of drying them out fast enough, or for certain members of Pseudophasmatidae. When you eviscerate them, you tend to pull out the spray glands, which gets everywhere and is extremely unpleasant, especially if it gets on your hands.
You'll need (for the way I do it);
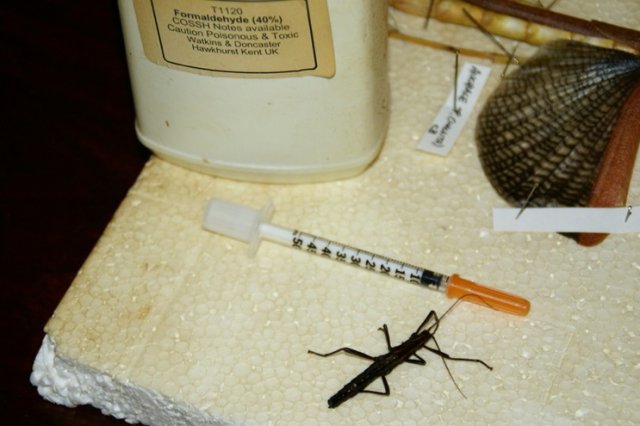

A: Formaldehyde - You can buy it from specialist shops;
B: A syringe - I use diabetic syringes, but you can get nice glass ones (formaldehyde tends to rot the rubber bungs on the plungers);
C: An insect - in this case a male of Anisomorpha paromalus.


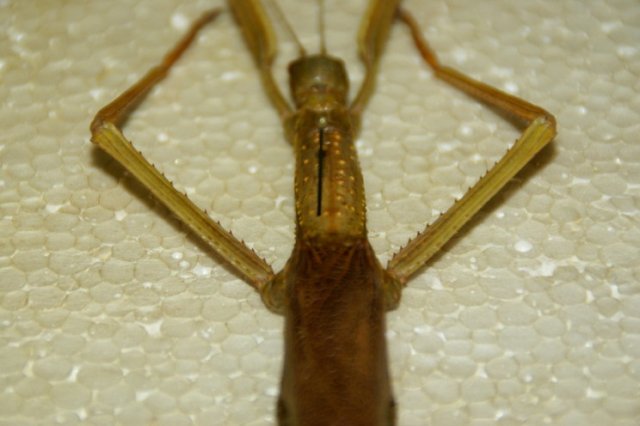
Carefully fill the syringe with formaldehyde and stick the needle between the mesothorax and the 1st abdominal segment. Gently squeeze the plunger and disperse the fluid into the insect. Don't do it too hard or the insect might go "bang", or fly off the end of the needle. This is not fun. You can generally tell when the formaldehyde is throughout the insect when it drips from the mouth and from the tip of the abdomen. If you overfill the poor bugger, suck some out with the syringe.
Once this is done, just pin it out as before and leave to dry. Jobs a good'un.
Now What?:
Now you've got some preserved phasmids, what do you do with them?? Some people put them into deep picture frames to hang on walls, Some into wooden specimen boxes, and some into specimen drawers. I put most of mine into drawers, mainly because I have a very large number of set specimens.
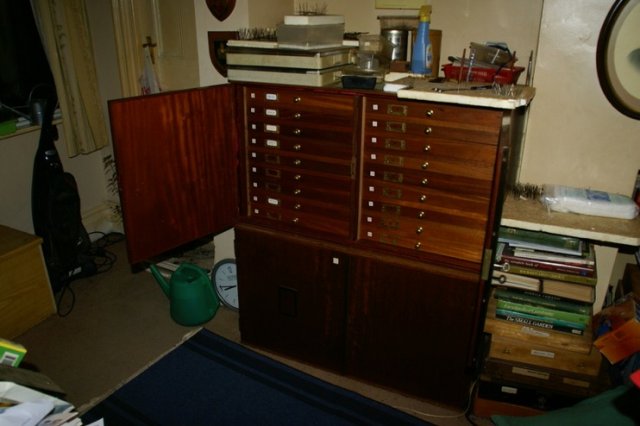

These are my 2 cabinets. On the top left you can see some old plastic drawers I used to use (lids were a bit loose), and to the right on the floor there are some old wooden boxes for spare specimens I don't have room for in the cabinets.
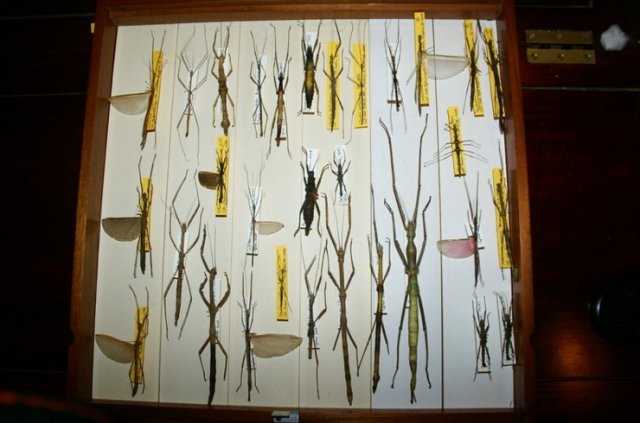

This is a typical drawer, albeit slightly muddled! I normally try to group families / genii together, but was moving things around. I also use yellow card for the labels on wild-caught insects so I can find them easier.
One thing to remember about your preserved phasmids is to make sure they are kept dry. Silica gel or sodium hydronbenzoate in sachets in the box suck up the moisture, otherwise your hard work turns to mould! Also, you should think about putting napthalene in the container with them (in a packet or otherwise) in order to prevent museum beetles etc. eating your specimens. A tight fitting lid also helps with that, but the little sods seem to get in anyway.