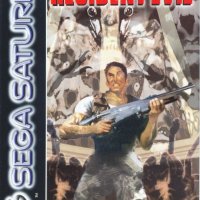
Resident Evil (Sega Saturn)


RESIDENT EVIL (Sega version, first of the series)
============
Version 1.0 (all other versions were done on paper...silly me) :)
(c) 2001
Todd Wilsher (todd-n-steph@cogeco.ca)/Chris Routheaux (CHRISR@o-tay.com)
Contents
- Section 1: Introduction
- Section II: Basic Tips
- i) Controls
- ii) Choosing to Be Jill or Chris
- iii) Weapon Use
- a) Using the Knife
- b) Using the Firearms
- iv) Blending Herbs
- Section III: The Walkthrough
- i) Maps and Room Descriptions
- ii) Suggested Method of Attack
- Section IV: Cheats
SECTION ONE: INTRODUCTION
This game was released quite a while ago. Resident Evil is a well-designed game (for the 'shoot everything in sight' genre), in that it went a step further than the basic Doom and Wolfenstein games that came out in the ancient days (before the Pentium chip and modern video game systems, like Playstation ^o^). The main drawback to the original shooting games was SAVING - the few games that you could save had poorly-chosen spots in which to save your progress, if you could save your progress at ALL. Given that Resident Evil was released for the Sega Saturn, its graphics are fairly good quality (for the era), and the storyline of the game itself is cohesive (although some of the dialogue was awful..."Maybe it would be better if you [Jill], the master of unlocking, had these [lockpicks].").
As a member of an elite fighting force, your mission is to enter the mansion, and discover what has happened to the missing "BRAVO" team (another elite fighting force, similar to your own). The first third of the storyline, as you explore the mansion, gives you very few clues. Later in the game, as you progress to other sections of the area (the courtyard, and the guard house), the clues start coming quickly, revealing the "truth" of your mission: why you were chosen, and what evil lurks in the nearby mansion you flee to...
SECTION TWO: BASIC TIPS
i) Controls
The controls of the Sega Saturn are fairly easy to use. I prefer to use the 'default' settings, and will be referring to this set-up when explaining how the actual controls work.
The main buttons used for Resident Evil are the 'B' and 'START' buttons, as well as the 'R' button. Use START to access the item menu - this lets you use an item, or equip a weapon. Until you gain access to a storage room, you'll find yourself with little inventory room - you can only hold up to eight items (if you're Jill), or six items (if you're Chris :P ) at any given time (not counting the maps of the various areas).
Once in the item menu, pressing B allows you to select a highlighted item for use, or equipping a weapon. To cancel the use of an item, use the A button (this can have the undesirable effect of taking you out of the item screen altogether, so if you're using the menu to switch weapons in a fight, take your time when you're in the item menu...the various monsters seem to have absolutely no problem with waiting patiently while you reload :P ).
Unlike some games (such as RPG games), merely 'looking' at an area where you plan to use an item (again, using the B button) does not cause the item to be used automatically. Get familiar with using the item menu, as switching weapons in mid-fight or using a healing herb might require quick reflexes...
The B button allows you to open doors, as well. Turn to face a door and press B to walk through. (The graphic for this is slow, and after a while, very annoying, as opposed to suspenseful.)
Also, if you possess more than one kind of the same item, these items can be combined to keep your item menu from being weighed down quickly. For example, if you find a clip with bullets for your handgun, and you already have another clip, both clips will combine automatically. However, if you place something in storage, then find the same item later, you can combine the items to save storage and item menu space. The means of doing so are described under 'Blending Herbs'.
ii) Using Jill or Chris
Each of the main characters has strengths and weaknesses. The woman, Jill Valentine (hmm...ok, maybe the names could have used some work, too), has more finesse than the man, Chris Redfield. She can use the lockpicks (which Chris cannot...this can slow the first section of the game considerably), and seems to shoot straighter without having to aim carefully. On the other hand, Chris seems to take less damage from getting hit. In other words, like many of the earlier games in which you could be a 'boy' or 'girl', Chris has more strength, while Jill has more speed. Base your choice of character on what you prefer. (I prefer Jill over Chris...I like speed and finesse over strength for any game that I play ^o^)
iii) Weapon Use
All weapons are used with the same commands; hold down R to 'lean back and aim', then press B to slash or fire.
a) Using the Knife
The knife has a lot of drawbacks, but if you spend your ammunition quickly, it's nice to have some kind of fallback weapon. The knife only works well in close quarters, and if you get used to close fighting, it can save bullets early on in the game. However, it is a nearly useless weapon during the last half of the game. Once you finish clearing out the guardhouse (or earlier, if you don't use up ammo quickly), just leave this weapon in a storage room. It takes up space in your item menu that can be put to better use (unless you're Chris, who starts with *only* the knife...no gun at all, until after the first fight, when you find Jill's handgun... :P :P :P ).
Knives can be aimed high, low or straight. In addition to holding down the R button, press up to stab high, or down to stab low, on the directional pad, BEFORE you stab by pressing B.
b) Using the Firearms
Most of the weapons in the game are (surprise!) firearms. Your initial gun (if you choose Jill) is a simple handgun - nothing fancy, but you can avoid the risk of being hit by firing from a distance. As the game progresses, better firearms, such as the shotgun, bazooka, and the Magnum gun, will be made available to you.
Each kind of firearm uses different ammunition...regular bullets for the handgun, shotgun shells for the shotgun, and rounds for the bazooka. This can weigh down your item menu quickly, so it is best to choose one kind of firearm and stick with that. (It is usually best to go with firearms where you need them for their special qualities. Notes are made in the walkthrough, giving tips on what weapon is best to use in certain situations.) Firearms can be aimed, just as you can aim your stab with the knife.
The shotgun has several good qualities, the main one being that if you let a zombie get close, and fire at point blank while aiming high, you can take its head off with only one shot. (This little tip saves you on a lot of ammo...so use it!)
The bazooka comes with various different kinds of ammunition. The basic ammo is explosive rounds (akin to shrapnel, I suppose). Next is the acid rounds, then flame rounds. You can only have one kind of ammunition in the bazooka at a time. Once you've loaded up the bazooka, ALL the ammunition must be used up before you can reload with a new form of rounds...so choose what you want to load up the bazooka with wisely.
The Magnum gun functions similarly to the basic handgun, only it packs a much heavier hit. Use it as you would use the basic handgun.
iv) Blending Herbs
There are several different items which you can use to heal yourself, whenever you get hurt (and if you shoot at everything that moves, you'll run out of ammo quickly, so you *will* get hurt, sooner or later...). Your health is shown only in the item menu screen, and begins with the listing of 'Fine', in green. This can lower to yellow (some danger, unless it still says 'Fine'), orange (where 'Fine' is usually replaced with 'Caution'...that's a good time at which to heal), and finally to red (where 'Caution' turns to the term 'Critical'....at that point you should definitely heal).
You begin the game with a 'First Aid Spray'. This item can restore you to full health, so it should only be used for emergencies (I keep them in storage, mostly, unless I've reached one of the nastier sections of the game).
Next, you'll discover the green herbs (which, by themselves, do some healing, but not much). Later in the game, you'll discover red herbs (which augment the strength of other herbs), and the blue herb (used to cure poison). Using a red and blue herb together is redundant - don't bother blending the two, it's a waste of a good red herb. :P
To blend herbs, have both herbs you wish to blend in your item menu. Highlight one of the herbs, using the directional pad to move the cursor. Press B, then choose the 'combine' option. Next, move the cursor over the second herb, then press B again. This mixes the herbs together. While many combinations are possible, the most worthwhile combinations are two green herbs, or a green herb and a red herb (for greater potency). Two green herbs provide better healing than a single green herb, but the result is usually not too strong. Three green herbs can be blended together, the result being as strong as a red and a green and red herb. However, this should really only be done as a last resort. A green and a red herb, blended, give you a much more powerful healing item, almost (but not quite) on a par with the First Aid Spray. Blending herbs gives you more room for new items, and gives you more healing for when you need it.
-> You can also use this 'combine' trick with other items, as previously mentioned, for more space in your item menu. It's not required once you gain access to a storage room, but it's a good precaution, nonetheless. The only items you should think about before blending are the bazooka rounds, given the difficulty in switching different types of rounds for that particular weapon. Maybe that's why, out of the goodness of their hearts, the game designers give you a few monsters that you NEED the bazooka for before you get access to all of the different kinds of rounds usable for the bazooka :P :P :P
SECTION III: THE WALKTHROUGH
i) Maps and Room Descriptions
The plot of this video game might never win an Oscar, but it can really be annoying to know the entire storyline of a game before you get to play it all the way through :P .
Therefore, I've provided maps for the various areas in this walkthrough, as well as a brief description of what to expect in each room. After that is listed the recommended way to go through the game. Various points of interest will also be listed for each room, where applicable.
If you get really stuck finding or acquiring an item, each item is listed at the end of each room description. This only tells you what room you can gain the item in...not where the item is in the room, nor what other items you might require to gain said item.
And with that in mind, on to the walkthrough...
MANSION, MAIN FLOOR (also called 1F)
                                                  +------+
                                                  |      |
                                             +----+  31  |              N
                                             |    o      |              |
                                             |  +-+      |            W-+-E
                                             |  | +------+              |
                                             |  |                       S
                                             |  |     +----+
+-------------+-------+                      |30|     |  |||          +------+
|             o       |                      |  |     | 27 |          |    21|
|    11       |   13  +-----+                |  +-+---+ +-o+----------+---+  |
|         +--o+             |                |  o | 29| |  |          |22 |  |
|    +----|   | +---+-+---+ |                +--+ |   | |28|  +-----+ |   |  |
|    | 10 | 12| | 5 | |   | |                   | +-o-+o+--+  |     | +o--+  |
|    |    |   | |   | | 6 o |                   |    25    o  o  23 |     o  |
|    +-o--+---| +-o-| |   +-+                   +-o--------+--+-+-o-+-+20 +--+
|         |   |14   | |     |                   |    26         |     |   |
|         |   | +---+o+-----+                   +------------+  |     +-o-+
|    9    | 4 | | 7         |                   |////////////|  |  24 |   |
|     +---+   o |  +--------+                   |////////////|  |     |   |
|     |||||   | |  ||||   8 |                   +------------+  |     |   |
+---+---+-+   | |  +--+-+   |                   |               |     |   |
    |   |     | |     |E|   +-------------------+---------------+-----+   |
    | 3 +-----+o+---o-+-+   |      |=====|      |               o     |   |
    |                 o     +-- -- |=====| -- --+  17 +---------+     |   |
    +------o----------+-----+      |=====|      o     ||||||||||| 18  |   |
    |                       |      |=====|      |     +---------+     |   |
    |         2             o                   +-----+         +-o---+   |
    |                       |         1         |     |------   |     |   |
    +-----------------------+                   o  15           | 19  |   |
                            |                   |     |---------+-----+   |
                            |                   |     o       16          |
                            +-------ENTER-------+-----+-------------------+


Walls are marked using a single |, or by using the - or + signs.
Stairs are marked as ||| heading east-west, or === going north-south.
Doors are marked with the 'o' sign.
Unused sections of the map are blotted out using slashes: ////.
A number for an area refers to the entire section, unless the area is very large,
has a variety of close encounters, or contains a lot of different items.
Elevators are marked with an 'E' on this map.

ROOMS

1. Main entrance - This is where the game starts.  There is a typewriter by the
   left-hand side of the bottom of the staircase, where you can save your game
   if you find an INK RIBBON.  Other typewriters are spread out in various
   areas (usually storage areas).

   Those who play Jill:  you will reach a point in the game where you have to
run around, looking for a lost friend.  If you get stuck, try running under the
semi-enclosed hallway that is built under the stairs, in the northern section of
the room.

   Viewing Tip:  When you get the chance, try leaving through the double
                 doors... ^O^  Jill also meets Barry here later.

   Items: INK RIBBON, JILL'S HANDGUN (the Baretta) [if playing Chris]

2. Dining room - Important to the beginning storyline, there are monsters to
   worry about fighting in here.  You will find several items of use in this
   area, likely coming back various times throughout the game.

   Viewing Tip:  None :( For an important area, this room could have used more
                 things to look at.

   Items: EMBLEM, (brown) MANSION KEY (aka SHIELD KEY), BLUE JEWEL

3. Corridor/Waiting area - You have your first fight here, to get you familiar
   with using your weapon.  (Make sure you have something equipped for fighting
   before you enter here!)

   Enemies:  Zombie (1)

   Items:  CLIP(x2)

4. Animal Keeper's Bedroom - One of the first main revelations to the storyline
   behind the mysterious goings-on in the mansion lies in this room.

   Enemies: Zombie (1)

   Items: CLIP, BOX OF SHELLS, KEEPER'S DIARY

5. Tiger Statue Room - This room is very small, but it holds a few important
   items.

   Viewing Tip:  The close-up of the statue when you get the item in this room
                 is good.

   Items:  WIND CREST, COLT MAGNUM GUN

6. Greenhouse - This room holds a large number of items.  Once you manage to
   trigger the special effect in the room, make sure you get everything!

   Viewing Tip:  A close-up when you manage to figure out how to kill the
                 plant.  It's ok, but could have been more graphic :)

   Enemies: Plant (don't try killing this monster with weapons - it won't work)

   Items: (grey) MANSION KEY (aka ARMOR KEY), RED HERB(x2), GREEN HERB(x4)

7. Bar Lounge - This room is a bit tricky.  Explore everything - it's well
   worth it for the items you'll find.

   NB.  This room is LOCKED.

   Viewing Tip: A piano scene with Jill (or Rebecca, if you are Chris).  Very
                nice!

   Items: MUSIC NOTES, GOLD CREST

8. Stairwell - This is just a method of egress.  (Egress?  Dictionary,
   please... :P )

   NB. The door to this room is LOCKED.  You have to enter here and unlock the
       door from this side to reach Room #3 (which might take a while).

9. Foyer - The area itself is not very important, but it leads you to a place
   which is INVALUABLE later in the game (namely, room 10 ^o^).

   Enemies:  Zombies (2)

10. Storage Room - One of the few places where you can store extra items!  Use
    it often, as there is also a typewriter here to save your progress, in
    addition to dropping off 'extra' items.  Chris first meets Rebecca here.

    Viewing Tip:  If playing Chris, the scene with Rebecca is good :)

    Items:  CLIP(x2) [if not already taken from room 29], (amber) MANSION KEY
            [if playing Chris] (aka SWORD KEY), INK RIBBON [if playing Jill]

11. Corridor - The corridor is exactly that - nothing more.

    Enemies:  Zombie (1)

12. Office - There are no clues to the actual storyline in here, but you will
    find several items that will be quite helpful.

    NB.  This room is LOCKED.

    Items: BOX OF SHELLS, CLIP, BROKEN SHOTGUN

13. Hall - One of many.

    Enemies:  Zombie (1)


14. Hall - See above.

    NB.  The door from Room #3 to here is LOCKED.  You have to enter here and
         open the door to Room #3 to unlock it.

    Enemies:  Zombie (1)

15. Statue Room - Several valuable items are kept in here.  Only one item is
    guarded, but given its value, you may wish to confront the zombie
    anyways...

    Enemies:  Zombie (1)

    Items: MAP OF MANSION MAIN FLOOR, INK RIBBON

16. Hall - This hall has a bit of action awaiting you.  Since clearing this
    area makes it easier to run through the mansion, your best bet is to kill
    the dogs.  (The official name for these critters is 'Cerberus'; but 'dog'
    works just as well.)

    NB. This door (from #15) is LOCKED.

    Enemies:  Dog (2)

    Items:  CLIP

17. Dressing Room - This dressing room contains several items of value.  The
    one enemy you face is easy to dispatch.

    NB. This door is LOCKED.

    Enemies:  Zombie (1)

    Items:  CLIP, BOX OF SHELLS

18. Bedroom - The one enemy in this room is best avoided; they will waste ammo
    or hurt you, if you let them.  There are several good items in here, but
    first you need to open Room #17.

    Enemies: Zombie (1)

    Items:  INK RIBBON, GREEN HERB (x2)

19. Secret Closet - You can't enter here unless you've already beaten the game
    once, so if this is your first time through, just ignore it.

    Items:  For Chris:

            ***LAME!***  You can change your outfit.  You can wear the 'Harley
            Davidson' Outfit, or the S.T.A.R.S. Outfit.  You can also change
            back into your original outfit, but if you wasted time coming here,
            you might as well play 'Dress-Up'.

            For Jill:

            Worse than Chris.  One outfit is camouflage pants and a skimpy top;
            the other costume is jeans with an even smaller top.  How...sexist.

20. Hall - This twisty area is unguarded (until much MUCH later in the game),
    but gives access to other key areas.

    Viewing Tip:  Jill has a scene in here if she tries to take the Shotgun in
                  Room #24 without solving the trick involved.  The scene starts
                  In Room #23, but ends here, so I've listed it here.

    Items:  GREEN HERB

21. Outside Garden/Catwalk - There are a few tough enemies here, but what you
    gain is worth more than the risk.

    NB. This door is LOCKED.

    Enemies:  Dog (2)

    Items:  GREEN HERB (x6)

22. Bathroom - This room is empty, unless you come here as Chris.

    Items: SMALL KEY

23. Trap Room - This room is a trap which does not trigger unless you take the
    shotgun in Room #24, and is otherwise empty.  Since you want the shotgun,
    however (you *really* want the shotgun), you'll have to overcome this
    little trap...

24. Meeting Room - This room holds one of the key weapons to the game, namely,
    the shotgun.  LOVE the shotgun!  HUG the shotgun!  It will be your
    *friend*...  You just have to overcome a few tricks first...

    Items:  SHOTGUN

25. L-Room - This irregular room is home to several zombies.  There is nothing
    to get in this room, but again, it's an important way on, so you may wish
    to clear the way.

    Enemies:  Zombie (2)

26. Painting Room - Several paintings adorn the walls.  Examine them...

    Items:  STAR CREST

27. Stairwell - Another key area to moving through the mansion easily, you may
    wish to kill the zombie that lies in wait here.

    Enemies:  Zombie (1)

    Items:  GREEN HERB

28. Storeroom - A place of safety.  Enjoy!

    Items:  CLIP (x2) [if not taken from room #10 first], CHEMICALS


29. Office - Unlike several later areas, this dark room cannot be searched
    until you turn on the lights.

    Items:  DOOM BOOK I, WOLF MEDAL, MAGNUM ROUNDS


30. Passageway - A dog lies in wait, protecting the main passage leading out of
    the mansion, and into the Courtyard.

    Enemies:  Dog (1)

31. Shed - This shed leads out into the courtyard.

    NB. This door is locked in an unusual way.  If you really need help, refer
        to the CHEATS section.

    Viewing Tip:  When coming back here from the Guardhouse, you see a scene
                  that introduces the 'Hunter'.  One comes running to rip you
                  to shreds!  Take the time that is eaten up by the scene to
                  hold down R2.  You WILL have to kill this hunter (like every
                  other hunter you meet) FAST.

    Items:  CRANK (square tip)


    MANSION, SECOND FLOOR (also called 2F)

                                                  +---------+
                                                  ||||||||  |
                                                  +------+==|
                                                         |==|
                                                         |==|
   +---------+    +-----+                                |==|
   |   36    |    |  44 |                                |==|
   +----+o+  |    |     |                      +-----+---+  +----------------+
   |    | |  +-+--+--o--+--+--+                |     o      55               |
   | 35 | |  |    |        |  |                | 54  |   +---+---o---+---+   |
   |    o |  | +--+  42    o  |                |     |   |   o       o   |   |
   |    | |  | 43 |        |41|                |     |   |57 | 56    |58 |   |
+--+----+ |  |    o     +--+  |                +-o---+-o-+---+-------+---+-o-+
|         |  |    |     |     |                | 53          |       |       |
|  ------ |  |    |     |     |                +----------+  |       |       |
|  |||||| |  +----+-----+--+  |                |          |  |       o       |
|  -------+       o     |40|  |                |    52    |  |  60   |       |
|    34   |  37   + 38  +--+  +----------------+          o  |       | 59    |
+------+  +----+  +---+       |   |||    |||   |          |  |       |       |
       |       |  |39 o       |   +-+====+-+   +----------+  |       +-------+
       +-----o-+--+---+-------+   |/|====|/|   o      47     +----+--+       |
       |  +----------------+  |   +-+----+-+   +--+----+o+---+    o  |       |
       |  |       33       |  o       32       |  o  46| |///| 50 |  |       |
       |  +----------------+  |                |45|    | |///|    |  |       |
       +----------------------+  +----------+  +  +--+ + +--++----+  |  51   |
                              |  |          |  |  |  | |    |/////|  |       |
                              |  |          |  o  |  | | ++ +///+-+  +       |
                              |  |          |  |  |  | | ++ +---+    +-+     |
                              |  |          |  |  |  | |   48   o 49 ||o     |
                              +--+          +--+--+  +-+--------+----+-+-----+

32. Main Room, Upstairs - This area is mainly another form of egress (that word
    again...*sigh*).

    Viewing Tip:  Jill runs into Barry up here, if not later in Room #1.  He
                  gives her a useful item.

    Items:  ACID ROUNDS [if playing Jill]

33. Balcony - This area lies directly above the dining room.  There are a few
    enemies here, but you only really need to defeat one of them to travel
    through the area safely.

    Enemies:  Zombie (2)

34. Stairwell - These stairs lead down to area 9.  There are a good number of
    enemies to defeat here; try to use the design of the stairwell to your
    advantage.

    Enemies:  Zombie (2, 3 if playing Chris)

35. Office - Several helpful items are in here, but the door is locked.  It may
    be some time before you can enter, and not everything is as it seems, once
    inside.

    NB. This door is LOCKED.

    Items:  MAGNUM ROUNDS, BOX OF SHELLS, ORDERS, RED JEWEL

36. Hallway - A zombie is feasting gruesomely on one of its fellow undead here.
    There are no items to be gained, so you may wish to avoid these enemies.

    NB. This room is LOCKED [from the south; only Jill can enter here from 34].
        The way to get through this door is listed in the CHEATS section.

    Enemies:  Zombie (2)

37. Foyer - There are several helpful items in here, good enough to kill off
    the enemy that lurks here.

    Enemies:  Zombie (1)

    Items:  BLUE HERB, GREEN HERB (x2)

38. Corridor - An enemy lurks here to impede your progress.

    Enemies:  Zombie (1)

39. Small office - There are several items worth ducking in here for.

    Items:  BATTERY, EXPLOSIVE ROUNDS (x2) [if playing Jill]

40. Elevator - This elevator goes down to B1 (the basement) of the mansion,
    bypassing Room #8 on the Main Floor.


41. Hallway - Several enemies await you here.  You could run around them just
    to get to the next areas, but clearing them out might be easier.

    Enemies:  Zombie (2)

    Items:  GREEN HERB

42. Library - This room holds a few helpful items, and a few enemies. :)

    Enemies:  Zombie (2)

    Items:  SCRAPBOOK, MAGNUM ROUNDS

43. Research Room - There are no enemies here, but there is a trick to finding
    the item within.

    Items:  MO DISK

44. Secret Office - This is a key area to reach.  It points out your eventual
    escape route.

    Viewing Tip:  What you see out the window is the way to escape this awful
                  place. :)

    Items:  INK RIBBON, CLIP

45. Hall - This leads out to the patio.  Look around if you're playing Chris!

    Items:  SMALL KEY (if playing Chris)

46. Patio - Several crows sit silently in this area.  There's a body here!

    Items:  BAZOOKA [if playing Jill], CLIP [if playing Chris]

47. Southern Red Hall - Be careful running through this area, it's well
    guarded.

    Enemies:  Zombie (2)

48. Corridor - This leads to a deadly, but necessary, area.

    NB. This room is LOCKED.

    Viewing Tip:  If you're playing Jill, you go through an interesting scene.

    Items:  CLIP, GREEN HERB (x2), RADIO [if playing Jill]

49. Narrow Hallway - Be ready to fire when you enter; an enemy is waiting for
    you!

    Enemies:  Zombie (1)

50. Astrology Room - There are a number of helpful items kept hidden in here.

    Items:  INK RIBBON [if playing Jill], ACID ROUNDS [if playing Jill], CLIP
            [if playing Chris]

51. Attic - One of the tougher enemies lies in wait for you.  Search the room
    carefully to get the items.

    NB. This door is LOCKED.

    Enemies:  GIANT SNAKE!

    Items:  MOON CREST, BOX OF SHELLS

52. Armoury - The armour that lines the walls is a bit distracting.  To find
    the item hidden in this room, ware the trap.

    Items:  SUN CREST

53. Northern Red Hall - This area is guarded up here, as well.

    Enemies:  Zombie (1)

54. Personal Library - Only one item lies in here, but it is a file.

    NB. The door from Room #53 to here is LOCKED.  You have to enter here and
        leave to Room #53 to unlock the door.

    Items:  BOTANY BOOK

55. Stairwell/Hall - This area is crawling with enemies.  Killing them makes
    travel across the mansion much easier.

    Enemies:  Zombie (2, 3 if playing Chris)

56. Den - Whether there is anything in this room depends on who you are
    playing.

    Enemies:  Zombie (1) [if playing Chris]

57. Bedroom - Several good items are waiting here for you.  Go get 'em!

    Items:  LIGHTER, RED HERB, CLIP [if playing Jill], BOX OF SHELLS [if
            playing Chris]

58. Office - Several more items await you here.

    Items:  RESEARCHER'S WILL, EXPLOSIVE ROUNDS [if playing Jill], BOX OF
            SHELLS [if playing Chris]

59. Mantle Room - An unusual room.  Sometimes it has enemies, sometimes not.
    If it does, chances are you're playing Chris. :P

    Enemies:  ZOMBIE (x2 or 3, when they are here...???)

    Items:  MAP OF SECOND FLOOR, GREEN HERB


60. Piano Room - Not to be confused with Room #7, which also has a piano.  You
    meet an old enemy here.

    Viewing Tip:  The snake gets nice and close before you can move.  While the
                  scene plays, I make sure I'm holding down the button to run,
                  or R2 to fire.  Also, Jill will meet Barry here.

    Enemies:  GIANT SNAKE!
THE COURTYARD (also called 1F)
+-o-+
| |
| |
| | +-----------------+
| | | 63 |
| | +-----+ +-+-------+-+-+---+
| +------------+ | |/| | | |
| 65 | ,-----+ +-------+-+ | | +-+
+------------+ | / ,---+ +-------+-+ POOL | | POOL+-+
| | / /////| |///////| | | | |
| | | |////| |///////| +-------+-+-+---+
| | +-----+--+--+--+-+-+-+/////| 62 |
| | | |//|66|//| | | |/////+-------+ +-+
| +---+ +--+ +--+ |/////////////| |
| o |///////////+-+-o-+---+
+-------+ |///////////| _____ |
| |///////////| |_____| |
+---+ +---+///////////| |
| |///////////////+--+ +--+
| 64 |//////////////////| |//|
| |//////////////////| |//|
| |///////////////+--+ +--+
| |///////////////| |
| +-+-------------+ 61 |
| |W| |
+------------+-+-------------+------+ |
| |
+-----------+ | |
| | E |
o 67 +--------------+ +--+
| _____ |
| |W| / \ |
+-+-+-------+ | 68 | |
| | | |
| \____ |
| |
+--------------+
The entrance to the Courtyard is marked with an 'E'.
The winch-controlled elevating platforms are marked on the map as 'W'.
61. Main Yard - A goodly number of items awaits you...once you've killed off
the enemies waiting to rip your throat out.
Enemies: Dog (2, 3 if playing Chris)
Items: GREEN HERB (x3), RED HERB (x2), BLUE HERB (x2), MAP TO COURTYARD
62. Pool area - The trick is to get past the pool. It's not too hard, but once
you cross over to Room #63, be prepared to run!
Viewing Tip: Watching the water drain out is a well-detailed scene. Now
if only there were more scenes like this for the monsters. :P
Especially the dogs. The dogs never seem to get focused on,
yet they're much tougher than a zombie, given the way they
attack.
63. Small path - Aggh! Snakes! Run! Just...run!
Enemies: Small snakes (infinite number)
64. Lower Courtyard - More enemies wait for you. If you can dodge them, go
ahead, but it's safer to kill them. :P
Enemies: Dog (2, 3 if playing Chris)
65. Walled Passage - This is a long run to the Guardhouse. Since there are a
few good items to grab here (and you just might head back this way later),
I recommend clearing out the enemies.
Enemies: Dog (2, 3 if playing Chris)
Items: GREEN HERB (x2), BLUE HERB (x2), RADIO [if playing Chris]
66. Waterfall - This area can only be passed if the water level is high in the
pool. So grab your thinking cap.
67. Small yard - There is some helpful items here. The door is welded shut, and
cannot be opened.
Items: GREEN HERB (x2), BLUE HERB (x2)
68. Small pool yard - Entering this small pool leads you into the Courtyard
Tunnels. But (you guessed it) there's a trick involved.
Viewing Tip: If you manage to drain the Fountain, the graphic is nice.
Water graphics seemed to be a specialty of the graphics
crew. Still, extra monster graphics would have enhanced
the game that much more (even if they do slow your playing
time).
GUARDHOUSE, MAIN FLOOR (also called 1F)
+------+
| |
| |
+--------+-----+ |
| | +-+--+-------+---+--+
| 72 | |/|76| 77 | L |80|
| | +-+-+ +---o---+ | |
+ | 73 | o 78 | |
+---+------+------+ | | +--+---+-------+ +---+-----+
| |//////| 71 o | | | | |82 | +------------+
| +------+------+o+-----+ | | 81 o | | | |
| 69 o | | | +-o-+ 83 o |
| +----+-----o----+ +-+ | +------+ o | |
| |////| | | | | +---------+ |
+-E-+----+ 70 | X | 74 | o 79 | 84 |
| | | | | o |
+----------+-o-+------+ | | |
| 75 +---------------------------+ |
+--------------+ | |
+------------+
The door where you enter the GUARDHOUSE is marked with an 'E'.
The 'L' indicates the position of a ladder.
69. Main Foyer - This area holds a few goodies. Technically, it has an enemy
(marked with an 'X'), which you can easily avoid...if you figure out how.
You can't kill the enemy here, though.
Items: BLUE HERB (x3)
70. Storeroom - Aha! You can save here (there is a typewriter), and
store/retrieve items. If you're playing Chris, this area is invaluable.
Personally, I think any place you can save in this game is good. :P
Items: FIRST AID SPRAY, EXPLOSIVE ROUNDS [if playing Jill], CLIP [if
playing Chris]
71. Bathroom - This small area holds a very important item!
Items: C. ROOM KEY
72. Bedroom - Watch out for the enemies! The items in here make it worthwhile,
though.
Enemies: Zombie (2)
Items: RED BOOK, BOX OF SHELLS, SMALL KEY [if playing Chris]
73. Recreation room - This area is the upper half of the rec room. There's an
enemy here that will attack you the moment you enter the room, if you let
it get close enough. The pool table gives you a hint to a future puzzle.
Enemies: Giant Tarantula
74. Recreation Room - This area is listed separately because there's a lot to
this room. Yet another enemy lurks nearby, dropping on you a few seconds
after you enter! Be careful! There are also a few good items in this
lower half of the rec room.
Enemies: Giant Tarantula
Items: INK RIBBON, CLIP
75. Hallway - There is not enemies waiting in here for you. At one point in
the game, you'll see a scene here.
Viewing Tip: Once you beat 'Plant 42', this area has an interesting scene.
76. Alcove - No enemies, but a few good items.
Items: GREEN HERB (x3)
77. Bathroom - The enemy in here is worth killing for what you find. Ammo!
And you'll want all you can get, for this game. ^o^
Enemies: Zombie (1)
Items: CLIP
78. Dorm 001 - Several good things are just waiting to be taken from
here...once you kill off those zombies!
NB. The door to this room is LOCKED. (Guess where the key is...) :P
Enemies: Zombie (2)
Items: MAP OF GUARDHOUSE MAIN FLOOR, PLANT 42 REPORT, BOX OF SHELLS
79. Large Room - There's really no hints as to what this room was originally
used for. The main area is safe, but beware the wasps that *will*
eventually fly out from Room #80.
80. Alcove - A nest of wasps is in here, possibly to guard that item...
Enemies: Wasps (infinite number...like the small snakes, just run!)
Items: DORM KEY 001
81. Chemical room - This is an important area for Jill. It's not too helpful
for Chris, though. Here, you get to play 'Zee Mad Zientizt'...muahahahaha!
A friend of Chris', namely Rebecca, would find this place helpful, though.
Items: BOTTLE (x4) [if playing Jill, or using Rebecca if playing Chris]
82. Bathroom - Avoiding the 'Enterprise Bathroom' scandal, where the designers
of the Enterprise only made one bathroom for 430 crew members, the
designers at Resident Evil made many places to make potty. Apparently, a
lot of scientists were in the loo when they went all dead and stuff. :P
There's another enemy in here. Kill him to get more ammo. :)
Enemies: Zombie (1)
Items: FLAME ROUNDS [if playing Jill], CLIP [if playing Chris]
***Side note: Flame rounds in the -bathroom-? What? Did the scientists
eat nothing but chili? It boggles the mind.
83. Dorm 002 - There's an enemy. There's also a little trick to use in here,
but be careful that you didn't miss anything before you come to this dorm.
Enemies: Zombie (1)
Items: V-JOLT REPORT, INK RIBBON
84. Meeting room - There's a big bad nasty in here, waiting to bash your brains
in. You...did...come prepared...didn't you?
Viewing Tip: If Jill comes in here without making V-Jolt, you see a good
scene with Barry.
Enemies: PLANT 42!
Items: MANSION KEY (aka HELMUT KEY, HELMUT=HELMET) :P :P :P
GUARDHOUSE BASEMENT (also called B1)
+---+
| L |
| |
| |
| +---------------------+
| 85 |
+----------+--------------------------------+----------+----------+ |
| | | | |
| 89 o o | |
| | 86 | 90 | |
+--+-------+ | | |
| o +-------------------------------+ | | |
| | | | +----------+ |
| 88 | | 87 | o |
| | +-------------------------------+ +--------------+
| | | | |
+-------+ | | |
| +-------------------------------+ |
| |
| |
| |
| |
+-------------------------------------------+
The ladder is marked on this map with an 'L'.
85. Corridor - Nothing but another dreaded trick awaits you here, just begging
to be solved.
86. Giant water tank room - Ack! (doo-do...doo-do...doo-do...doo-do...doo-
do...doo-do DOO-do doo-do DOO-do doo-do DOO-do doo-do DOO-do...) Ok,
enough of the 'Jaws' music. This area can be safely explored until you get
close to Room #89 if you're Jill. If you're Chris...RUN! (Yes. Run.
Through water high enough to tickle your pectorals.) :P
Viewing Tip: If you're playing Jill, the scene with the sharks first
appearing is pretty cool.
Enemies: Big shark (1)
Little shark (2)
***Side note: I learned this the hard way, although I should have known
better. I'll note it here because it's too important to NOT
know. You CAN'T shoot underwater! You'll see the shark get
hit, and blood, but it takes NO damage. This will waste
ammo, and result in your untimely death. (Thanks for
letting us see the blood, oh designers of Resident Evil...it
makes this room harder to beat. Maybe too hard, for less
persistent players?)
87. Giant water tanks - Displayed on the map that you can access of this area
under the 'MAP' command in the item menu, these tanks are not really
anything. You can't go in them (Wouldn't sniping from these at the sharks
make life grand? Ah well. I can dream.). You can't get any items from
them. Yet they're clearly marked on the map generated for the game, so I
include them. Even if they -are- useless.
88. C. room - I assume the 'C' stands for 'Computer'. If you have the key for
this room, you're in great shape! If not...why are you down here? To see
the sharks? They don't play nice, so make sure you have that key!
NB. This room is LOCKED. (I just like repeating myself.)
89. Ammunition room - Woohoo! Lots of ammo...mostly waterlogged...mostly
useless...oh...darn. Wait! There's still some real good stuff here.
NB. This room is LOCKED. It doesn't need a key. There's a trick to
opening this door, and if you're really having a hard time of it,
check the CHEATS section.
Items: CLIP (x2), BOX OF SHELLS (x2), DORM KEY 002
90. Meeting room - This room has been renovated by Plant 42. Its roots hang
down here, presumably for a little drinkie-poo. You'll want to make a
mental note of the fact that the roots of Plant 42 are down here. It helps
you later...
Items: SMALL KEY [if playing Chris]
Now, after all that, you want to head back to the Mansion. (Eep!)
SPECIAL NOTE: You WANT to know this. EVERY MONSTER that was in the Mansion is
replaced by 'Hunters'. These are very NASTY. Avoid them if you
can. If you have to kill them, do it quick, do it fast, do it
DIRTY.
MANSION BASEMENT (aka B1)
(This map is not out of order. It's not included with the main Mansion
because you won't be able to come here until after the Guardhouse is done. I
know, that's also true of some of the areas in the Mansion, but those maps are
necessary for doing the first part of the game.)
+--------+
| |
| +----+
| |
+---+-------------+----------------+--------------+ +----+
| o |||||||||| | 92 o 91 L|
| +-------+--+--+ +------------+-----------------------+
| +-----+ |94| | |
| 93+-----+ +--+ | |
| | |
+-o---------------+ +-----+
| |
+---------------------------+
The entrance to the Basement is marked with an 'L'.
91. Passageway - Enemies. Stuff. You can try to grab the item without
fighting, but that takes the fun out of it. ^o^
Enemies: Zombie (2)
Items: BOX OF SHELLS
92. Passageway - More enemies. More stuff.
Enemies: Zombie (2)
Items: GREEN HERB (x2)
93. Kitchen - There's a few enemies in here. The one in front of the elevator
is particularly annoying. The stairway leads up to Room #8.
Viewing Tip: When you approach the stairs, a cool scene starts,
displaying...the smartest zombie in the game! Why is
it the smartest? Because it can open doors... :P
Enemies: Zombie (3)
Items: SMALL KEY [if playing Chris]
94. Elevator - This will take you up to Room #41.
COURTYARD TUNNELS
(Again, this is placed in order of how you go through the game. It's for
easier viewing. If you don't like it, try making your own maps. They ain't
easy with ASCII art, I'm telling ya!)
+-----------+
| |
| +---+ | +-----+-----+
| | | | | o 99 | +----+
| | | | | +-+ +-+ +--+ |
| | | | | |/| |/| 100 |
| | | | | |/| +-+ +--+ |
| | | | | |/| | +----+
| | | | | |/+--+ |
| | | | | |////| |
| | |95 | | |////| |
| | | +----+ |////| |
| | | o 96 |////| |
| | +-L-+----+ |////| |
| | | |////| |
+------------+-o-+---+---+ | |////| |
|B 101 | | | |////| |
| +------------------++ ++ | |////| |
+-+ | | | |////| |
| | | +-+--+ |
| | | o 97 |
| | +-----+---+o+
| | | |
+---------------------+ +------+o+------+ | |
|B 106 | | | | |
| +-------+ +-----+ +-+ | 102 | +---+ | | +--+
+-+ | | | | | | |104| | | | |
| | +-+ +-+ | | | | | | | |
+-----+ | |105 +-+------+o+------+-+o+-+ | +---+ |
| o | | o 103 | | 98 |
|107 +-+ | +--+---------------------+ +--------+
| | | |
+-----+ | |
| |
+--+
Boulder placement is notated on the map with a 'B'.
The entrance, a ladder, is marked with an 'L'.
95. Tunnel passage - Just up and around the bend is a typewriter. This is a
good thing. If you can do the first section before you have to save,
great. If not, I hope you've been saving up your Ink Ribbons - especially
if you are Chris, who gets less of them than Jill. You will also see a
strange trap around the corner from the typewriter. You can't be hurt by
it, but it makes getting to that far door oh so annoying.
96. Tunnel corridor - Hmm. If you're Chris, check this area out. You get a
very nice toy. There are no enemies here initially, but a few come out to
play later.
Viewing Tip: Jill has a scene with Barry here. You're asked a few
questions. Answer wisely, and bravely.
Enemies: Hunter (2) [these show up later]
Items: FLAMETHROWER [if playing Chris] muahahahaha!
97. Tunnel passageway - This tunnel connects to several areas. You don't meet
any enemies when you first come here, but they'll show up later. (Isn't
that nice?) The hunter from Room #99 will join the one here pretty
quickly. (What? You say you already killed the Hunter in Room #99? Read
Room #98 below. :P)
Enemies: Hunter (1)
98. Tunnel - This tunnel leads you to Enrico. After seeing Enrico, you'll find
a hunter in the passage leading back out. Oh, and anywhere that you didn't
meet hunters before...they are there now. Also, just for fun, if you've
killed off the Hunter from Room #99...it's back. (Goody.) :P
Viewing Tip: The scene here is not very well thought out. Actually, it's
kinda annoying. Someone gets shot in the head, and keeps
talking anyways. The dialogue after the shooting is
atrocious. (You see someone get shot, and then Chris decides
to yell out: "Is anyone there?" NO! Of course no one's
there! Bullets materialize out of nothing and fire themselves
all the time! AGGH! Brain...hurt...)
Enemies: Hunter (1)
Items: CLIP, CRANK (hexagonal tip)
99. Pit room - There's a small pit in the middle of the room. There's also a
Hunter, and some goodies. The Hunter is worth killing to get to Room #100.
Enemies: Hunter (1)
100. Power Generator - Someone thoughtfully left you a few goodies here.
Items: FIRST AID SPRAY, SHELLS
101. Tunnel - This tunnel seems to lead nowhere, at first. Maybe the boulder
is a clue...
Enemies: Hunter (1)
Items: MAGNUM ROUNDS [if playing Chris], FLAME ROUNDS [if playing Jill]
102. Spider Room - Exactly what it sounds like. This spider can be RATHER
nasty...it's not quite a boss monster, but close enough!
Enemies: GIANT SPIDER!
Items: COMBAT KNIFE
103. Snake Tunnel - If you tarry in here, an infinite number of little snakes
will drop from the ceiling. So don't tarry!
Enemies: Snakes (infinite)
104. Storeroom - Woohoo! Just what you need. And there's some items in here.
Items: INK RIBBON, FIRST AID SPRAY, BLUE HERB
105. Anteroom - This area leads to the Courtyard (the lower part). There's not
much here.
106. Tunnel - Another boulder! Unfortunately, Indiana Jones is nowhere to be
found, so you'll just have to figure this trap out. Hmm. What is that
thing on the wall? Two tricks in one room? How utterly fiendish!
Items: MO DISK, MAP OF UNDERGROUND (TUNNELS)
107. Statue Room - There's a statue in here, and a button. Wonder what they do?
Items: EAGLE MEDAL LABORATORY, LEVEL ONE (also called B1)
+--+---------o-----------+
|//|L |
|//+-+ |
|////| |
|////| |
|////| 108 |
|////| |
|////| |
+----+ |
|||| |
+------------------------+
The door leading out to the helicopter pad is marked with an 'o'.
Stairs leading up to the fountain in Room #68 are marked as '|||'.
The ladder is marked with the letter 'L'.
108. Large Storage Room - Whatever was once stored in here is now gone.
However, the ladder leads down to the lower Laboratories.
Viewing Tip: Jill has a quick scene here with Chris and Barry, near
The end of the game.
LABORATORY, LEVEL TWO (also called B2)
+---------------------+-------+
| | L |
+---o---+ |=====| 109 |
| | |=====| |
| 111 | |=====+---o---+
| | +-----+ |
| | 110 |
+-------+---------------------+
Stairs leading down are marked as '='.
The ladder is marked with the letter 'L'.
109. Storeroom - No extra items are here to grab, but you can switch your
inventory around, which is nice. You can't save, though.
110. Hall - There are a few zombies in here. You could probably run around all
of them, if you wanted to spare ammo, but killing them can be fun, too.
Enemies: Zombie (3)
Items: MO DISK
111. Boardroom - There's a projection screen on one wall, which might be fun to
use. There's also a few other items of interest.
NB. The door to this room is LOCKED.
Items: LAB KEY, SECURITY SYSTEM DOCUMENT
LABORATORY, LEVEL THREE (also called B3)
+--------+ +--+
| | |==|
| +--o--+----------+==+-----------+
| | | |==| |
| | 127 | 114 |==| 116 |
| | | |==| +-o-+
| +-----+--o-------+==+-------+ |
| 126 o 113 o 112 |
+--------+-------o--+ +-------+ +-------+----+---+
| | | | | 119 | o E |
| 115 | | 120 | | | +--+---+
| | +---+ | | | | |
+----------+ +-o-+ +---o---+ | 118 |
| o 117 o |
+--------------+-------+ | |
| +------+
| |
| |
| |
+-------+o+------+
| 121 |
+--+ +---+ +--+ |
|//| |///| |//| |
|//| |///| |//| |
|//| |///| +--+ |
+--+ |///| |
|122 |///+----+o+
+-----+////////| |
|//////////////| |
|//+-----------+ |
|//| 123 |
|//| +---------+ |
|//| |/////////| |
+--+ +----+/+--+ |
| |/|124 |
+-------o-+-+----+
| |
| +----------+ |
| |//////////| |
| +----------+ |
| 125 |
+----------------+
112. Squared Corridor - Numerous zombies run around here. There are no items,
so blast away with the shotgun, and go for a door!
Enemies: Zombie (5 to start, then 2 each time you re-enter; these are
replaced by Critters near the very end)
Items: FAX
113. Corridor - This corridor is empty.
114. Junk Room - Several zombies lurk here, waiting for you. Perhaps they're
protecting something...?
NB. This door is LOCKED.
Enemies: Zombie (4)
Items: PASS CODE ONE
115. Research Room - There are a few good items in here. There's also a riddle.
Items: GREEN HERB, CLIP, RESEARCHER'S LETTER
116. Laboratory - This lab holds an item for your perusal, and a computer.
Items: SLIDES
117. Corridor - There are a few zombies lurking in here to impede you.
Enemies: Zombie (3)
118. Storeroom - Your last refuge! Use it when you need to. You can save here.
Items: FLAME ROUNDS [if playing Jill], MAGNUM ROUNDS [if playing Chris],
BLUE HERB, GREEN HERB
119. Laboratory - This room holds a few items, and yet another riddle.
Items: SHELLS, RED HERBS
120. Morgue - Why is this place so hard to get into? Must be something
important in here.
Items: PASS CODE TWO
121. Corridor Maze - A few enemies are waiting on the ceiling for you! Run!
Enemies: Critter (3)
***Side Note: These creatures are very wierd. There was no booklet with
the game to name them; I just call them 'critters'.
122. Power Relay - There's a panel here. Hmm.
123. Hall Maze - More enemies! Gah!
Enemies: Critter (2)
124. Desk Corner - There's an item worth getting here.
Items: PASS CODE THREE
125. Power Room - Lots of machinery is in here. Maybe press something...?
126. Passageway - This passage leads to a secluded area, and is unguarded.
127. Jail Cell - "At last, I've found yoooooo...". Your "other half" (Jill, if
you're Chris, or Chris, if you're Jill) is held hostage here!
Viewing Tip: This is brief and to the point. I like that, especially when
you're playing through the game for a 'best time'.
* * * * * * * * * * * * * * * * * * * * * * * * * * * * * * * * * * * * * * *
ii) Suggested Method of Attack
THIS IS ONE BIG SPOILER. USE IT ONLY WHEN YOU CAN'T GET THROUGH THE GAME (or a
specific part).
You get the best out of this game when you can beat it in under three hours.
Since the items you can get are listed in the room descriptions, and the locked
doors are detailed in the CHEATS section, this suggested method of attack is
only designed to minimize time. If you find this path difficult, examine the
maps and room descriptions. You may find a method of attack which better suits
you. If you want to beat the game under three hours, use Jill! Being a bit
pragmatic, I've based the initial estimated time to complete each goal on Chris.
And now, on to the method of attack.
MANSION, Floors 1F and 2F
Goal One (Estimated Completion Time [ECT]: 10 minutes;
Current Total Time [CTT]: 0 minutes)
Your first goal should be to clear a path to a storeroom. Whether you're
playing Jill or Chris, your inventory is limited. This will help free up space.
Note here that there will also be a notation, 'JCT', for "Jill's Completed Time",
at the Goal headings, should you try to stay in the time limit. If you choose
to do this, ignore headings reading 'Note For Those Playing Chris', but
pay close attention to headings reading, 'Note For Those Playing Jill'.
ECT, CTT, and JCT will be rounded up to the closest five minutes. So aim under
this as much as you can!
Start the game (in Room #1). After the scene plays, you'll go to Room #2. From
there, enter the north corridor to the scene in the west end of Room #3. Skip
through the scene if you've already seen it. Grab the clips from the body on
the floor, quick, and go back to Room #2.
Note For Those Playing Jill:
***In Room #2, you go through a quick scene with Barry.
Run like a bunny back to Room #1. Get Jill's handgun, if you're Chris;
otherwise run behind the stairs to clear the scene with Barry. Grab the Ink
Ribbon by the typewriter, too.
At this point, your inventory should hold: First Aid Spray, Combat Knife, Clip
(with 30 ammo), 2 Ink Ribbons, and the Baretta gun.
Go up the stairs to Room #32 and head west to Room #33. Run to the right side
of the screen, down that narrow path. A zombie will face off against you. Take
him down. In the future, run down this side of the balcony, and you can avoid
the second zombie. Go to Room #34. Run in, and gun down the 2-3 zombies in
here. You'll want this area free of zombies in the future. Head down to Room
#9 and duck into Room #10 fast.
Note For Those Playing Chris:
***Chris will meet Rebecca here. Take her with you. Otherwise, you're asking
for trouble. (This isn't a concern for Jill. She has that *dreamy* hunk,
Barry. Yeah, right.)
Take the two clips in the storage box. You can never have too much ammo.
Finally, take the Sword Key off the bed if you're Chris.
Goal Two (ECT: 20 minutes; CTT: 10 minutes)
JCT: 10 minutes
Starting Goal Two, you should have: First Aid Spray, Combat Knife, Clip, and
the Baretta Gun (plus the key, if playing Chris). Jill will have four spots
open, but Chris will have only one. Chris should consider leaving the First Aid
Spray; with practice, he'll kill everything without getting hurt. Alternately,
you can use one of your two Ink Ribbons to save, and in either case leave the
Ink Ribbons behind.
Having started with 15 ammo in the gun, plus 30 from clips, then killing those
four zombies, you should be down to 20-28 bullets. This assumes you do the
smart thing, and switch to the combat knife to stab zombies when they fall down.
It saves bullets, and is a very handy technique for the future.
Now, you want to liberate that Armor Key in Room #6. For that, you need the
Chemicals. (Doh!)
Run out and shoot the zombie walking towards you. (The one from the bottom of
the screen, not the one under the stairs.) Run down the right-hand wall to #11,
past the dumb zombie there, to Room #13. Shoot the two zombies that come at you
from the bottom of the screen. Then run down the hall (Room #14) hugging the
left-hand side, away from the alcove that leads to Room #5. You can unlock the
door to Room #3 from this side, another time saver. Run to Room #2, then Room
#1.
From here, run into Room #15. Slip into the hairpin turn behind the tank and
grab the Ink Ribbon (I suggest you let the zombie there gnaw on you, and tap B
fast to squish his head). Jog back out and through the door to Room #16 after
unlocking it with the lockpicks/Sword Key. Run forward, but as soon as the
screen angle changes, turn around and walk backwards down the centre of the hall.
Why? Because you get the drop on the dog that crashes through the window behind
you! After dispatching it, run around the corner. Again, when the angle
changes, centre yourself in the hall, but walk down forward. Take out the
second dog, then move the empty case against the wall to get the Clip underneath.
Go into Room #20, and grab the Green Herb. Run around to Room #25 and kill the
two zombies inside. Go into Room #27 and kill this zombie, too. If you have a
free spot, grab the Green Herb in here as well, blending it with the first Green
Herb for a quick, strong heal. Then enter Room #28 and grab the Chemicals.
After fixing up your inventory to only the baretta, fully loaded, and the
chemicals(go grab that herb from Room #27 if you haven't already; once blended,
it takes less space), head back the route you used to get here: Rooms #27, #25,
#20, #16, #15, #1, #2, #3, #14, #13.
From here, head down to #6. Dump the chemicals in the tank, then grab herbs and
blend, blend, blend! The optimum mix is red / green twice, then the last two
Green Herbs together. Go get the Armor Key from the crest on the glass wall,
then head back to storage; #13, #11, #10.
Goal Three (ECT: 10 minutes, CTT: 30 minutes)
JCT: 20 minutes
Once you adjust your inventory, you should have: one of the blended herbs (save
the First Aid for later...it brings you to full, always), the Baretta gun (fully
loaded), and the Armor Key. You don't even need the Baretta, but play it safe.
You should still have a maximum of 10 bullets. The 20-28, minus 8-12 for the
zombies in #13; minus 10-14 for the dogs; plus 15 from under the case; minus 8-
12 for the zombies in #25; minus 3-5 for the zombie in #27. If you're all out,
bring the Knife instead of the gun.
The next goal is grabbing that shotgun! With that, the rest of the Mansion is a
piece of cake.
Run out to Room #11, then unlock Room #12. Inside is a Clip and the Broken
Shotgun.
Note For Those Playing Jill:
***Since you have the lockpicks, unlock the desk and get the shells within.
Now you have a little more ammo, as well as a very important item. Back out
into Room #11, then into Room #13. Go down to Room #14, then follow: #3, #2,
#1, #15, #16, #20. From here, go into Room #23, then Room #24. Grab that
shotgun! Then use the Broken Shotgun to replace the shotgun you took. Aha...!
Note For Those Playing Chris:
***If you're playing Chris, pause here to duck into Room #22, and grab the Small
Key in the tub. It will unlock otherwise impossibly locked desks, but it is
discarded automatically after one use. You can find one of these keys for
each of the especially locked desks.
Run back to the storage area -> #22, #25, #27, #28. Use an Ink Ribbon to save.
Goal Four (ECT: 35 minutes; CTT: 40 minutes)
JCT: 30 minutes
Your inventory should now be adjusted to hold: one blended herb, the shotgun,
the Armor Key, and (if you have taken Chris) the Sword Key. This leaves two
spaces open, minimum: you'll need them.
You should have up to 25 bullets for the handgun, and 7 shots for the shotgun.
Now, you want to blitz the house for ammo. You'll need to get it now. Later,
there's too many Hunters to bother. You'll also want to grab three of the four
Crests.
Run out to Room #27, then to Rooms #25, then #21. Use the Armor Key. Run back
to Room #25, then Room #27, and up to Room #55. Use the shotgun at close range,
tilted up, to take down the two zombies up here, pausing to unlock the door to
#55 from this side (it's just latched, no key is necessary). Use the Armor Key
on Room #56. Go in. If you're Chris, be ready to blast the zombie inside. Go
into Room #57 and grab the shells (if Chris) or Clip (if Jill) behind the far
bed. Also grab the Red Herb, which you can now see at the head of the closest
bed. From here, head into Room #58. Examine the picture to your left, and
press the button. Move the now-empty tank to the right, then move the cabinet
down towards where the tank was. Behind is a second box of shells, if Chris, or
Explosive Rounds, if Jill.
Ammo is good. :)
Run down to Room #28 and drop off the Red Herb (and Explosive Rounds, if Jill).
Run into Room #26 and after solving the picture trick, grab the crest. Back to
#28 and drop it off. Then run around to Room #17 and use the Armor Key. Don't
enter, though. Run up the main stairs, and into Room #47. Kill the zombie.
Use the Armor Key on Rooms #48 and #52. Now that the Armor Key is useless, you
should discard it. Head in. Cover the vents and press the button to get your
second crest.
Continue around to Room #53 and kill the zombie, if necessary.
Note For Those Playing Chris:
***Head back down to #28 to drop the crest off. You should still have two spots
open, minimum.
From here, hightail it over to Room #7, unlocking it. Now head across and
around to the cabinet, and move it to get the music notes. If you're playing
Jill, use them (facing the piano) right away; otherwise, Rebecca shows up again.
Have her practice. In either case, go from here to #3, then #2. Grab the
Emblem, then go out to #1, then head up to Room #33. Push the statue until you
can drop it over the balcony, into Room #2. Head back to Room #7.
Note For Those Playing Chris:
***Rebecca plays the Moonlight Sonata correctly for you (good thing!), which
takes over 30 seconds (bad thing!). This opens the secret passage.
Inside, swipe the Gold Crest, replacing it with the Emblem. Head out to Room #2
and put the crest where the Emblem was, then grab the Shield Key and Blue Jewel.
Run over to Room #14 and kill the zombie in the alcove. Inside Room #5, use the
Blue Jewel to get the Wind Crest.
Deep breaths. Deep breaths.
Now: you should have 5-6 items in your inventory. Run over to Room #10,
dropping off the crest(s) and the Shield Key.
Note For Those Playing Chris:
***Grab the Small Key (if you are Chris) and head back to Room #12. Unlock the
desk and get the shells. :)
Run out to Room #11, and go for Room #4, discarding the Sword Key if you are
Chris. Go to the desk to get the zombie to leap out of the closet. Kill it,
and scoop the clip on the bed, as well as the shells in the closet. Back to
Room #10 to drop off the clip, then go to Room #1. Head up to Room #45. If
you're Chris, get that Small key on the shelf! Then go into Room #46. In here
is either that bazooka for Jill, or a clip. Grab, and run.
Head down to Room #17. Kill the zombie inside, grabbing the clip from the
dresser. Unlock the desk behind the shelf to get more shells, then run into
Room #18 to grab the Ink Ribbon. The zombie in here can be run around easily.
Also grab and blend the two Green Herbs, if Jill, or just grab the one herb, if
Chris. Now run over to Room #28!
Whew! It's a lot of running, but not much killing. This part goes much faster
with the shotgun, which is why you use it. If you run, you can make this area
in the time that is estimated, give or take. Don't go over twenty minutes,
using Jill. If you do, reset.
Goal Five (ECT: 20 minutes; CTT: 1 hour, 15 minutes)
JCT: 50 minutes
You should have in your inventory: the shotgun (or bazooka, if Jill), the
shells (or the explosive rounds, if Jill), two blended herbs, and the Shield Key,
for this next area. Leave the rest for now.
For ammo, you should have about 29 shotgun shells (22 with Jill, plus 6
explosive rounds), and about 55 total bullets for the Baretta.
The next goal is to get the last crest, and get out to the courtyard!
Head up to Room #55, then go to #48. Jill has to do a scene immediately to get
Serum. The fastest route is to head: #47, #32, #33, #34, #10, then back. Chris
doesn't have to do this, but after he fights the snake, Rebecca will have to do
this 'Run For the Serum'.
Note For Those Playing Jill:
***Get the Clip from the body on the floor in Room #48. Also, blend the two
Green Herbs nearby. You'll receive the Radio at this point, too.
Go into Room #49 and kill the zombie waiting. Then head up the steps and use
the Shield Key to get into #51, discarding it.
Tips on the 'BOSS': running is useless. Aim low when it gets close and FIRE AT
WILL. If Jill gets hit twice, heal. If Chris gets hit three times, heal.
(This assumes you entered with full health. You did, didn't you? After all,
it's a Boss fight!)
The last crest is in the hole where the snake runs away. The shells are in the
lower north-west corner on the map. Grab both, and head out. You, as Rebecca,
run for Serum at this point, if playing Chris. Jill, already having killed time
doing the Serum run, is rescued by Barry and taken to Room #10.
Note For Those Playing Chris:
***On the way out, snag the Clip on the corpse in Room #48. Also grab and blend
the two Green Herbs.
No longer poisoned in either case, you want to get to Room #28.
Dump everything but the Baretta, your combined Clips, and the four crests, and
head over to Room #30. Kill the dog, use the crests, and presto!...the shed is
open! From here, go straight to Room #21. Turn around the corner, kill the
first dog, blend the six Green Herbs into three blended herbs, kill the second
dog on the way back, and go to #28. Save your progress with an Ink Ribbon,
making sure you have in your inventory: the shotgun, one blended herb, a fully
loaded Baretta, and the combined clips.
Now you've completed the first of five major parts to the game! Don't worry
about the time you've taken. The ammo is worth it, regardless of what anyone
says, and at this point, you should still have about 25 shotgun shells total,
and about 55 bullets for the Baretta. Not bad.
THE COURTYARD, 1F (ECT: 15 minutes; CTT: 1 hour, 35 minutes)
JCT: 1 hour, 5 minutes
The courtyard is a quick blitz, and the second of the six segments to the game.
No other section goes this quickly, so enjoy it, and don't dawdle, for pity's
sake!
In Room #31, grab the Crank on the shelf, using the stepladder. Head out into
Room #61, and kill the dogs with the Baretta. You are much lower on shells, and
the Baretta can kill the dogs...it just uses up ammo. Expect 'Dead-Eye Jill' to
use up to 10 bullets. Chris, on the other hand, will probably use 21 or so (he
has an extra dog to kill, and since his aim is lousy, he takes an extra shot
more than Jill for each kill, minimum).
Head out to Room #62 and use the Crank. If you want, let the scene run. It's
one of the better scenes in the game. Then go back to #28 and reduce your
inventory to just the Baretta. Run back, grabbing the Green and Red herbs,
blending them. This puts your inventory back up to a total of four items (after
blending), but it's okay. Besides, you might need the healing if you still
haven't gotten the hang of shooting. Go down the ladder, across the walkway,
and up the other ladder to Room #63. RUN past the snakes. You could kill them,
but they come back ad infinitum, so save the ammo. Go to the winch-operated
elevator, descend on the platform, and get ready to kill more dogs. Switch to
the shotgun, and run over to Room #65. Kill even -more- dogs. You need this
area clear for later.
At this point, you'll be down to about 10 shells and 25 bullets. Oh, goodie.
Fear not, though, for soon, thou shalt find yon third storeroom, and it shall be
a good thing...
Grab a green herb or two (if you need it), leaving one space open in your
inventory, and head on over to the Guardhouse.THE GUARDHOUSE, 1F and B1 (CTT: 1 hour, 50 minutes)
JCT: 1 hour, 15 minutes
Goal One (ECT: 15 minutes; CTT: 1 hour, 50 minutes)
JCT: 1 hour, 15 minutes
For this goal, you want to clear out most of the Guardhouse. The items you get
will go a long way to making this area easier.
Run through Room #69, pausing to grab a Blue Herb, and head to Room #70. Drop
off everything but the shotgun and a blended herb. While you're at it, blend
the Red Herb you have in storage with the Green Herb you just got. Scoot over
to Room #72, and kill the zombies within. Get the Red Book, the Small key on
the far corner desk (if Chris), and then unlock the other desk for the shells
inside. Yes! More ammo! Now go into Room #71, and get the C. Room Key from
the tub. Go back to Room #70 and reduce your inventory to the shotgun, fully
loaded, and the C. Room Key. Next, go to the statue by the entrance, and push
it over the hole near the entrance to Room #75. This keeps that nasty tentacle
from slapping you all the time. Head into Room #75, then over to Room #79. Get
the key at Room #80 (the alcove), then run back to #75 before the wasps can hit
you! If they do happen to poison you, run back to Room #70 and grab that Blue
Herb.
Note For Those Playing Jill:
***Having more inventory room than Chris, pause during the next jaunt to #78,
grabbing the two Green Herbs at #76 and blending them to conserve space.
Now, go up to Room #78 and unlock it, tossing away the key in the process. Kill
the zombies inside, and shift the left-hand cabinet back.
Note For Those Playing Jill:
***Since you have the lockpicks, snag the shells from the desk after you unlock
it.
You can move the other cabinet to the right, revealing the ladder that heads
down to Room #85. Go down, and push the box back until you can shove it against
the far wall. Push it down a good distance, but not too far. Then push the
boxes into the water to cross. Pause to scoop the two Green Herbs, blending
them. Head into Room #86. Run...like...heck, over to Room #88, and unlock it,
discarding the key, then get in the room QUICK! The far left computer panel
drains all the water out; the button by the door unlocks Room #89. In Room #89,
scoop up the key, Clips, and Shells.
Note For Those Playing Chris:
***Head over to Room #90 to snag a Small Key. The key is used on the desk back
up in Room #78 for Shells. You should also grab two of the Green Herbs in
#76 and blend them, since it's on the way back.
Head back up to Room #70, unload the goodies until you've only got the shotgun,
a blended herb, shells, and that Blue Herb (if you didn't use it; there are more
Blue Herbs at #69, if you did).
At this point, I wholeheartedly recommend you save again.
Goal Two (ECT: 20 minutes; CTT: 2 hours, 5 minutes)
JCT: 1 hour, 25 minutes
Now you have most of the good stuff, it's time to do some last-minute clean-up
and kill off that dastard, Plant 42!
Charge into Room #74 and kill the tarantula! It's better to let it drop, and
try to keep it at bay with the shotgun/bazooka. If this fails, you have the
blended herb to help you. The second tarantula in the area marked #73 will
likely scuttle over as well. Do not shoot it if you can help it. You only want
the first spider dead. When it dies, a lot of baby spiders pop out and run
around. Head for the door! Heal when outside if necessary (and likely, it is
necessary). Don't heal any poison status yet, though. Run back in. Hmm. No
little spiders are in the room anymore! :) It's time to go and kill that there
ornery second spider. Then, you heal the poison, and loot the room! The clip
is on a barrel in the southern half of the room; on the table nearby is an Ink
Ribbon. Get both, and drop them off in Room #70. Switch around your inventory
until you have your Shells, the Shotgun, a blended herb, the Red Book, the Dorm
Key (and if Jill, the bazooka). Nip over to Room #83 and unlock it, discarding
the key. Kill the zombie inside and put the Red Book in the missing spot on the
shelf. Ignore that tempting door, get the V-Jolt Report on the desk, and slip
into Room #82 if you're Chris, killing the zombie and getting the extra clip, or
Flame Rounds, if Jill.
Note For Those Playing Jill:
***You have to head over to Room #81. The code to get in varies, but it can
usually be solved in less than a minute. If not, you saved. :) Inside are
four Bottles, of which you only need three. You want to mix chemicals here
to make the V-Jolt, so BE VERY CAREFUL.
Fill one Bottle with water from the tap, and another Bottle with UMB-2 from
the shelf on the east wall. Combine them to get UMB-3. Fill two Bottles
with UMB-4 from the northern shelf, and blend one with the UMB-3 for UMB-7.
Fill the empty Bottle with UMB-2, mixing it with the other UMB-4 for UMB-6.
Combine UMB-6 and UMB-7 for UMB-13. Now, fill one Bottle with water, and one
Bottle with UMB-2, combining them (again) for UMB-3. Blend UMB-3 with
UMB-13, and you have V-Jolt!
Zombies say it tastes great, but hunters say it's less filling. :P
Run down to Room #90 and use the V-Jolt on the roots, then head to Room #70.
Substitute the Baretta and Clips for the Bazooka and more rounds, and you're
ready for that tempting door in Room #83...
Note For Those Playing Chris:
***Give in to the temptation to run right through the door to #83. Inside
is Plant 42! Rebecca comes in through the south-western door somehow (?),
and then has to run off to mix the V-Jolt and use it (just like Jill; see
above).
Now that the game comes back to an easier mode of explanation...KILL THE PLANT!
Aim up and fire, run, repeat process. Avoid the acid dropping from the ceiling,
if you can, and don't get too close to the Plant. If you do, it picks you up
and slams you down very, VERY hard. Once you manage to kill off Plant 42, get
the Helmet Key from the fireplace, and...
...are you ready for this...?
You have to go back into the Mansion! AAGGHH!
There is a quick scene for Chris with Rebecca. She gives Chris the Radio, then
walks over to Room #81. If you follow, she can heal you up to full! This kills
time, though. After going out to the corridor (#75), both heroes have a scene
with Wesker. Stop by Room #70, heal, and have: the Shotgun, shells, the Helmet
Key, and a blended herb. Save, and head on back...grabbing a Blue Herb from #65
on the way, for your inventory. It never hurts to kill a few seconds if you get
something you'll need in the future.
MANSION, PART II: F1, F2, and B1 (CCT: 2 hours, 25 minutes)
JCT: 1 hour, 30 minutes
Well, you're halfway through the game, and only a wit bee over the halfway time
mark. Right?
When you go back into Room #25, a scene showing a Hunter comes up. You have to
kill it, or get a lot of headaches later. Your choice. Better yet, every
monster is now replaced by a Hunter in the Mansion. Joy.
If you do the Mansion correctly, this can go quickly, even for Chris with his
limited room for items. If you do this wrong, you will likely die. If you die,
just remember: taking a hammer to your Sega Saturn is a good way to make it
stop working. Of course, that means you won't be able to play any other games
on it, but then again, sometimes therapy is expensive.
Goal One (ECT: 30 minutes; CTT: 2 hours, 25 minutes)
JCT: 1 hour, 30 minutes
In this first goal, you want to get to the Basement. What Basement, you ask?
Why, read on, and you'll see.
From where you are, this isn't gonna be easy. It starts to get easier for Chris
at this point, because he takes less damage. Jill, on the other hand, dies
quite fast from getting hit by Hunters. But you can do it!
Go into Room #27. Blast the Hunter inside with your shotgun so you have clear
access to the storeroom; you'll want it. If you're feeling really brave,
substitute the Shotgun and shells with the Baretta and combined clips. Hunters
usually take 4 shell shots or 7 bullet shots, so you might be able to survive,
and keep your ammo relatively balanced. You'd better have a lot of healing on
you if you do this, though, because you *will* need it. You should also save if
you choose to do this crazy thing (which I managed to succeed in, after many
attempts), assuming you didn't save before coming back here.
Your ammo situation should be (approximately): 15 shells and 80 bullets, hence
the wacky 'switch to the Baretta' idea. If you get used to killing Hunters, and
have a lot of healing, it is very possible to succeed...with practice.
Ready, Freddy?
Here we go. Walk back to Room #25, then unlock Room #29 and step inside. Turn
on the light on the desk. Grab the Doom Book and examine it in the item menu.
You can get the Wolf Medal from the book, which then disappears. Get the Magnum
rounds and head back to Room #28. Whittle down your inventory to the Baretta
(Shotgun), the Clip (Shells), two blended herbs, the Helmet Key, and the Magnum
Rounds. Out to #27, and head up to #55. There's three hunters up here in all;
just kill the one blocking the way to #53. Kill the hunter to your left, then
RUN past #47 to get to #32. Now use a blended herb - you'll need your health.
Enter #33. If you run to the right-hand side and hug the balcony when the
camera angle switches, you can sometimes get past the Hunter without being hit.
RUN over to Room #34. This is where it gets kind of hairy. Inside are two
Hunters. For lucky Chris, one is positioned to tackle you when you enter. Turn
right, fire your weapon for all you're worth, then turn the corner and get as
many shots off as you can, before the second hunter attacks. You might need to
heal during one of these fights; always check your health after you're hit. If
you ever see red, or orange two checks in a row, heal with the second herb. Now,
stroll on over to Room #35 and unlock it. Get the Red Jewel, the Shells, and
the Magnum Rounds. (If you are playing Chris, and need room for this, heal
yourself.) The next step will be to run back into #33, hugging the far wall to
the right to avoid the Hunter (he'll probably hit you anyways, but if you've
been careful, you'll live). Go into #32, then down to #1.
From here, scoot into #2, then #3 quickly to avoid the Hunters. Run up to the
alcove that leads to Room #14. The Hunter in this alcove might not hit you at
all. In Room #5, use the Red Jewel, and GET THE MAGNUM!
Now, you're well-equipped. Forget being wounded. You have a weapon that takes
no more than two shots to kill a Hunter! Duck out and kill that Hunter. A
second comes down from Room #13; kill him too. (Why not? You have all those
extra Magnum rounds.) :) Run to #3, then to #2, and #1. Once there, go up to
#47 and kill the Hunter. Run around to #53 and duck into #55. Kill the Hunter
with his back to you down the hall, then head downstairs to #28. Reset your
inventory to have: the shotgun, shells, two blended herbs (even if they are
your last two) the Helmet Key, and the Magnum gun, fully loaded. SAVE.
(Getting to this point should take 15-20 minutes.) Go back up to #55. There
might be a Hunter guarding the door to #59; if so, kill it and go in. There's a
Green Herb in here, if you need some healing. Unlock Room #60 and dispose of
the Helmet Key, then enter. Inside is an old buddy!
Go over to the piano, and the giant snake from Room #51 comes out of the
fireplace! Fire the Magnum into it until it's empty, then switch to the Shotgun
and kill it. You might (actually, you will) need to heal during the battle, but
the snake can no longer poison you. Once it's dead, go back down to #28,
changing your inventory to only the shotgun and shells. You'll see why soon
enough. Once back in #60, jump into the hole it made in the floor, during its
initial attack. (Jill gets to use a rope. Barry helps her. No, I don't know
why.)
Note For Those Playing Jill:
***Press the 'B' button several times to make Barry reappear when he drops the
rope.
Press the button by the base of the grave marker to reveal the ladder, which
descends into Room #91 - the Basement.
Goal Two (ECT: 20 minutes; CTT: 2 hours, 55 minutes)
JCT: 1 hour, 50 minutes
Wow! Wasn't that fun, boys and girls?
(Don't hit me. I'm not insured.)
Your ammunition should be at: about 7 shells, and (in storage) about 50 bullets.
(If you have any Magnum Rounds, kudos!)
The rest is a cakewalk, by comparison. Duck around the corner and kill the
zombie. Then grab the shells there! YES! Go back and kill, or run around, the
second zombie to #92.
Special Note (optional):
***ONLY if you think you'll need the healing (chances are you won't), get close
to the zombies in #92, to lure them from their feasting. Kill both, and grab
the two herbs, blending them. Now you can heal if necessary...even better!
Go into Room #93. If you're Chris, kill that first zombie, grab the Small key
on the far counter of the kitchen, then head over to the zombie in front of the
elevator. Believe it or not, it's best to let him gnaw on you, and hit B
repeatedly; it saves ammo. It is possible to dodge around the zombie; if you
can, so much the better! Enter Room #94 (the elevator) and ride it up to Room
#41. Kill the zombie nearby, then kill the one coming towards you from the
northern corridor. If you feel the need to heal (and have room in your
inventory), get the herb in the alcove directly north of the elevator and use it.
Nip in Room #42 and kill the close zombie. Then go unlock the desk against the
north wall. (This frees up a space for Chris, using that Small Key.) Inside is
Magnum Rounds (!), which you can grab. Open the way into #44, and if playing
Jill, grab the Clip. There is an Ink Ribbon here as well; grab this also. Back
in #42, go over to #43 and grab the MO Disk. Now, head out to #41, and across
to #39. Inside are more Shells (if Chris), or Explosive Rounds (if Jill), plus
a Battery. Get all of this. If you're Chris, this will fill your inventory,
but that's ok.
Note For Those Playing Jill:
***You can save yourself a LOT of time here. Follow this path: Room #'s 41,
94, 93, 92, 91, 60, 59, 55, 27, and 28. This makes up for the time you lost
with the scene involving Barry, after the snake.
Note For Those Playing Chris:
***Go back into #41, down to #94. Head across to the way to the door that leads
up to #8. You'll encounter a zombie; kill it. Once you are in #8, open the
way into #3 (it was latch-locked on this side), and hug the left wall,
running down to #14. This resets the position of the Hunters. Duck back out
into #3, then #2, until you're at #1. From here, head up to #32, and through
Room #'s: 47, 53, 55, 27, and 28.
Strip down to the (fully loaded) Magnum, the (fully loaded) Baretta, your
combined Clips, a blended herb, the crank and the battery. Go out to Room #'s
27, 25, 30, 31, 61, 62, 63 and 64. Put the battery in its niche, then ride the
elevator up. Use the crank in Room #62, then go back to #28. Drop off the
crank and save. You're finally (!) done with the Mansion, for good.
THE COURTYARD TUNNELS, B1 (CTT: 3 hours, 15 minutes)
JCT: 2 hours, 10 minutes
Now we're getting to crunch time. But this part can be done quickly, if you do
it smart. Your ammunition should be approximately: 6 Magnum Rounds, 25 Shells,
and 50 Bullets. The Shells are better to use later, in the last section (past
the tunnels), so get ready with the Magnum, and if you have to, use up that mass
of Bullets you have for the Baretta!
Goal One (ECT: 10 minutes; CTT: 3 hours, 15 minutes)
JCT: 2 hours, 10 minutes
The goal to this area is easy - get to the next (and third last) storage room.
First, head out to #61, and use the elevator you activated with the battery. Go
Over to the middle area in #64 where the water was cascading down. There's a
ladder! This leads down to Room #95.
From Room #95, go through the door nearby, into Room #96.
Note For Those Playing Jill:
***When you run into Barry, follow him!
Grab the flamethrower on the wall, if you're Chris (this locks the door back to
#95, until you replace it again). Take the passage that leads around to Room
#97, then run to the door for Room #98. Go around the bends, and after the
scene with Enrico, go back around the close bend. A Hunter is waiting for Chris
(use the flamethrower!), and in either case, it seems that the shooter of Enrico
has dropped a Crank! Grab it. You need it.
Duck back out into Room #97. There's a Hunter awaiting you, and the Hunter from
Room #99 also decides to stroll down. Kill them! (I prefer to use the Magnum
on one, shoot the second Hunter once with the Magnum, then use up the flame-
thrower on it. It conserves bullets and hey, it's fun. Jill, on the other hand,
should use the Baretta, or run, giving up the goodies in #100.) Now head over
to Room #100, since the Hunter from #99 is kaput, and grab either the First Aid
Spray (for healing), or the Shells. Jill can take both (if she went this way),
but Chris will have to choose due to restrictions on inventory. Doesn't that
figure.
Head to Room #96, and come out running! Two Hunters are here; one close by,
near the door to #95, and the other coming down the hall from guarding the door
into #99. Chris will have to replace the flamethrower to unlock the door, and
likely will take one hit; Jill need not worry about this. Once back in #95,
head around the bend and use the new Crank to get to Room #101. Go up to the
boulder, then turn around and run, ducking into the recess. The boulder smashes
a way open to Room #102. If you want, grab the Magnum Rounds (if Chris) or
Flame Rounds (if Jill) in the alcove that was hidden by the boulder. This will
make a Hunter appear, but you can take it down easily, and you might want the
spare ammo for Room #102...
There's a very nasty huge spider in here! So run around it, shooting with the
Magnum, and then (if necessary) the Shotgun. Once it dies, lots of little
spiders will come out, so grab the Combat Knife on the northeast barrel, and
slash away the webbing to Room #103 as fast as possible. Run down to Room #104,
and you're in the Storeroom! Use the Blue Herb if you're poisoned from the
spider. Switch around your inventory to hold a blended herb or First Aid Spray,
the shotgun, shells, the new (hexagonal) Crank, and then save.
Goal Two (ECT: 10 minutes; CTT: 3 hours, 25 minutes)
JCT: 2 hours, 20 minutes
For this part, all you need to do is get to the lower section of the courtyard.
Note For Those Playing Chris:
***Jog back to Room #101 and grab the flamethrower. Head back to Room #103, and
put the flamethrower on the hooks by the door to #105. This unlocks the
door.
Head into Room #106, and use the Crank to open the passage to the left (south).
Then go up to the boulder, and run away. Duck into the new passage, then go out
and grab the MO Disk in the alcove that was behind the boulder. Go into room
#107, and move the statue so that it is pushed out by the wall, when you press
the button. Push the statue onto the button on the floor, and get the Eagle
Medal from Doom Book II. Go back to Room #104, and readjust your inventory to
hold: the shotgun, shells, the two medals (Wolf and Eagle), and a blended herb
or First Aid Spray. Now, back to Room #105 and down the small passage that
leads to the ladder. It's time for the Courtyard!
THE LOWER COURTYARD/LABS (CTT: 3 hours, 35 minutes)
JCT: 2 hours, 25 minutes
The Courtyard is quick, and leads into the Labs, so both are melded together to
create the last section in this FAQ.
Goal One (ECT: 5 minutes; CTT: 3 hours, 35 minutes)
JCT: 2 hours, 25 minutes
Once in Room #67, you'll find two green herbs. Blend them for extra healing, if
you have the free space. Ignore the door; it can't be opened. Use the two
medals on the fountain in Room #68, and descend the stairs to the elevator,
which leads to the Labs.
Goal Two (ECT: 30 minutes; CTT: 3 hours, 40 minutes)
JCT: 2 hours, 30 minutes
There's not much left to the game, so here we go...on to beating RESIDENT EVIL!Now, to descend into the Labs. Level One of the Labs is small. Just run over
to the ladder that descends to Level Two. Run through the storeroom (unless you
really need something), to Room #112. Blast your way to Room #116, and use the
computer to open the locked doors on Levels Two and Three of the labs. Head
back up to Room #110, grab the MO Disk, go into Room #111, grab the Lab Key,
then go back down to #112. Use the key to access Room #117, and blast more
zombies. Slip into Room #118 to rearrange your inventory as: the shotgun, all
3 MO Disks, and a blended herb. Make sure to grab the Magnum Rounds (if Chris)
or Flame Rounds (if Jill), and the Green Herb in here, as well. Go into #119
and cover the vents with the crates, then situate the ladder to get into the
vent. Aha! It leads into #120, where you can swap an MO Disk for a pass code,
and grab...Magnum Rounds!. Head out into #112, back to #117, and brace yourself
to RUN a LOT.
Go into Room #121 and to #122. Turn the power on. A few creatures will drop on
you from the ceiling. Do your best to dodge them, going to Room #123. Run down
to #124 to swap another MO Disk for another pass code, then run like crazy to
#125. Inside, you may want (or need) to heal. Connect the power circuit in
here, then RUN all the way back to Room #117. Run over to Room #114, blast more
zombies, and swap the last MO Disk for a pass code. Talk to the sensor on the
right-hand wall in Room #113, by the door to Room #126, then run back to Room
#117. Duck into Room #118, and grab the Magnum gun, as well as any extra Magnum
Rounds you may have. You may want to save; you're close to the end, and doing
the run through Rooms #121-#125 is not fun to repeat.
Head north in Room #117 and go right around the north-eastern corner, to the
elevator. Here, you meet Wesker, who leads you underground to the grand
creation of the scientists...Tyrant. Once you defeat Tyrant, not everything is
done just yet. Rebecca (or Barry) sets the whole place to destruct. Nip over
to Room #127 to free the prisoner. Next, go up to Room #108, and head out that
door to the Helicopter Pad. You enter a twisting corridor - grab the Battery
along the way. At the end of the corridor you must use the Battery to go up to
the pad, and a 3-minute countdown starts. At the top of the elevator, you hear
the radio one last time. Grab a Flare from the box, head out into the pad
landing area, and use the Flare.
A new, giant monster leaps up through the concrete! This is a massive Tyrant.
Shoot it several times with the Magnum or Shotgun - but mostly, just dodge! At
the 30 second mark, you are dropped a Rocket Launcher. One shot from this baby
kills the massive Tyrant, and guess what...you've beaten the game!!!
CONGRATULATIONS!!!
Now, if you've managed to beat the game in the time limit, resave the game after
the credits, when given the option. Using this new save file, you'll see your
reward...a Rocket Launcher (it's called an 'R. Launcher', actually) with
unlimited ammo! NICE! You also get the key to Room #19 just for beating the
game, regardless of time, but the consolation prize within is very disappointing.
Using this FAQ as a guide, I first beat the game with Chris in 4 hours, 28
minutes, and 29 seconds (I was off in a few places in regards to timing, near
the end; I used more healing than I should have, and didn't bother to reset,
mostly to confirm estimated time for each goal). :P I got the Special Key, but
no Rocket Launcher. I don't believe it's possible to get it without using Jill.
If anyone out there knows otherwise, email me! Tell me what time you had to
score, as well, please. I couldn't get better than the score above. :(
Using this FAQ for Jill, I first beat the game in 3 hours, 17 minutes, and 14
seconds. There were some areas where I was slowed by the numerous doors. If
you need to, you can skip the giant tarantulas in room #74. Don't mix the
V-Jolt either (go in and try it...it's a special scene, and you save a goodly
amount of time; BRING AMMO THOUGH!). You will get very close to the three hour
mark using this FAQ for Jill. Sometimes you go over the mark, sometimes under.
I recommend saving often, so you can backtrack and try different ways to save
time. Getting the best possible ending in the game, plus beating the three hour
mark, is not very easy, so take heart. On my second attempt, my time lowered to
2 hours, 55 minutes, and 55 seconds. If all else fails, just aim for speed to
get the Rocket Launcher, and -then- go for the good ending (where Chris rescues
both Jill and Rebecca, or Jill rescues both Chris and Barry).
* * * * * * * * * * * * * * * * * * * * * * * * * * * * * * * * * * * * * * *
SECTION IV: CHEATS
For the few areas that gave you a hard time, this section is included for easy
use. However, this part of the FAQ should ONLY be used if all else fails.
While you get the best out of the game by running through, sometimes it's fun to
just puzzle everything out yourself.
...
If you're still reading, you must really need help. Below, I've listed places
where you may need help by room number. Some of these cheats are detailed in
the walkthrough, but as you may not have used it, the answers are repeated here.
ROOM CHEAT ADVICE
2 Getting the key...you need to play the Moonlight Sonata in Room #7, using
the notes behind the far shelf in that room. (Rebecca will play for
Chris.) Once the secret area is open, grab the GOLD CREST, and use the
EMBLEM from Room #2 to replace it. Now take the GOLD CREST back to Room
#2, and presto! The grandfather clock moves. (Sneaky clock.)
3 The doors to Rooms #8 and #14 are latched on the other sides. You have
to go into Rooms #8 or #14 and unlatch them from that side first.
4 This door requires lockpicks, or the Sword Key in Room #10 if Chris.
7 This door requires lockpicks, or the Sword Key in Room #10 if Chris.
16 This door requires lockpicks, or the Sword Key in Room #10 if Chris.
17 This room requires the Armor Key in Room #6.
19 This room requires the Special Key. You have to beat the game and rescue
both Barry and Chris (if Jill) or Rebecca and Jill (if Chris).
21 This room requires the Armor Key in Room #6.
23 The shotgun trap room. This isn't too bad. Assuming you have the Key
from Room #6, unlock Room #12 and grab the Broken Shotgun. When you
take the shotgun from Room #24, replace it with the Broken Shotgun.
This prevents the ceiling in Room #23 from squishing Chris. (Jill does
not have this problem; Barry kicks the door in and pulls her out. What
a guy! Why can't Rebecca be that manly?!)
25 The door to this room, from Room #27, is latched on Room #25. Enter Room
#25 and unlatch the door to get into Room #27.
26 To get the Crest in here, push the buttons under the pictures in this
order: newborn, infant, young boy, man, middle-aged man, old man.
Then examine the plaque at the end with the phrase: "Give me the
gift..." and press the button.
29 The Wolf Medallion be obtained by examining Doom Book I in the inventory
menu. Turn the book so that the spine is away from you, and press B.
This room requires the Helmut Key from the Guardhouse, Room #84.
ROOM CHEAT ADVICE
31 You need the four Crests to open this door. They are in Rooms #6, #26,
#51, and #52. They shouldn't be too hard to get, with the available
clues. Room #6 requires the Blue Jewel from the statue in Room #33.
Just shove it over the balcony and grab the Jewel in #2. Room #26 is
described above. Room #51 only requires that you beat the snake, then
follow it when it retreats. Room #52 is described below.
35 The Red Jewel? Yes. Tricky. Move the ladder so that the top is just
under the moose head. Turn the light in the room off. Now go back and
look at that moose head.
This room requires the Helmut Key from the Guardhouse, Room #84.
36 Jill is the only one who can get through here from Room #35. She needs
the pass code number, which she gets in Room #60 from Barry, after he
brings her the second rope. (When he dropped the rope, you should - if
you didn't - wait for him to show up, and press the 'B' button. If you
didn't do so...reset to your last save.)
43 The MO Disk area opens when you press the button, and push the statue
onto the illuminated area.
44 To get into the secret office, just move the shelf.
48 This room requires the Armor Key from Room #6.
50 To get the Acid Rounds (if Jill) or Clip (if Chris), light the candles
on the table with the lighter from Room #57.
51 This room requires the Shield Key from Room #2 (see above).
52 Move the Statues over the vents before pushing the button in the floor.
This prevents the poison gas from escaping into the room.
This room requires the Armor Key from Room #6.
53 The door to this corridor is latched on the side of the corridor marked
as Room #55. Go into Room #55 and unlatch the door from that side.
55 The door into Room #54 is latched on the other side. Enter Room #54 from
Room #53 to unlatch it.
56 This room requires the Armor Key from Room #6.
59 Use the lighter from Room #57 on the blank parchment over the fireplace
to get the Map.
60 This room requires the Helmut Key from the Guardhouse, Room #84.
68 Use the Wolf and Eagle Medals on the fountain (opposite sides) to gain
access to the Labs below.
69 To avoid being hit by the tentacle, just push the statue by the entrance
over the hole. Once there, the statue stays in place, even if you leave.
ROOM CHEAT ADVICE
78 Looking for the ladder? Push the left cabinet back, and the right
cabinet to the right. Voila! There you go.
This room requires Dorm Key 001 in Room #79.
81 Making V-Jolt: There are several hints on this, in this very room, as
well as the V-Jolt report. Here's the quick method. Grab three of the
four Bottles (you can find them by the glittering shine they make). Fill
one from the tap (water) and the other two with UMB-2 (directly behind
you when you face the sink). Combine the water and the UMB-2 (this
empties a Bottle for re-use). Go over to the other shelves; UMB-4 is on
the left-hand side. Fill your empty Bottle with UMB-4, and combine it
with UMB-3 (made from adding water to UMB-2), to make UMB-7. Fill
another Bottle with UMB-4 and mix it with the UMB-2, to make UMB-6. Now,
mix the UMB-6 and UMB-7 to make UMB-13. Fill the last two bottles with
water and UMB-2, and remake UMB-3. Combine this with UMB-13 for V-JOLT.
83 This door is locked by Dorm Key 002, down in Room #89.
88 This door requires the C. Room Key from Room #71.
89 To open this door, just push the red button in Room #88, near the entry.
95 The Hexagonal Crank, used on that plate on the left-hand side of the
tunnel, turns the wall so you can pass forward to the door.
101 Walk up to the boulder, then run away, ducking into the recess. This
will reveal the way on, when the boulder crashes through the fake wall.
105 This door is locked for Chris. Run back to Room #101 and grab the
flamethrower. Run back to the door and remount the flamethrower.
106 Same as 101, only use the hexagonal Crank first on the plate in the left-
hand wall. It opens another place to duck into, and it's necessary.
107 To get the book from its secret recess, you need to keep a weight on the
button in the floor. Press the button in the wall, and notice where the
wall moves out. Now shove the statue up to the shifting wall, and press
the button (once to move the wall out, then once again to retract it).
With the statue moved thus, it is easy to shove it onto the button in the
floor.
111 This door is opened by the computer in Room #116 (see below).
113 You require three pass codes to enter through to Room #126. Each
requires an MO Disk - from Rooms #43, #106, and #110. Hope you were
thorough. The disks are used in Rooms #114, #120 (the way in is from
Room #119; see below), and #124, to gain the pass codes.
114 This room is opened by the computer in Room #116 (see below).
115 Move the cabinet to reveal a special switch. Turn off the main light and
look at those symbols on the wall again. They're letters! Careful
deliberation reveals the code word, but this is a cheat section...so the
answer is 'mole'.
ROOM CHEAT ADVICE
116 The Login for the computer is 'John'; the Password is 'Ada'. To unlock
the electronically locked areas, you need to input a second password.
The answer is in Room #115 (see above).
117 You say the Elevator won't work? Oh dear. Turn the power on at #122,
and connect the power circuit in #125, first. Now try again!
The door that leads into the series of hallways marked as Room #117 is
locked by the Lab Key up in Room #111.
119 To use the ladder to get into the vent, cover the vents in the floor with
the crates first. After the floor vents are covered, you can slide that
ladder over the button in the floor, and no nasty poison will come out.
This takes you into Room #120. (Ahhh.........)
This FAQ, quite frankly, was created originally because I'm interested in making
FAQ's for future games. I've learned a lot in devising an 'FAQ style'. (For
example, the odd spacing - I realized some people may wish to print this FAQ, so
I set the FAQ to read easily, if printed. Little details can mean a lot!) My
good friend Chris Routheaux owns the Sega Saturn; he turned me on to this game.
It's a good run, overall; every game has its little undesirable quirks, so the
few comments you might find peppered throughout the FAQ are mostly frustration.
Since I've developed a reputation among my friends as a "game wrecker", a game
that can frustrate me is a good game, as far as I'm concerned.
Anyone who wishes to borrow this FAQ may do so - just please keep the credits
intact. If you have any questions, comments, or criticisms, please feel free to
contact me via the email address on the first page of the FAQ. I'm always
looking for feedback regarding my writing, whatever the format (especially as I
have finished writing a book recently, and continue to write poetry, RPG stories,
short stories, etcetera). It would also be nice to hear from anyone who has
consulted my FAQ; if it helps you, then great! The whole purpose of this FAQ,
ultimately, is to help other players of the game.
Resident Evil was a fun game to play. I hope it gives you the same pleasure!
- Todd Wilsher