No USB Exploit Instructions
Making and installing the Independence Exploit via swap discs. For users without a USB flash drive.

MC Exploit Including HD Loader 48Bit
Written by Goldfire for Exploit Station. Modified and adapted for Exploitstation by Alex
Note from Alex: Blue sections are ones I have written as shortcuts. If there is a blue section there will also be a red section (the original, longer version). The Blue and Red will result in the same thing.
This is also for people without access to a USB storage device. The HD Loader version I’m including has been patched with the 48Bit patch, making it able to read hard drives that are bigger than 120GB/137GB in size. I’ll keep this short and simple.
Tools needed:
- 1 PS2 (Of course)
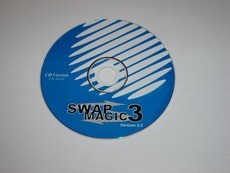
- 1 Swap Magic CD 3.3 (May work with older versions, I haven’t been able to test though)
- 1 Blank CD-R (Any brand, as long as it’s good)
- 1 PSX Trigger Disc (It can be almost any game, but it has to be a legal original)
- 1 PS2 8MB Memory Card (Essential)
- 1 HDD (Preferably 10GB+ for multiple games)
- Win RAR
- These extra files. http://users.tpg.com.au/adslgvfk/MC.rar
For this exploit, I’m using Future Cop L.A.P.D. as the trigger disc for the exploit, It’s the only real game I had sitting around, anyway, this PSX game works for the exploit. Some PSX (Playstation 1) games do not work and are listed here.
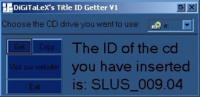
You now need the unique ID number of your disc. Start by inserting your original PSX game into your computer.
Now you can run IDGet Then select the drive and press "Get" then "Copy". OR You can open up notepad by going Start > Run > Notepad. Then, File > Open > Choose All Files for Files of type. Guide yourself to the CD-ROM of where the PSX game is, open the System.CNF file. You should see the following: (Not exactly identical unless using Future Cop L.A.P.D.) What you want, is the ‘code’ after cdrom:\ In this case, its SLES_014.49, you’ll have the same if using Future Cop L.A.P.D. Note this number down in a safe place or press CTRL + C to copy it to clipboard.
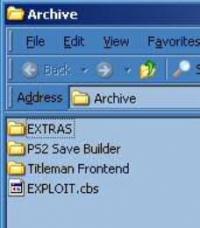
Download the files from my webpage, http://users.tpg.com.au/adslgvfk/MC.rar (If you’re too lazy: Right click and Save Target Here) Extract them to your C:\ drive.
Click Here (Automaticly Opens a new window) to open Ps2Base. When it has loaded scroll down to where all of the white textboxes are on the left and click on the first one and press CTRL + V to paste that code in there.Click "Make Title.DB" below and remember where you downloaded it.
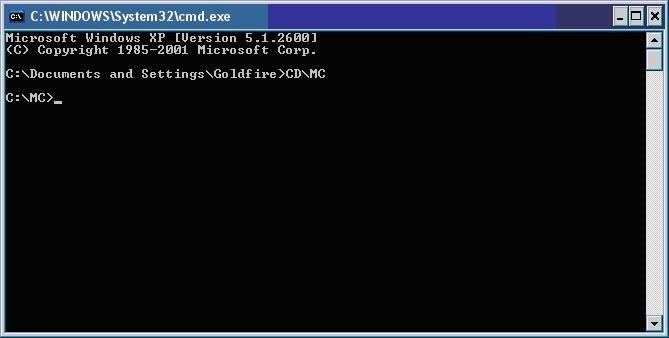
Click on Start > Run > CMD. You’ll then be greeted by this black box, so to speak. Once this has come up, type in CD\MC and press Enter/Return.

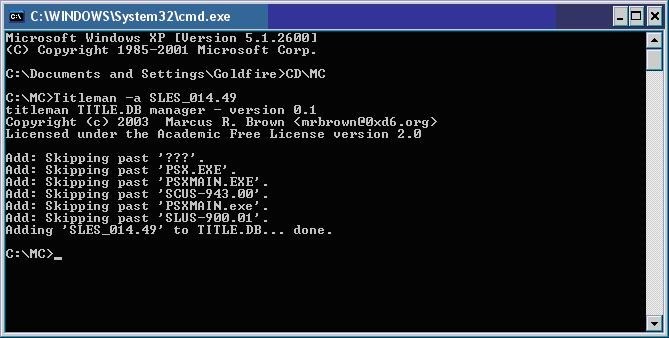
Now, you’ll have to type in: Titleman –a and press Enter/Return. I.E. Titleman –a SLES_014.49 You should then see this:

If all has gone to plan so far, good news, if not, head back to start and double check everything. Close the Command Prompt (The black box).
Next, open up the MC folder, and delete the Titleman.exe file. Next, you’ll need to obtain Nero, you can download a trial version from Here, (new window) Run Nero Burning ROM, not Express, as we need to set some different options.
Once in Nero, chose No Multisession:

Next, click on the ISO tab, and set the following options:
Data Mode: Mode 2/XA
File System: ISO 9660 Only
File Name Length (ISO): Max. Of 31 Chars (Level 2)
Character Set (ISO): ISO 9660 (Standard ISO CD-ROM)

Click on New, and make your way over to the MC folder, if you like, you can call the CD Exploit. You’ll then see the following:

ou need to drag and drop the contents of the MC folder into the ISO side (Left side) of the compilation. You should then see the following:

Chose Recorder from the top and chose Burn Compilation or press Control + B. You’ll then see this screen, I chose to burn the CD at 8x, I recommend you keep the speed around this limit.


Once done, click Burn! You’re almost there, just a few more simple steps.
Now, run Swap Magic CD 3.3, once it has started up, you’ll see the following:

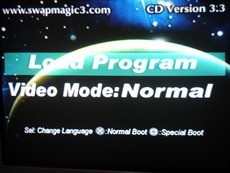

Change the Swap Magic CD with your exploit CD and press X to continue. It will start to transfer files across to your memory card (PS2), once done, you’ll see the following:
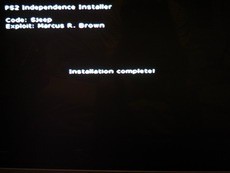

Almost there! So far, so good, restart the PS2 with your PSX trigger disc in the PS2, you’ll the see the following if you have a HDD installed. (Excuse the blurriness; I don’t have a steady hand with a digital camera.) However, you won’t have the HDLOADER.ELF file there; we can copy that to the HDD for easier access instead of having to change over to the memory card every time, but it’s up to you. Let’s do that now. Press triangle to ensure that the file will be copied to the HDD.
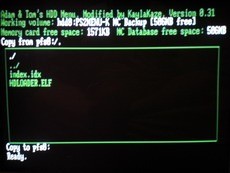

Press R1 and choose MC0: This is your memory card and its files, go into the BEDATA-SYSTEM or BADATA-SYSTEM folder.
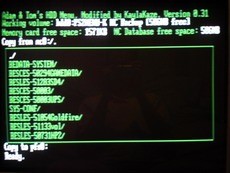

If you’re in Australia/New Zealand (PAL), you’ll see BEDATA-SYSTEM/
If you’re in America (NTSC), you’ll see BADATA-SYSTEM/
Ignore the other files, they’re just my save games, you’ll have the same too, but different numbers etc.
Locate HDLOADER.ELF as showed in the following:
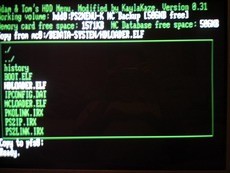

When located, press triangle to transfer the HDLOADER.ELF file to the HDD. When the transfer is complete, press R1 and select PFS0: If the HDLOADER.ELF file is there, great! If not, double check everything. All you have to do now, is restart the PS2 with the PSX trigger disc in the PS2, it’ll load the menu and show the HDD straight away, all you have to do, is simply move down and select HDLOADER.ELF, it’ll then load the 48Bit patched version of HD Loader. As you can see in the following:
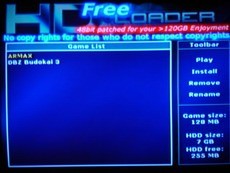

I’ve only got two things on the HDD, mainly because it’s only an 8GB HDD; I’m working on getting a bigger one soon.
Anyway, I hope this helps a lot of you whom have had trouble with the transfer and running of the exploit.
Credits go to:
Me for making this tutorial
Exploit Station for showing me the light and keeping me motivated
Sony for making the excellent PS2 system
Dad for buying me the Sony DSC-P73 digital camera for Christmas (Which I used early, he-he)
If there are any errors in this tutorial, please let me know by E-Mail: Death_8678@hotmail.com or you can contact me at Exploit Station under the name of ‘Goldfire’
Hope you enjoyed reading this tutorial as much as I did making it!
If you want to use this tutorial on your webpage, please E-Mail at least to say you’re going to use it, thank you.
Any comments or questions? E-Mail me at the above or message me at Exploit Station.
Source URL: http://users.tpg.com.au/adslgvfk/MC.html