Playstation 2 Laseradjustment
Ver. 2.00.1
Mr. B / DNA

- Introduction
- Tools of the trade
- Disassembling the console
- SCPH 10000 (Jap)
- SCPH 30004 (Eur)
- Adjustment
- SCPH 10000 (Jap)
- SCPH 30004 (Eur)
- Document History
- Disclaimer
1. Introduction
There are many FAQs regarding the adjustment of PS2 Laserunits (LU), as Sony seems to adjust ́em too careful, so the LU has a greater life expectance, but the PS has difficulties reading some DVDs or gamediscs (backups ?).
Most of the answers give advice to screw a little bit on the laserpots, but that ́s a real nerve wrecking way of getting your PS to work.
This reworked and rewritten tutorial gives explanation to properly adjusting the LU.
2. Tools of the trade
- Oscilloscope (at least 20 Mhz bandwidth!)
- 10:1 Scope testprobe with clamp
- a set of presicion screwdrivers (like the ones for repairing clocks)
- Philips screwdriver (for removing the PS2 cover)
- your PS2 utility disc (Jap model) / demo disc (Eur model) or any other PS1 gamedisc and a DVD movie
- knowledge on how to use that stuff ... (esp. the oscilloscope !)
optional: small piece of thin, isolated wire, solder wick and a solder iron
If you don ́t have one of the tools above (esp. 1,2 ) ask somebody who can lend it to you (TV repair shops ..), if you lack of [6] then ask somebody who ́s familiar with this (again TV repair shops...) ;)!
3. Disassembling the console (Bringing the console into service position)
Note: If you disassemble and modify your PS2 you will lose warranty.
The following procedures should only be done by skilled persons with the console unplugged from the mains. If you aren ́t sure if you can do this ask somebody who ́s familiar with this kind of work !!!
Furthermore be extremely careful while doing the adjustments as there are no spare parts !!! :(
a) SCPH 10000
- Remove the bottom and top cover by removing the screws under the small plastic/rubber pads.
- Remove the metal rfi-shielding at the bottom (pcb) side.
- Unplug the flat wire band from the drive connector by lifting off the clamping bridge (carefully!!!)
- Turn the machine around and dismount the drive by removing the two screws holding it.
- Turn the machine back to the bottom side and plug the wire band back to the connector.
- Place the drive that you can access the drawer, without bending the flat wire band (I put it on the pcb, isolated with a sheet of paper and „up-side-down“ to get access to the adjustable resistors).
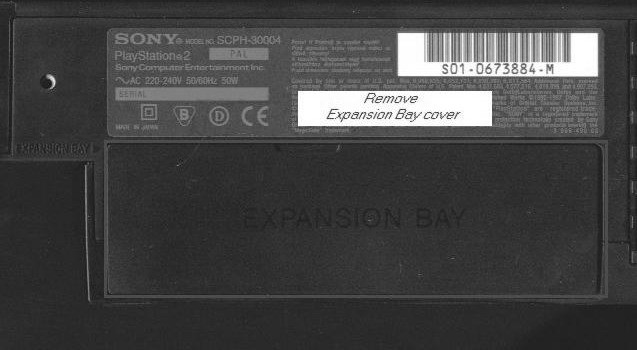
b) SCPH 30004
1. Remove the EXPANSION BAY cover and the warranty-void-sticker (don ́t need it any more ;) )

2. Remove the bottom and top cover by removing the screws under the small plastic/rubber pads. (Sorry no pictures, yet)
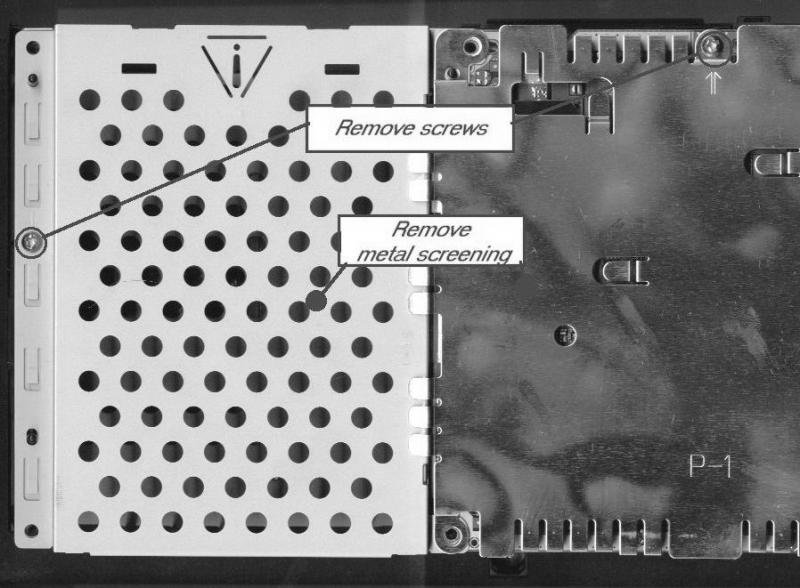
3. Remove the screws holding the rfi-shield and the metal base plate first, then the shield and plate.

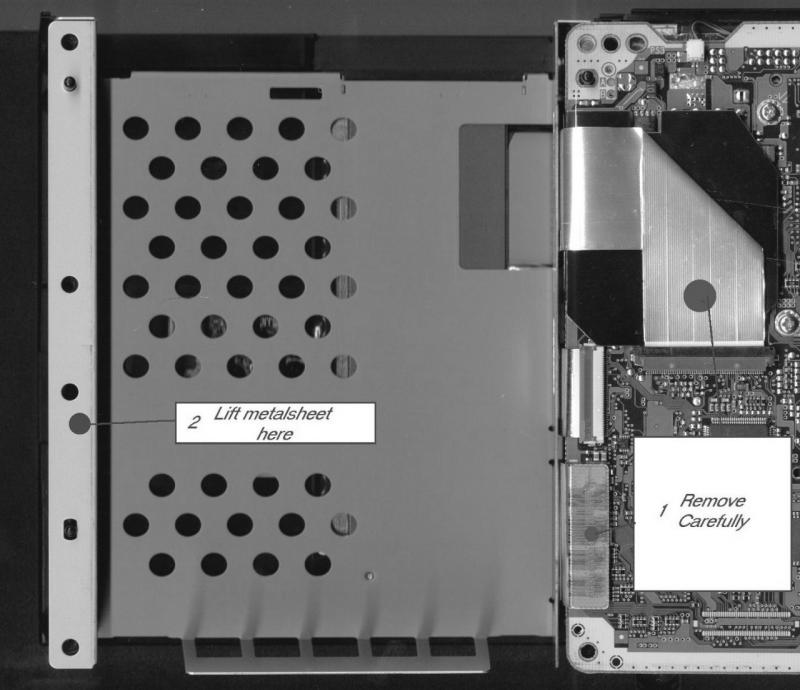
4. Unplug the silver ribbon cable (drive unit connector) and the Expansion Bay connector (Be very careful !!!). Lift off the metalsheet on it ́s left side.

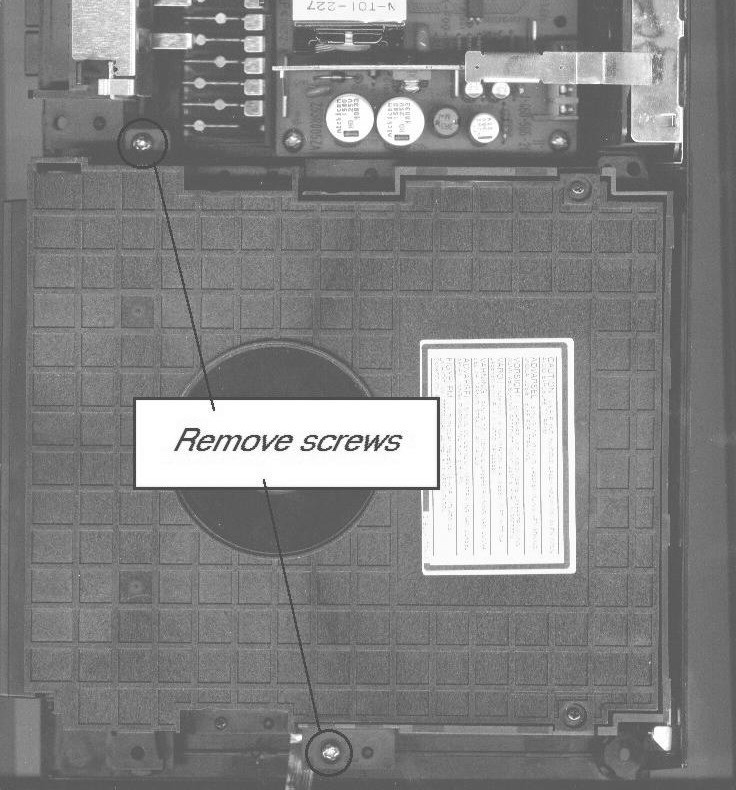
5. Turn the machine around (to top side) and dismount the drive by removing the two screws holding it. Get the drive unit out of the console (make sure you ́ve disconnected it in step 4 !!!)

6. Turn the console again upside down. Lock the black isolation sheet in position with a small strip of power-strip (Tesa) - this is important as the silver ribbon cable is conductive on its surface! Place the drive upsidedown on the Expansion Bay spacers and the mainboard ́s left side. Reconnect the silver ribbon cable.


4. Adjustment
Adjustment ́s basically the same for all model types, only the the testpoints differ.
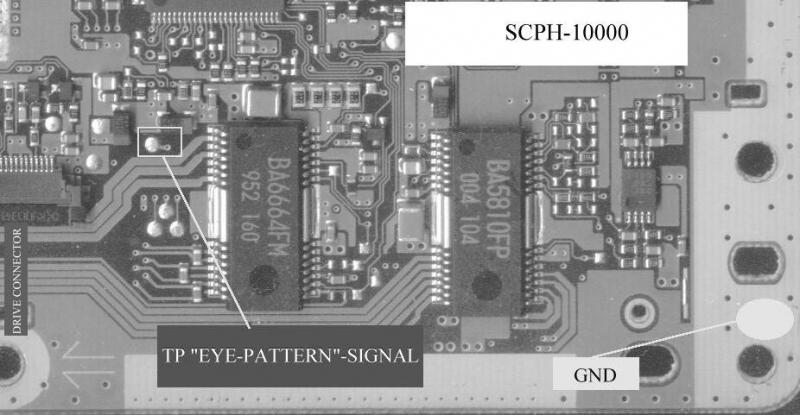
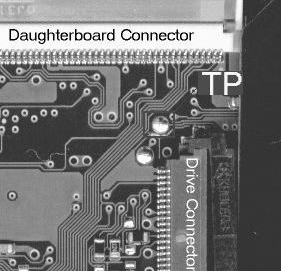
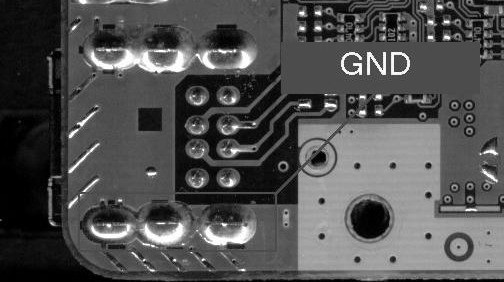
Connect your probe to the TP and GND. I soldered a small piece of wire to the pad and connected the probe via the clamp, this is safe and replaces the „third hand“ you would need to hold the probe while adjusting the laser and holding the drive. Set your oscilloscope to 20 mV/Sect. and 0.2 us/Sect.
SCPH 10000

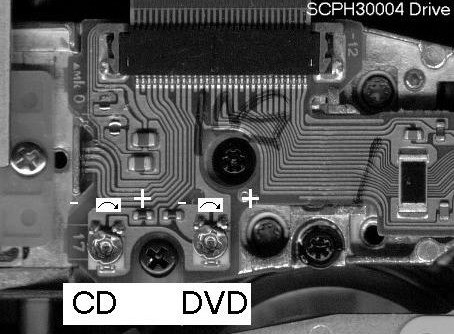
SCPH 30004


Performing the adjustments
Power up the PS2 and insert the PS2 utility disc.
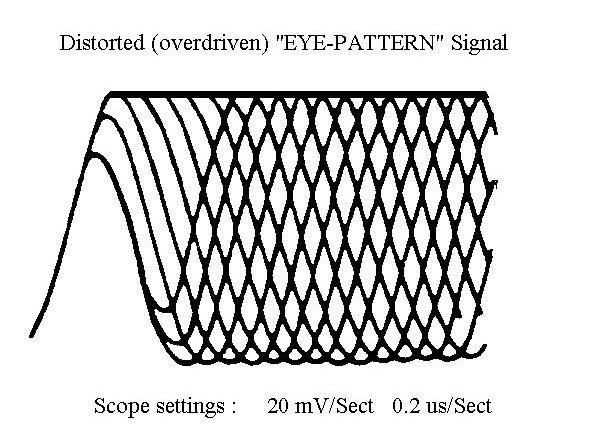
You should now see the „eye-pattern“ signal (as below) on your scope. Wait until the disc is completely booted to get a stable picture on your scope.
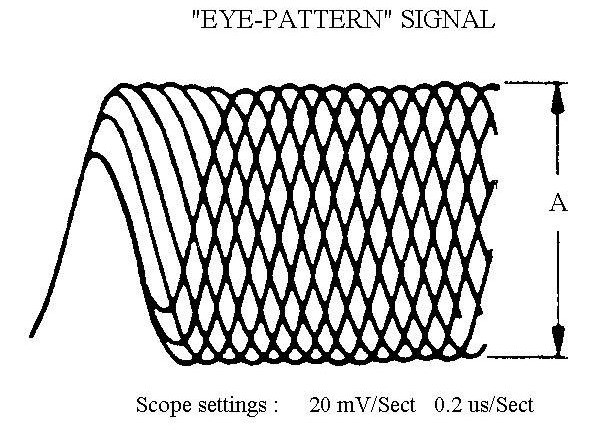

Turn the resistor marked `CD` clockwise until you get the maximum undistorted „eye-pattern“
(if you want more safety and a longer life of your laser then turn back a bit so the laser doesn ́t run at full power).
SCPH 10000


SCPH 30004

If you get a distorted signal just turn back a bit until it becomes stable and clear !

Ok, now the CD section is adjusted so replace the utility/demo CD with the DVD and reset the console. Now do the same adjustments as above but use the variable resistor marked `DVD` this time.
Safe values (tested on Jap model only!) :


4. Document History