“Demo/AR2” or “Demo/GS” Disk Swap Tutorial (part 2)

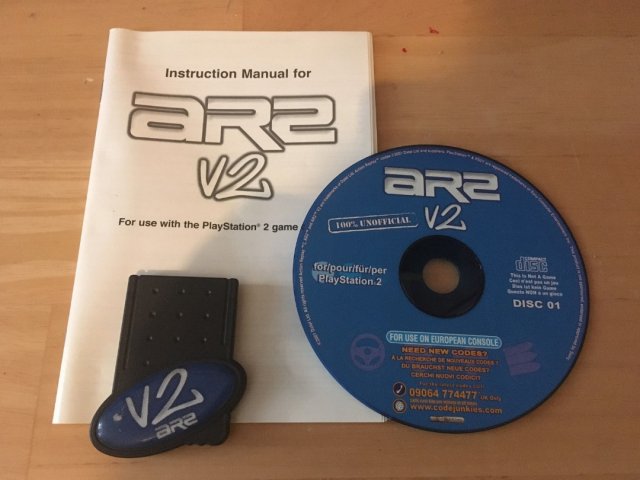
Step 2.
Stop for 5min and have a smoke, drink, some food or even a Wank (My Preference)
Was going to add a PornO here but then this couldn’t be Distributed so your going to have to find your own way of having a toss. Im sure u got some =) .
Step 3.
Ok now we need the files from the Action replay 2 or Game shark, ok now im going to use the AR2 1.7 CD1 Image and then after the GS1.9 CD1 Image first we will do the AR2. =)
This will also have Pictures with info on each step taken on the next few pages
Ok now get your AR2 1.7 image and open it with ISOBUSTER it will look something like this… no actually it will look like this if it doesn’t u got the wrong AR2 Image.
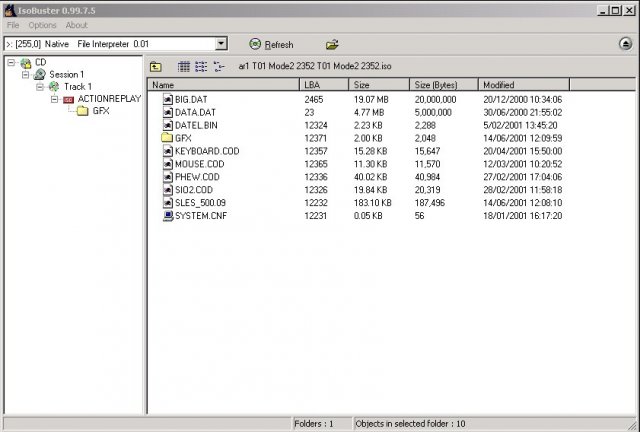
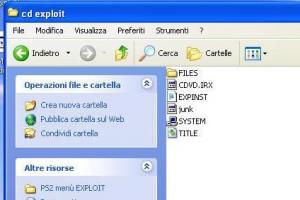
Ok now you need every file here so now go and make a directory something like this C:\2 , now when you have made the directory select all the files and again go to Extract Objects, once you have done that the Browse For Folder window will pop up again, go to C:\ and then to the folder C:\2 or just 2 what ever same thing ok then select the folder and hit ok it will begin to transfer the files to the hard disk. As it is transferring the files you will get a error it will say something like UNREADABLE SECTOR click on Ignore all and then hit the button Ignore and it will continue, that is some kind of gay protection or something I dunno =\ hmmm well it’s a good one easy to get around unlike there new protection Scheme like on the AR2 1.92 GRRR still haven’t been able to do that one as a DEMO/AR2 swap but… will and will follow in the tutorial. Ok now we have got all the files needed to make our DEMO/AR2 BOOT CD but we still need the AR2 image because we need the LBA Positions, the demo LBA I will just tell u but this one I wont so you can sorta see what to do in case u want to make your own after of a different Version of the AR2 and cant get it to work because of the LBA’s of the Files are wrong so this will give you a idea of what to do.
To get the LBA in a text go to the side bar and right click on ACTIONREPLAY then go to Copy Tree Info to File and then the Browse For Folder window will pop up just put it in one of the folders in C:\ either 1 or 2 doesn’t matter and then hit OK. This will copy the LBA info for later.
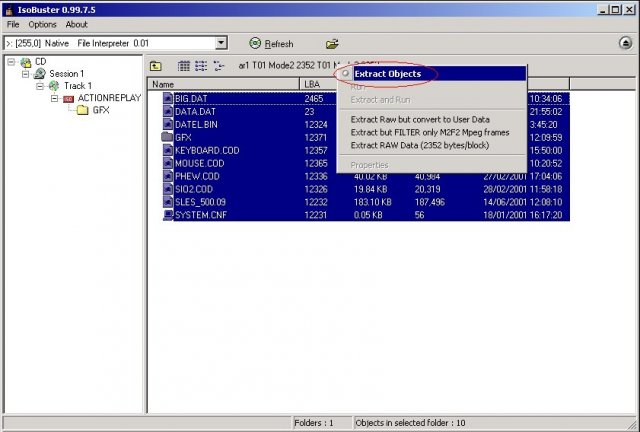
Select all the files and again go to Extract Objects,
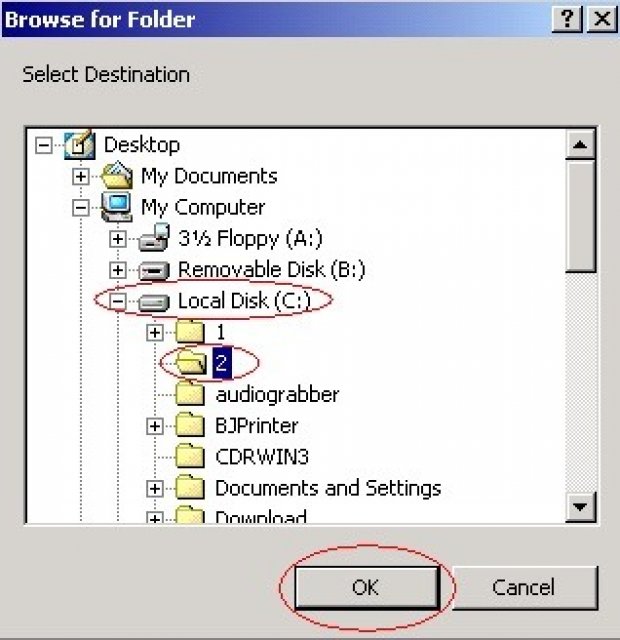
Browse For Folder window will pop up again, go to C:\ and then to the folder 2 then select the folder and hit OK
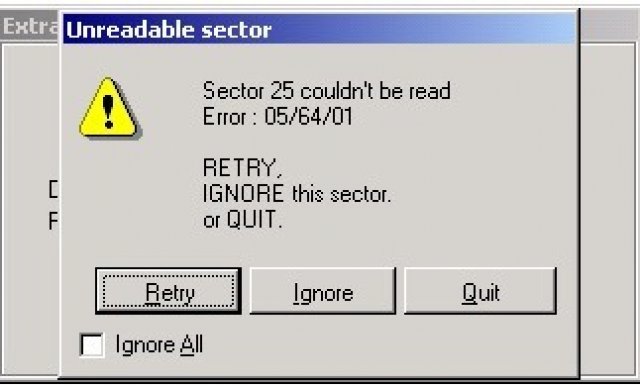
You will get an error it will say something like UNREADABLE SECTOR
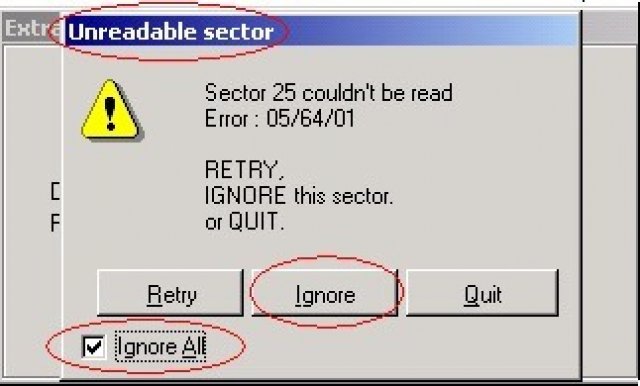
Click on Ignore All and then hit the button Ignore and it will continue
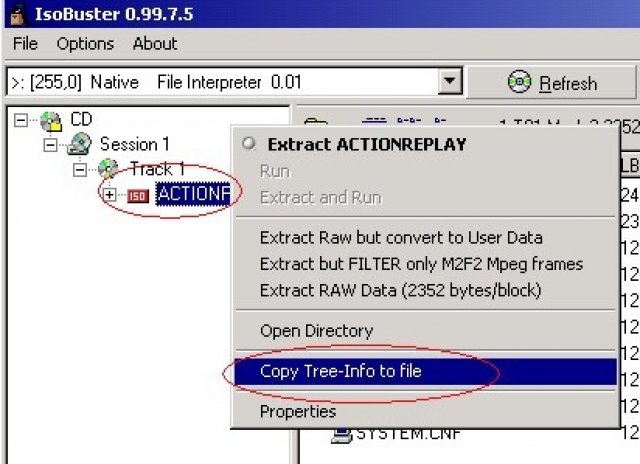
Right click on ACTIONREPLAY then go to Copy Tree Info to File
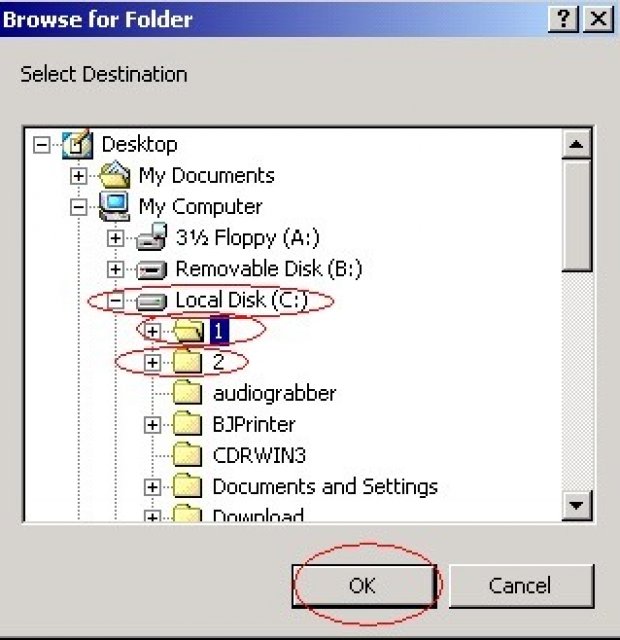
Browse For Folder window will pop up just put it in one of the folders in C:\ either 1 or 2 doesn’t matter. And then hit OK
End of the AR2 File Extraction next Part now =} half way there =} hmmm so now just close ISOBUSTER as we don’t need it anymore and lets get on to STEP 4.
Step 4.
Ok now we are going to use Sony CD/DVD Generator here is a Picture of what it looks like. We will use this to make the Image of the CD that contains the DEMO/AR2 files.
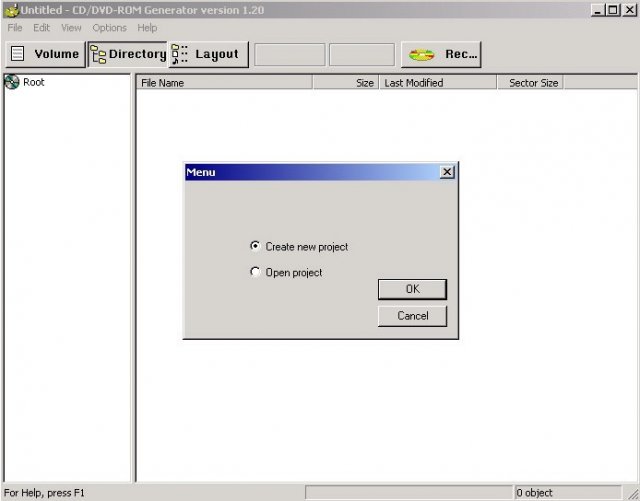
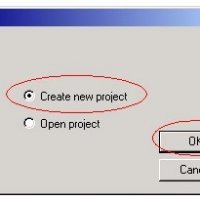
Ok here we go First off we need to select Create New Project so select that on Sony CD\DVD Gen and hit OK then select CD-ROM Master Disk and hit OK, then u get to the Program its self go to the VOLUME Tab, once you have done that go to the Licence Area and select Europe then go to the Disk Name and Put in the name/number what ever u call it of your DEMO CD, NOT your AR2 name/number. In Disk Name at the moment we have PBPX 95205 it’s because I have that Demo CD and that’s what we are going to use to swap it so it has to have the name of the DEMO CD to work. Anyways once you have done that go back to the Directory Tab and we will begin to add the files. Ok now I will show you in Pictures so u people know what to do, then will continue with the next part. These picture steps are all in order.
Here we go !!!


