Copy Link
Add to Bookmark
Report
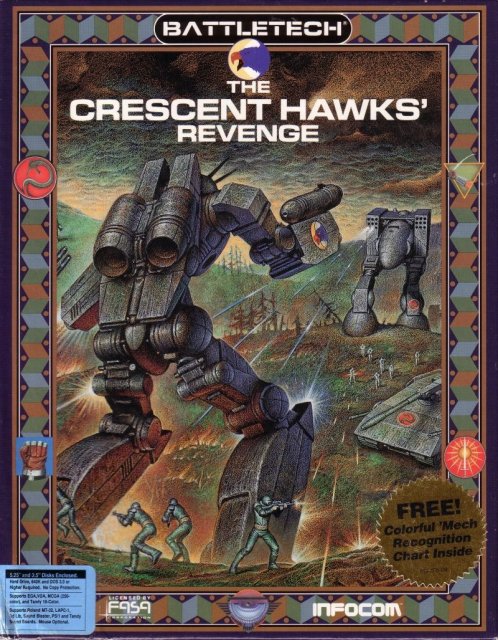
BattleTech: The Crescent Hawks Revenge


BATTLETECH: THE CRESCENT HAWK'S REVENGE

 1 Introduction, Lyons-East,
    Kellhound Base, Lyons-North
 2 Operation: Liberty
 3 Training Grounds, Luthien
    Campaigns, Endgame


 BATTLETECH: THE CRESCENT HAWK'S REVENGE
                  Part 1

 INTRODUCTION

 This version of the BATTLETECH game is much more closely aligned with the FASA
standard BATTLETECH combat system. As with all walkthrus, it is best used as a
reference when you get stuck; however, in BATTLETECH even the right strategy
will not always yield the desired results. So, this is more of a list of
strategies that worked for me but which might need modification to suit your own
needs.

 In many of the scenarios, you will start out with new mechs. Unfortunately, you
will often find there are times when you have to use severely battered mechs,
and you may even have lost some. Now, on to the game.

 Hint: Make photocopies of the maps starting on page 118 so you can plot where
enemy mechs are anytime that the satellite link is active.

 LYONS: EASTERN AREA

 The first thing you will do is select the mechs for your first drop. Grab the
hardest hitting mechs you can -- especially those with good, long-range
capabilities (give Jason the Griffin). The dropship is shot down, two mech
pilots are killed, and you land in the drink with no mechs to use. But there is
a "blind" Jenner being piloted by Grease Anderson; you need it to guide you to a
Locust that is coming in to finish you off. The manual describes an effective
strategy in the Quick-Start section for the first two scenarios.

 The Dragon scenario is tough, and you will need to ensure that you don't go
one-on-one with him. Stick to a close-knit formation and keep your mechs moving
(you can't afford to slug it out).

 The Mobile HQ scenario is tricky as you will need to nail it as soon as
possible because it moves very fast. The HQ starts out just to the north of your
Mech force. So, quickly plot an intercept (using the road where possible). The
Phoenix Hawk, which is pretty fast, is your best bet (.2 MPH faster than the
HQ).

 Engage overburn, but keep an eye on the heat buildup when you get to firing
range. Turn on Fire-At-Will as you close. In addition, get all your other mechs
moving west as fast as they can; there's some heavy-hitting stuff coming
(including Rommel Tanks) from the east, and you need to regroup with the Phoenix
Hawk once the HQ is nailed.

 Another Hint: If you can't get the satellite link to work, there's still the
chance that you can spot enemy mechs by looking for their tracks through woods
and grass!

 THE KELLHOUND BASE

 Here, you receive a couple Urbanmechs which are very slow; so, try to keep them
on the road. Try to keep them on intersections giving you crossfire and good
long-range capability against the short-ranges of infantry and jump troops. The
loader will pick up the ammo from different parts of the base automatically, but
you will need to control it outside the city which is tough: An Assassin mech is
blocking the gates!

 Team up the two urbanmechs and the truck behind the building near the gate
(remember the truck moves fast, so don't get it too far out in front). Move the
mechs to the north of the gate; keep them moving and the Assassin should chase
and overrun you. Put the urbanmechs between him and the gates and get the truck
moving (keep to the road) like the blazes out the gate. You don't need to
destroy the Assassin to complete this scenario.

 LYONS: NORTHERN AREA

 The real trick here is in keeping together and out of sight as long as possible
until you are needed to make your attack, but you need to stay nearby. One good
strategy is to head into the thick, forested area in the center of the map. You
can make quite a lot of undetected movement toward the north in 20 minutes.
Again, there are heavy mechs here, so concentrating your firepower is a must.


 BATTLETECH: THE CRESCENT HAWK'S REVENGE
                  Part 2

 OPERATION: LIBERTY PREPARATIONS

 You can take either of two routes: around the mountain or through the passes. I
would recommend the latter because you are less likely to lose the APCs (needed
for the city scenario). You will run into Rommel tanks and Drillsons -- the most
dangerous foes in this scenario. You will need to keep the heavy mechs out front
and the APCs to the rear. When you clear the mountains (and before you enter the
city), send either a mech or the APC to the northeast: You will find a mech
repair facility, and receive four shiny new Crusaders to attack the city.

 OPERATION: LIBERTY -- THE CITY

 You start just inside the gates and will need to move the APC lance very
quickly to the east. To give yourself more time, immediately set the game speed
to 1. Move the remaining mechs south to the large crossroads, and hold them
there until the APC is clear.

 You will be attacked by a Drillson and some Skulkers. Disable the Drillson as
soon as you can. As soon as an enemy has a movement of "none," move onto another
target, as you can move out of a disabled vehicle's range quite easily. Move
quickly to the prison with the Crusaders (I simply moved the lance target to the
prison gate). Move the APC lance to the east wall, and move them close to the
prison as your mechs are closing.

 About now, I set the speed of the game to 8 and waited until I heard firing,
then I moved the APC lance in. Blast a hole in the wall, move the APC in, get
the prisoners out, and get the heck out of there. Don't bother going after the
infantry; they are in endless supply and only whittle down your Crusaders (you
will need all the firepower you can muster to get out the gate).

 Move the mechs back to the large crossroads and keep the APC nearby. You can
target the APC lance on lighter targets like Skulkers. The tanks guarding the
gate have no long-range firepower and won't budge, so you can pick them off with
relatively light hits, _if_ the infantry isn't in too hot pursuit!

 This is one of the toughest scenarios in the game. Once you have escaped the
city, you have to make a run back through the mountains with whatever mechs you
have left. Unfortunately, there is a Kurita warrior, Chiun, who has sworn to
roast you; the Kurita have planes strafing the roadways, so keep moving.
Interestingly, they are almost single-mindedly after Jason Youngblood, so they
will only shoot at other mechs in passing.

 Move all of your mechs (except Jason's) up the road, and take the first left
turn. Go just a little way off the road to the south, line up your mechs (and
even the APC lance!), and start firing into the forest in different spots to set
fire to it. This will definitely help heat up the enemy mechs and give your
mechs a better shot. After a bit, much of the forest will be ablaze. Cease fire
to cool off, set the speed to none, and your firing instructions to "fire at
will."

 Meanwhile, Jason's mech should move northwest a little way from the gate and
wait by the lake. As soon as the enemy mechs clear the burning trees, they will
come after you. Move west to the mountain's edge, then north to put the forest
between you and the enemy lance. Follow the enemy mechs with your remaining
force (the enemy won't be firing much), and fire defensively (or target bits of
forest in their path -- they're still only after Jason and won't deviate). I
even set the APC lance to fire-at-will (they took out an Archer) and they didn't
get scratched.

 Even if one mech breaks free, provided Jason's mech is in relatively good
shape, he should be able to finish it off. Regroup both lances, and send the
Crusaders round the mountain. Meanwhile, send your mech and the APC at full
speed through the mountain passes, and you should not meet any resistance until
you clear the opening at the other end. Wait just inside until your other mechs
arrive. Your mechs should meet a Rommel tank and a Drillson or two at the
northern entrance to the mountain (they would've come in after you). Because
they are in a line, advance slowly and concentrate your firepower on the nearest
vehicle (again, if you disable a vehicle, move on to the next).

 Finally, the mech will meet a couple of Rommels and a Galleon or two. Draw them
off and they will follow; meanwhile you can make a dash for the dropship
coordinates and wipe the sweat from your brow! Don't be surprised if you lose a
mech or two in this scenario!


 BATTLETECH: THE CRESCENT HAWK'S REVENGE
                  Part 3

 THE TRAINING GROUNDS

 The training grounds are relatively straightforward but give you a taste of
using the satellite link and artillery: Use it as much as you can.

 On the assault session, hold your mechs back in a concentrated large formation
to the south of the target. Shell the heck out of the target area where four
heavy mechs should be sitting ducks (why get shot at yourself?); you might
actually destroy one with shelling, but you will certainly make some dents in
them. With about three minutes to the deadline, make a rush at the target area
(don't forget to turn the shelling off).

 Use the same strategy with the "defend position" scenario. Shell the oncoming
mechs and look out for stationary reserves: They're easy pickings. Again, if you
lose the link, look for footprints and water ripples, and shell them instead.
Rolling barrages are good for troops on the move. But just make sure you keep it
coming!

 LUTHIEN CAMPAIGNS

 Again, where possible, go for the heavy hitting, long-range mechs, and
especially the upgraded mechs. Make sure Jason is in something with lots of
armor.

 Do stop and help the locals at the first jump-point. If nothing else, it will
raise the skill level, and in the "protect the city" scenario, your mechs will
be repaired for you.

 In the first scenario, just keep your mechs in a tight formation, concentrate
long-range firepower, and you can pick off the enemy (they seem to attack in
columns).

 In the city scenario, use the satellite link, and set up a strafing run on the
heavy mechs near the gate. Move your fire lance quickly down the wide street,
and have them set up shop on the far side of town (stop strafing when your fire
lance nears the fire line or you'll get hit, since strafing a point actually
strafes two lines that cross at that coordinate!). Send your scout mechs up
north to keep an eye out for flankers, then move them in behind the enemy. Move
the heavy mechs in, set them up about one-third of the way in, and you can catch
the enemy in a crossfire. Having beaten the Clan, you will get your mechs
repaired by a grateful city.

 The Luthien Campaigns can only be won by continual strafing, shelling, working
at long-range concentrating firepower, and keeping your mechs out of firefights
as much as possible. The mountainous terrain is ideal since the enemy is
channeled down passes which can be easily strafed and/or shelled.

 In one of the most difficult Luthien Campaigns, you will come across Elementals
-- nasty things; they're slow, but devastating at short range. They appear at
the northeast, so strafe the heck out of that area. Move your mechs so that you
can get your long-range weapons working to your best advantage: Avoid close
combat at all costs.

 ENDGAME

 The final scenario involves destroying the Clan Galaxy Commander's mech. You
will need to move your mechs immediately north and locate them about two-thirds
of the way up the map. Strafe the central corridor until you have nailed a puma
or two. After a while, try crossing the corrider around the south of a building
(roughly in the center of the map): There are four Madcats waiting there. Wait
for the remaining Pumas and nail them when they emerge from the passes (don't
move, they'll come to you). Immediately move west at top speed and get your
mechs to a storage building (you protected this in an earlier scenario).
Somewhere along the way you will be told that the Galaxy commander is in the
area (four more Madcats). Remember to turn off the strafing as you cross the
line of fire; turn it back on again when you are clear! Stake out the area south
of the grassy/forest peninsula and wait. You might want to strafe the oncoming
Madcats if you get a satellite link (move your mechs to one side first).

 Other than that, try different strategies/equipment mixes; this is a very good
tactical implementation of BATTLETECH. Of course, you will still need luck, so
good luck!

 BATTLETECH: THE CRESCENT HAWK'S REVENGE is published by Infocom and distributed
by Mediagenic.


