Champions of Krynn (Walkthrough)

CHAMPIONS OF KRYNN: Part 1
INTRODUCTION
This walkthrough for CHAMPIONS OF KRYNN is divided into several parts:
"Basic Training" is intended for people who are not familiar with the AD&D system or SSI's implementation of it. It has basic game mechanics information for the inexperienced, but also offers some specific information about KRYNN that is unique to the game for veterans of POOL OF RADIANCE and CURSE OF THE AZURE BONDS.
"Active Duty" is the actual walkthrough but it's presented as hints rather than a detailed solution.
"Intelligence Reports" contains all the details that are normally in a walkthrough. For example, the Throtl section in "Active Duty" hints at where Caramon can be found, while the Throtl section in "Intelligence Reports" gives the precise location.
"IBM Version Notes" contains machine-specific information for the IBM version of the game.
CHAMPIONS OF KRYNN: Part 2
BASIC TRAINING
The proper party composition is important to winning KRYNN. The following is a good combination for a beginner:
- 2 knights
- 2 fighter/mages
- 1 cleric of Majere
- 1 cleric/thief of Mishakal
One of the mages should be a White (Good) mage, and the other should be a Red (Neutral) mage. There are two reasons for having Red and White mages. Certain spells are only available to Red mages, while others are only available to White mages. The phases of the Red and White moons are different and affect the mages' abilities. You have a better chance of at least one mage having a rising moon helping him out if you have a mage of each color. Pure mages will have a hard time in this game. They cannot wear armor and there are few non-armor protection such as Rings of Protection for them to wear. Fighter/mages can wear any armor and use any weapon a fighter can use. Elves make good fighter/mages and should be equipped with bows and stationed in the rear ranks where they can use the bows and cast spells with minimal hindrance.
You need at least one knight, as there is a mission that can only be done if you have a knight in your party. You can substitute a regular fighter or ranger for the second knight, but there is an advantage to having two knights (as will be shown later). The knights start out in the Order of the Crown and should petition for transfer to the Order of the Sword when they have enough experience points to become 6th level Knights of the Sword. The reason is the cleric spells they can then cast. You can never have too many Cure Light Wounds spellcasters in your party.
A cleric of Majere is very useful in this game, as you will encounter many Undead. A cleric of Mishakal is very useful for the bonus spells, but the second cleric can be of any other god.
You only need one thief. Since the situations where thieving skills are needed are few, you only need a part-time thief. Full-time thieves also have a difficulty in this game as there is no magical leather armor. Thieves are almost as hard as mages to protect because of the restricted range of armor they can wear.
A kender is useful because his Yell gives you the effect of always having a Prayer spell ready. However, kenders don't make good fighters because of their small size and low strength. This also makes them very vulnerable to spellcasters who will cast their spells at the kender if they are affected by his yell. It is best, if you decide to have a kender in your party, to make him one of the clerics. The cleric/thief would be very appropriate. Kenders are also the only race which has no penalty for being female. The SSI implementation of AD&D is very biased in favor of male-only parties. Human clerics and mages are the only other female characters that do not suffer a strength penalty compared to males.
Dwarves, elves, and kenders are useful as characters because of their magic resistance. You will face a large number of enemy spellcasters, and you will not always be able to stop them from casting their spells.
When Creating your characters, the only variable that counts is the number of steel coins they initially have. All the other attributes can be Modified before starting the game. It is very worthwhile to modify your characters' attributes for the game. All characters should have their Strength, Dexterity, Constitution, and Hitpoints changed to the maximum possible. Clerics should have their Wisdom changed to the maximum possible. Mages should have their Intelligence changed to the maximum possible. At least one character should have his Charisma changed to the maximum possible. There is one situation in which that is needed. The knights should have their Intelligence changed to at least 10 and Wisdom to at least 13. Otherwise you can leave the attributes at whatever value they had at creation.
Except for the mages, the alignment of your character is not relevant in this game.
Your knights come with plate mail, shield, and a long sword, but everyone else needs to be equipped at the Armory. Initially, you will not have enough money to properly equip everyone in your party. Buy a second long sword for the knights. Buy shields for everyone without one. Buy ring mail, a mace, and a staff sling for your clerics. The cleric thief can use a long sword instead of a mace, but a mace is cheaper. Equip any kender you have with a hoopak. Your fighter/mages should be equipped with bows and arrows and maybe a long sword (if you have the money). Buy as many arrows as possible. You will find very few arrows as loot. Each archer should have somewhere between 100 and 200 arrows. Otherwise, there is a good chance you will run out of arrows at a most inopportune time.
As soon as you can, upgrade everyone's armor. Looting the enemy dead is the best way to do this, and is the only way to get magical armor and weapons. The thief is the only character whose armor has to be carefully chosen. Thieves cannot wear heavy armor and retain their thieving functions. Fighter/thieves have no such restriction. One way around this restriction is to have a pure thief wear Bracers and Rings of Protection. However, if you have a pure mage, reserve the bracers for him. Eventually, everyone should have at least two melee weapons and some sort of missile weapon. The front-line fighters should have three melee weapons. The reason is obvious when you fight the Baaz.
The Adventurers' Journal has a good summary chart of the weapons and armor, but it does not explain everything you need to know. There are no long bows, but there are composite long bows. The difference between the short and long bow is range (logically, the long bow has a longer range). Non-armor protection that is not listed in the Journal exits. Bracers are magical items that act like heavy armor, but weigh only as much as leather armor. Bracers have an AC associated with them. For example, Bracers AC 6 provide the same protection as scale armor, which is also AC 6. Rings of Protection decrease the AC of any bracer or _non-magical_ armor your character is wearing. (In AD&D, the lower the AC the better the protection.) For example, a Ring of Protection +1 will change Plate armor from AC 3 to AC 2 when it is Ready. (Confusing, isn't it?) A Cloak of Displacement reduces the AC by 2.
Various magical weapons are available. They act just like regular weapons, but you are more likely to score a hit with them than with regular weapons. Magical weapons have a plus number such as Long Sword +1. The higher the plus number, the better the weapon. Some magical weapons are plus only against specific targets. One such weapon is the Long Sword +4 VS Reptiles. This means the sword is a Long Sword +1 except against reptiles (draconians and dragons), where they act like a Long Sword +4.
Bows need Ready arrows, but slings, staff slings, and hoopaks have unlimited ammunition. They throw rocks, and the presumption is your characters can always find rocks anywhere. Rocks thrown by a magical sling, staff sling, or hoopak are magical. This is of little importance, but some monsters can only be hit with magical weapons. Magical arrows are also available. Magical arrows are differentiated from each other by their source. So, if you have two bundles of Arrows +1 and they will not Join together into one bundle, they are from two sources.
The important thing to remember about missile weapons is your character cannot use them if there is an enemy next to the character. That's the main reason your archers and slingers should always be in the rear ranks -- to minimize the chance that an enemy will end up next to them. No computer-controlled character will ever walk past a live enemy. This is because the enemy gets a free hit at the character. However, you can move a character past a live enemy. One reason is to get into the back ranks to attack enemy spellcasters. Sometimes this is worth the hit.
The order of your characters in the party is important. In combat, the first three characters are always placed in the first rank and the rest in last rank. If there are seven or eight members in the party (which is possible if you have Non-Player Characters in the party), the first four go in the first rank. Keep your best fighters in the front rank, as they will take the brunt of the attack. Make sure they have the best armor. However, given the party composition above, you normally only have two full-time fighters. You want your fighter/mages in the rear so they can cast spells. This means putting the cleric or cleric/thief in the front.
Here are some general tactical tips:
Quickly learn what the enemy spellcasters look like. Concentrate on killing them first. Above all, prevent them from casting a spell. Combat is done in rounds. Spells can be cast once per round. If you wound a spellcaster before he can cast a spell, he cannot cast one until the next round. If you wound him again in the next round and the next and so on until he is killed, you can prevent him from casting anything. Magic spells are the key to winning the battles, and you want to cast all you can while preventing the enemy from casting any. Casting certain spells takes time, and you can interrupt the casting by wounding the caster during that time period. In this game, you are told someone is casting; you can see who by targeting the spellcasters.
Certain spells can make your enemy "invisible." You can actually see them, but you cannot Target them. The key is to Move into their square. The presumption is you have targeted them by feel. This does require that you attack them with a contact (or melee) weapon such as a sword.
There are many spells, but some are more useful than others.
Sleep works quite well, but anyone who is level 5 or higher is immune from this spell. It is a very useful spell early in the game, but is useless later. The spell affects everyone in and next to the target square.
Another very useful spell is Stinking Cloud. It affects everyone except the Undead, although high-level characters have some immunity to it. The spell creates a 2 square by 2 square stinking cloud. You target the upper left corner of this square.
Charm Person can turn an enemy into an ally. It works only on humans and elves. The other side can cast Charm Person on your characters as well.
Hold Person is the best cleric combat spell, but it is only effective on humans and elves.
Charm Person and Hold Person are favorite spells of evil spellcasters. Dispel Magic will uncharm your characters and release them from a Hold Person spell. It is a good idea to have at least two Dispel Magic spells ready at all times. You can also Charm back someone who has been charmed, but your character will fight as an NPC for the duration of the battle. There is another way to uncharm your characters: Kill them and then Bandage them _before_ the battle ends. Continue the battle if you have to. They become automatically uncharmed at the end of the battle. You can then heal them back to full strength.
Silence 15' Radius is a good cleric defensive spell. It prevents spellcasters from casting a spell as they cannot chant the necessary words. It also affects any other spellcaster next to the target. This spell can take out all the spellcasters on the other side (under the right circumstances). This is also a bonus spell for a cleric of Majere, and is another reason for having one in your party.
Bless, Prayer, and Protection from Evil 10' Radius are also good defensive spells. Bless is best cast _before_ going into battle, as everyone is Blessed then. If cast in combat, only the target character is Blessed and only if he is not in contact with an enemy. All these protection spells should be cast before combat as casting a spell uses a turn in combat that could be used for something more useful like killing monsters. Protection from Evil only protects the target, while Protection from Evil 10' Radius protects the target and anyone next to him. So, it is better to use the 10' version.
Magic Missile is a good combat spell whose power increases with the level of the caster.
Fireball is _the_ offensive spell, and is the whole reason for having mages. They burn _everyone_ within a three-square radius of the target square. The best way to target it is find the closest square to your party, count off three squares, and target that one. You can turn your enemies into crispy critters without singeing a hair on your characters.
Ice storm is the cold version of Fireball, and is only a two-square radius spell. It is useful indoors when you cannot target a square far enough to avoid burning your own characters with a Fireball spell.
Lighting Bolt is of limited usefulness, although when the conditions are right, it can be very devastating.
Detect Magic is a useful spell to have ready at all times. It is how you find magical items. When you are in the Loot menu, the command Detect appears if the highlighted character has a Detect Magic ready. Hitting D for Detect casts the spell, and any magical item is marked with an asterisk. If you do not have a Detect Magic spell ready, but suspect there are magical items, pick up everything you can. Memorize and cast Detect Magic later to find the magical items. Detect Magic affects all magical items carried by all members of the party. Detect Magic will _not_ tell you if a magical item is cursed. There is one cursed item in the game. It also cannot tell exactly what the magical item is. For that you have to go to an Armory or Magic Shop and have the item ID'ed for 100 steel coins. There are very few magical items in this game, so it is very important to find the few that exist. In general, combat with ordinary soldiers will not yield magical items, but high commanders often have magical items. Treasure troves often have magical items.
Wands have a limited number of charges and disappear when they are used up. There is no way to determine the charges in a wand.
Beware of Auraks. They are powerful spellcasters with an invisibility spell on at all times. They also take several turns to die when killed and will attack during their death frenzy. They can also rise from the dead once. The best way to handle them is to kill everyone else and have your characters run away until the Aurak finally dies.
In the previous games, the only way to gain experience points was to kill monsters and find treasures. In KRYNN, you can also gain experience points by doing the right thing at the right time. Listening to the enemy before attacking to learn their plans, rescuing good dragon eggs, etc. will all earn experience points. The amount is never indicated. You can only find out how many experience points your characters got by checking their experience points before and afterwards. In many cases, the points are very substantial.
In the beginning, check your characters' experience points frequently. Promotions come fast in the beginning, and you will need all the Hitpoints and increased THAC0's that come with higher levels. Most of the time, you can leave an area to go to a training hall and resume where you left off. The game is event-driven, so you can take all the time you need to complete most missions.
Finding places to Rest is very important, as that is how you heal your characters and memorize more spells. The program will explicitly tell you if a place is safe to rest. However, some places are only relatively safe. Read the messages carefully. There are also hints as to whether the place is truly or only relatively safe. Fortunately, most of the time you can rest for brief periods just about anywhere. If you get interrupted, try again. You will usually succeed the second time. There are several places where you cannot rest at all. The only thing you can do in such a place is move on.
You're often given a choice of action. In many cases, some of the choices are obviously bad choices. You can take them and then discover the choices are as bad as they seem. The game gives you many opportunities to fall on your own sword as a result of a bad judgment.
CHAMPIONS OF KRYNN: Part 3
ACTIVE DUTY
After equipping your characters at the Armory, check into the Inn to memorize spells. Before going to the Commandant's office to get your orders, have some drinks at the bar. You will get several Tavern Tales that indicate what everyone believes to be the current state of affairs. This sets the stage for what you will find when you go out on patrol. Your first assignment will be to patrol Throtl and take care of any hobgoblin bands that are still around. What you will find are draconians! After you kill them, escort the women and children to the outpost and report to the commandant. This triggers an interesting sequence that sends you back to Throtl to find Caramon, who is also in Throtl. At this point, the game starts in earnest.
THROTL
Throtl is a 16 by 16 maze. The Area command is available.
After defeating the Hobgoblins guarding the entrance (your first big battle), explore the southeast quarter first to determine Caramon's fate. Then proceed up the north/south corridor that runs through the middle of Throtl to the north end of town, and explore the northwest quarter. This will set up an encounter with someone who claims to be one of Caramon's soldiers but is not. This will also set up encounters with two friendly NPCs (Kildirf and Strangbourn), who you can add to your party. Once you have them, you can search for Caramon in earnest.
The priest is in the southwest corner, but will be there only after you rescue Caramon.
After getting the key from the priest, search the north/south corridor for the secret entrance to the temple. The temple is in the middle of the northeast quarter. However, there are several side encounters in that quarter you might want to look for just for the experience. After you bust up the evil clerics, some will escape with dragon eggs. They will flee to the northwest of the temple to the entrance to an underground maze. There is no Area command in this maze, but the first part is fairly straightforward. It runs east/west. There are two treasure rooms in this portion of the maze.
This long tunnel eventually ends at a cave complex where you can get lost, so save before entering it. The Area command is also not available in the cave, but the game will tell you in what direction to go to follow the fleeing hobgoblins. At the far end of the cave, you will finally catch up with the fleeing hobgoblins and three white dragons, as well. Good luck with that fight. A save before starting the battle is recommended. After taking on the remnants of the hobgoblins, you can take the exit and return to the outpost.
GARGATH
Gargath has two parts: the town and the keep. The town is a 16 by 16 maze, and the Area command is available. The Area command is not available in the keep, but you should have found a map to it at Throtl in the underground maze. The two-handed sword you will find in the keep is cursed.
The best way to get into Gargath is Bluff your way in, but have someone with a high charisma do the talking. There are two sets of guards at the gate: one on the ground and one on the wall above the gate. You only have to fight your way past the ones on the ground, but if you want to eliminate the ones above, there are stairs to the wall to the east and west.
Once inside, you will be met by Sir Karl's agent, who will give you disguises and explain the situation. Before trying to penetrate the keep, search the town. There is a group of commanders who have a map showing the secret doors in the wooden structure and who also have some magical weapons and armor. Once you fight your way into the wooden structure, you will have to explicitly LOOK to find the hidden doors, even though you know where they are.
It is worthwhile searching the first floor to find the back exit before going upstairs. On the second floor, look for the imprisoned castellan. He will tell you where to look for the Dragonlance.
On the fourth floor, there is an amusing side encounter. Look for the gambling guards and join them first before attacking them.
On the 6th floor is Myrtani. You will chase him up the tower and there will be a climatic battle at the top. A save is strongly recommended before going to the top.
You will not be able to retrieve the stolen Dragonlance at this point, so after the battle go back downstairs and exit by the secret exit you should have found earlier. Return to the outpost. This is also a good time to check if your characters can train to a new level.
INTERLUDE
About this time, you will be asked by Sir Karl to go to Jelek and get him a silver rose. For several reasons, this is worth doing immediately. You will find a magic shop where you can buy some nice items such as arrows +1, Potions of Extra Healing, and Wands of Magic Missiles. There is also an armory where you can buy better weapons. You will also find Skyla, who will play an important role near the end. Finding the rose will set the stage for an interesting side story concerning Sir Karl and Maya. This story is irrelevant to the main story, but it adds a nice touch to the game if you participate in it.
At outpost 2, you will get orders about Sir Dargaard's tomb, outpost 3, and the ogre camp. As long as you do these missions before going to Sanction, it is not important when you do them (but they should be done).
Sometime before Sanction, Sir Karl will be kidnapped. Once this happens, do _not_ visit the Commandant. This triggers the side story involving Sir Karl and Maya. You get only one chance to participate. If you are not ready, you can avoid starting the sequence by not going into the Commandant's office.
JELEK
Jelek is a 16 by 16 maze and the Area command is available.
You will meet Skyla at Jelek. Explore the town with him. Have fun. After Skyla leaves you, you will meet Mysellia. She is a good NPC to add to the party. Help her explore the graveyard, but first talk to the grave digger whose hut is just outside the gate to the cemetery. The silver rose you want is at the northwest corner of the graveyard. Beware of the dragons guarding the rose bush. The building there has treasures and a back exit from Jelek. Mysellia will leave the party when you leave Jelek. Other than meeting Skyla, Mysellia, and getting the silver rose, there is nothing else to do in Jelek. Jelek is worth going back to periodically to buy stuff from the magic shop.
SIR DARGAARD'S TOMB
The tomb is a 16 by 16 maze. The Area command is available.
This is the one mission where you must have a knight to complete. This mission is also why you should have gone to Jelek first. You cannot rest in the tomb until you have accomplished the mission. The Potions of Extra Healing from the Jelek magic shop will come in real handy here. You will not have enough Cure Wounds spells to complete this mission. To use the potions, just Ready it and Use it. Each potion can be used 3 times and acts just like a Cure Light Wounds spell.
Sir Dargaard's tomb is in the southeast quarter, but you cannot enter it until your knight has completed the three trials of honor, battle, and fear.
You can do the tests in any order, but the best order is battle, fear, and honor. To start the trial of battle, go west from the entrance and go through the south door. To start the trial of fear, go east from the entrance. To start the trial of honor, go north from the entrance. The trials are fairly easy as long as you remember that your knight is a fearless and honorable man who never shirks from a fight against evil and will give anything he has to fight evil. There are treasure rooms in the northwest quarter, but you cannot touch them. Once you have completed the trials, you can enter Sir Dargaard's tomb and receive his treasures. This will consist of six sets of Solamnic armor, a magical long sword, and a girdle of giant strength. The Solamnic armor is the best armor you will find in the game, but can only be worn by a knight. This is the reason for having all your fighters be knights. The girdle increases the wearer's strength to 21.
After getting the items, you can rest. This is highly recommended as you will encounter draconians on the way out.
THE OGRE CAMP
The ogre camp is a 16 by 16 maze. The Area command is available.
Immediately to the north of the entrance is a room containing an old ogre. Talk to him. He will tell you the situation in the camp and a secret password to get the ogre patrols to leave you alone. Except for the old ogre, none of the rooms outside the ogre mansion has anything.
The first step is to find Morog's quarters. The old ogre will tell you approximately where it is. The next step is to find and kill the assassins. They are located in the northwest corner of the mansion. Save before entering the assassins' room. This is a tough battle. You will meet your first Aurak in this battle. Read the paragraph in BASIC TRAINING to find out how to handle an Aurak.
Afterwards, find the ogre meeting in the center room of the mansion. You now have all the evidence to expose Morog's treachery. After killing Morog, the ogre chief will proposed an alliance. Accept it. Otherwise the final battle will be much, much harder and you will also lose the opportunity to get some easy experience points.
OUTPOST 3
The key to solving the mystery at outpost 3 is to rest in the Inn at the outpost. Once you know what is really going on, find the back entrance to the jail. There you will find the information you need to end the menace. Once you rescue the children, go back to the jail and the uprising will start. You will have to find the renegade commander in the commandant's office. You will also have to fight the dragon in the room north of the commandant's office. Again Save the game before going in.
NERAKA
Neraka is a 16 by 16 maze. The Area command is available.
There are two ways to enter Neraka, by yourself and with Maya. When you visit the commandant's office after Sir Karl is kidnaped, Maya will meet you outside when you leave. She will ask you to help her rescue Sir Karl. If you say no, you will miss an interesting love story.
If you say yes, she will take your party to Neraka. This is automatically done. You cannot back out once you have said yes. The first door to the south leads to the secret base. There are many side encounters in the base, but the only required one is to the south and west. That's where you will find Sir Karl. Maya will leave with Sir Karl's body. You now have to rescue the prisoners.
Once you enter the prison area, the door to the west leads to some prisoners being tortured. The doors to the east lead to some empty cells (but check them out anyway for more on Maya and Sir Karl's love affair) and more prisoners to be rescued. After freeing all the prisoners, kill the Prison Lord to the southwest. You can then leave by the back entrance in that area. Save before leaving the Prison Lord's room. You will encounter more dragons.
If you enter Neraka by yourself, you will enter at the extreme northwest corner. There are draconians to be cleared and prisoners to be rescued there as well, but this mission is optional and you can only stumble upon it yourself. No one will tell you about it.
SANCTION
Sanction has three parts. Each is a 16 by 16 maze and the Area command is available in all of them. The three parts are Sanction itself, the Huerzyd Temple, and the Duerghast Temple. The temples will be a little confusing. That's because part of what you see in the temples with the Area command is _not_ part of either temple, but an underground maze that is separate from but connected to the temples. They are how you will get into the temples. Because the underground is separate, many rooms in the underground that look like they are connect to rooms in the temples are not really connected. Instead, the exits and entrances from the underground will lead to totally different rooms in the temples. That is why you will go up a stair and find yourself somewhere other than where you might expect from the Area command.
Sanction is also a two-part mission, and the second part sets the end game in motion. Once that happens, you have no choice but to play the endgame...so be prepared.
The first part is to clear Sanction itself. Take out the Minotaur guards at the piers in the west side of town. There is one other fixed encounter with Minotaurs at the Tavern and a fixed encounter with mercenaries in the middle of town. There will be an endless number of random encounters with both minotaurs and mercenaries. There is only one safe place to Rest in Sanction, and that is the Inn in the southeast corner of town. However, the trigger for the second part of the Sanction mission is also in that Inn. Avoid the north room until you are ready.
Explore the east side of Sanction. You will find a Training Hall in the northeast corner. There is also an armory and a magic shop on the east side. The magic missiles wands there are not worth buying, but the arrows +1 are real cheap. Beware that the shop sells Potions of Healing. These only work once, unlike Potions of Extra Healing. You will find bridges to the temples. Do _not_ use them. You cannot get across on them.
There is a treasure trove in the south side of Sanction.
When you are ready, kill the recruiters in the north room of the Inn. When you leave the Inn, you will hear a woman scream towards the west. Go back to the waterfront and walk by the piers to locate the woman. Rescue her. She will tell you of a secret way into the temples. This is the beginning of the second part of the Sanction mission.
HUERZYD
The secret passage way will take you into the Huerzyd Temple. There are four treasure troves in the temple. There are also passages back to Sanction at the south end, but you do not want to take those. You want to explore the rooms at the northeast end of the temple. After fighting a battle, the Shadowpeople will contact you there.
You must first meet the Shadowpeople's conclave, and then talk to their wise one. You cannot rest in the Shadowpeople's area except in the one designated room. They will show you the secret entrance to Duerghast Temple. You should be able to locate the Dragonlance with little trouble with the map from the Shadowpeople.
DUERGHAST
The trip to the location of the Dragonlance is also when you first meet Skeletal knights. These Undead require a really high level cleric to turn. Unless you have a level 8 cleric of Majere it is not worth while to try to Turn them.
After recovering the Dragonlance, proceed west to exit. You will end up in the northeastern section of the Duerghast Temple as you were still in the tunnels under the Temple. Directly south of where you exited the tunnels are some rooms you want to explore. In one of them, you will find Skyla again. By this time, you want very much to meet Skyla again. Check the room within that room after the battle. South of where you found Skyla, you will find a fighter who has something you want. That will lead you to the southwest corner of the temple where you will find more dragons and an exit back to Sanction.
At this point, you probably want to return to Sanction to ID the items you have found, train, and get supplies for the endgame. You can now use the bridges between Sanction and the temples.
Return to Duerghast and go to the arena in the northwest corner. There are undead in the arena you want to kill. On the way out, check the rooms to either side of the arena entrance. There are stairs there. You can take either one. Sir Lebaum is waiting for you up there. Good luck. This is another one of those tough battles.
After you defeat Sir Lebaum, a messenger will flee the scene. Follow him south from the arena. You will fight some more dragons. You will get two wands from the battle with Sir Lebaum. You will not have time to ID them, but one is a Wand of Paralyzation and the other is a Wand of Lighting,
The battle with the dragons starts the endgame. From this point on, the game forces you to advance onward to the Final Battle. After the battle, you will meet Tasselhoff Burrfoot, who will lead you in an assault on a floating castle. This is the beginning of the Kernen sequence.
KERNEN (ENDGAME)
The first step towards the Final Battle is to capture an enemy floating castle. The Area command will not be available until you land at Kernen, but the game gives you explicit directions (most of the time), so you should not become lost.
When you land on the castle, there is a stairway to the right. You then fight a long sequence up the castle tower. You can Rest after taking the control tower. To start the next sequence, move after you have rested. Once the tower crashes, you have to get down from the tower. You cannot rest until then. Move west along the walls, and you will eventually spot a stairway down.
On the first floor down, go south and then west at the first cross corridor. There is a room with treasure elsewhere on that floor (if you want to risk getting lost). On the second floor down, go east to find the stairs. On the third floor down, go south to find a dragon who will fly you to safety, but first kill some guards and don their clothing. The dragon will fly you to Kernen.
Kernen is a 16 by 16 square maze. The Area command is available.
Once in Kernen, you can wander around safely as you are still in disguise. (Actually there is something you can do that destroys the disguise, but I haven't been able to determine exactly what that is.) Before attacking Myrtani's mansion, explore Kernen. There are some interesting things you can do first.
Proceed along the east side and explore the alleys. You will find some humans who are talking about revolting against Myrtani. Pretend to join the conspiracy. Attend their meeting and encourage them to revolt. Pick up that cheap crown. It will come in handy later on. Also locate all the ogres and Gravnak. If you have forged an alliance with Gravnak at the ogre camp, they will help you attack Myrtani's mansion. Finding them and solidifying the attack plan will give your characters experience points.
Explore the southern side of town. Have some drinks with the draconians you find. If you select the right options, you can make some mischief that will tie down some of Myrtani's forces. Give that cheap crown you found to the dragon. There is a training hall on the south side, if you need any final training. There is no place you can safely Rest in Kernen, but you have a good chance of resting without interference in any of the buildings. Tas will occasionally interrupt. Ignore him and try again if this happens.
When you assault Myrtani's mansion, you want to first explore the eastern half of the place. You will find something useful for getting past the Guardian. Check out the treasure room in the north. Myrtani's room is to the west, but you have to enter through the southwest rooms. The entrance is in the Dragon Master's room. Save before using the passage, as once you enter Myrtani's room, you start the Final Battle Sequence. There is no way to save until that sequence ends.
The battle against Myrtani is in two stages. After killing Myrtani, you have to stop the messenger dragons. Fortunately, Tas will show up with healing potions, so you can go into that battle fully healed.
When the Final Battle ends, you get a nice pat on the back and many of your magical items are taken away from you. You can continue playing the game after the game ends. In general, it is not worthwhile unless you have some characters that are almost ready to train to the next levels. There are minor random encounters that will remain, and the game has many side encounters that you may have missed that you can try to find. The reason to finish developing your characters is for possible importing into the next KRYNN game.
CHAMPIONS OF KRYNN: Part 4
INTELLIGENCE REPORTS
These intelligence reports are deliberately incomplete. Items and places needed to complete the game or mission are listed. Treasures are listed. However, optional encounters are not listed. Many of them are required as a practical matter, since without them your characters will not be able to gain enough experience points to rise to the proper levels to win.
All mazes where the Area command works are 16 by 16 square mazes. The indices are of the form x,y. Both x and y start at 0 with the northwest corner being 0,0 and the southeast corner being 15,15.
Most location coordinates are for the doors leading to them and not to the actual location.
THROTL
The locations to visit to find out Caramon's fate are 10,15 and 15,11.
Kildrif is at 2,3.
Strangbourn is at 2,6.
Caramon is at 6,11.
Treasures can be found at 1,11, 2,5, and 0,8. The treasure at 2,5 appears only if you successfully find and disarm the trap. There is also treasure in the two rooms on either side of 4,7.
The cleric's study is at 3,15, but the cleric will only appear there after you rescue Caramon.
The entrance to the secret temple is at 7,6.
The altar is at 12,7. Some of the loot after the battle is magical.
The hobgoblins will flee with the dragon eggs to 9,0. There are magical items in the loot after the battle here.
The map of the keep in Gargath is found somewhere in the first section of the underground maze.
GARGATH
The stairs to the wall are at 1,5 and 14,5. Use them to get to the wall above the gate.
The commanders with the map to the wooden structure and magical weapons and armor are at 13,5.
The entrance to the wooden structure is at 8,7.
You are on your own in the keep, but the secret exit on the first floor of the keep is at the extreme north east corner. The map you should have found in the maze under Throtl is accurate except for the treasure notations.
TOMB OF SIR DARGAARD
The tomb entrance is at 8,12.
The entrance to the Test of Honor is at 9,3.
The entrance to the Test of Fear is at 10,8.
The entrance to the Test of Battle is at 1,7.
To complete the tests, just explore each area until you are told you have passed the tests.
OGRE BASE
The old ogre is at 14,7.
Morog's bedroom is at 12,12.
The assassins are at 5,4.
The meeting room is at 8,9.
OUTPOST 3
The Inn is at 8,7. Go into the room at 8,4.
The children are at 9,3.
There is a checkpoint at 9,4 that should be taken out.
The commandant's office can be reached at either 3,9 or 5,8.
The dragon is at 3,7.
The secret entrance to the jails is at 0,9, but you have to explicitly LOOK to find it even after you are told about it.
JELEK
The armory is at 4,13.
The magic shop is at 6,13. The Wand of Magic Missiles and the Potions of Extra Healing are worth buying. You can get magic arrows cheaper in Sanction.
Visit 10,14 with Skyla. He's one of the enemy, but you cannot get rid of him until the ambush at this location. Until you get rid of him, you cannot proceed
with the rest of the mission in Jelek.
The safe place to rest that Mysellia mentions is entered at 13,1 and is located at 15,3. You can go back without her later on. You automatically know the
password after one visit with Mysellia.
The grave diggers hut is at 12,5.
Sir Lebaum's office is at 11,7.
The silver rose is at 2,2. This is also the entrance to the building with the secret exit and treasure. You will fight dragons here as well, so a Save is recommended before entering this square.
NERAKA
If you go to Neraka with Maya you will enter at 15,7.
The entrance to the secret base is at 13,7.
Sir Karl will be found at 8,14. This is also the entrance to the jail. Once you find Sir Karl, you _must_ rescue the prisoners.
In the jail, there are prisoners to be rescued at 3,2, 0,1, and 2,6.
Check out the cell at 12,2.
The entrance to the other cells is at 8,7.
There are more prisoners to be freed at 15,7.
The Prison Lord is at 7,12.
There are dragons at 3,14.
The exit is at 0,9.
If you enter Neraka by yourself, you will enter at 0,0. There are no prisoners to be freed, but there is an interesting encounter at 5,12. Explore Neraka to discover an interesting story.
There is treasure at 6,9.
SANCTION
There are minotaur guards at 3,2, 3,4, and 3,6. There may be guards at 3,10, depending on your difficulty level. Parlay Meek will avoid most battles here if you decide that discretion is the better part of valor.
The training hall is at 13,1.
The magic shop is at 13,9.
The armory is at 13,12.
The inn is at 13,13.
The room with the evil recruiters is at 14,12.
There is treasure at 12,14, but you need a Knock spell to open the door.
There is a bridge to the temples at 15,7 that is usable after you have recovered the Dragonlance.
Once you kill the recruiters, the woman to be rescued can be spotted at 4,7. She will be at 9,6.
The secret passage to the underground is at 8,9.
HUERZYD
There is treasure at 6,7, 5,0, 10,8, and 6,4. You will have to explicitly LOOK in most of these places to locate the treasure.
There are exits back to Sanction at 3,8 and 10,8.
You will meet the Shadowpeople at 15,4.
The entrance to the Shadowpeople's caves is at 15,2 and 13,0.
The Shadowpeople conclave is at 12,12.
The Rest room is at 8,13.
The Wise One is at 5,10.
The entrance to Duerghast is at 2,10.
DUERGHAST
The Dragonlance is at 11,13. You are still underground at this point.
The exit to Duerghast proper is at 5,15 and will take you to 12,0.
Skyla is at 9,3. You really must see him again and show him how much you appreciated his help in Jelek. The treasure room is at 12,3.
The fighter is at 9,8 and will flee to 12,9.
The dragons are at 2,10.
You can exit back to Sanction at 4,11.
The entrance to the arena is at 1,5.
The stairs to Sir Lebaum is at 0,5 and 3,5.
You should encounter more dragons after killing Sir Lebaum at 1,8 or thereabouts. The exact location is variable. This begins the end sequence.
KERNEN
You are deposited at 12,13.
The conspirators are at 14,12. Their meeting is at 13,2.
The entrance to Myrtani's mansion is at 7,8.
The old crown is at 13,7.
The old dragon is at 3,10.
Draconians can be found at 5,10 and 10,13.
Friendly ogres are at 13,9, 11,10, and 1,4.
The training hall is at 6,13.
The formula for the salve is at 9,3, and you can mix it at 11,3.
The treasury is at 7,2.
The entrance to Myrtani's room is through the doors at 4,3 and 4,5. All movements is automatic once you enter Myrtani's room. After defeating Myrtani and the red dragons, some of your magical items are taken from you. The IBM VERSION NOTES tell how to recover them.
CHAMPIONS OF KRYNN: Part 5
IBM VERSION NOTES
The game is very disk-intensive on the IBM version. If you have a hard disk, one way to speed things up is to use a disk cache program. If you have enough memory, you might try running the game off a RAM disk.
If you save the game, the state of the game is stored in a file SAVGAMx.DAT, where x is the save letter. In addition, two files are created for every character in your party. The file names are of the form:
CHRDATxn.SAV
CHRDATxn.STF
Certain characters such as mages also have a third file created with a name of the form:
CHRDATxn.SFX
x is the save letter and n is the position of the character in the lineup.
For example, you have two characters in your party and the second one is a mage. You save to letter C. You will get files:
SAVGAMC.DAT
CHRDATC1.SAV
CHRDATC1.STF
CHRDATC2.SAV
CHRDATC2.STF
CHRDATC2.SFX
If you run out of disk space, you must delete all these files. If you want to archive a save, you must save the game file and all the character files. The files are all located in the subdirectory SAVE under the directory KRYNN (assuming you used the standard defaults when you installed the program).
The .STF file contains the items your character are carrying. To regain the items that will be taken from your characters at the end, save the game (to C, for example) after picking up the loot from the Dragon Master battle. After the Final Battle, unready all items and save the game (to A, for example), and exit back to DOS. Run Krynn again and load game C. Unready all items and drop all items that were _not_ taken from your characters. Now, save the game again (to D, for example) and exit to DOS.
Now type the following DOS commands:
copy /b CHRDATA1.STF+CHRDATD1.STF 1.STF
copy /b CHRDATA2.STF+CHRDATD2.STF 2.STF
...
copy /b CHRDATA6.STF+CHRDATD6.STF 6.STF
Now type
copy 1.STF CHRDATA1.STF
copy 2.STF CHRDATA2.STF
...
copy 6.STF CHRDATA6.STF
Run Krynn and load game A. You will find all your lost items magically restored. This trick can be used to duplicate useful items. Just remember to unready everything and make sure you have less than sixteen items total in the two .STF files.
This is the end of the walkthrough. May Paladine bless you.
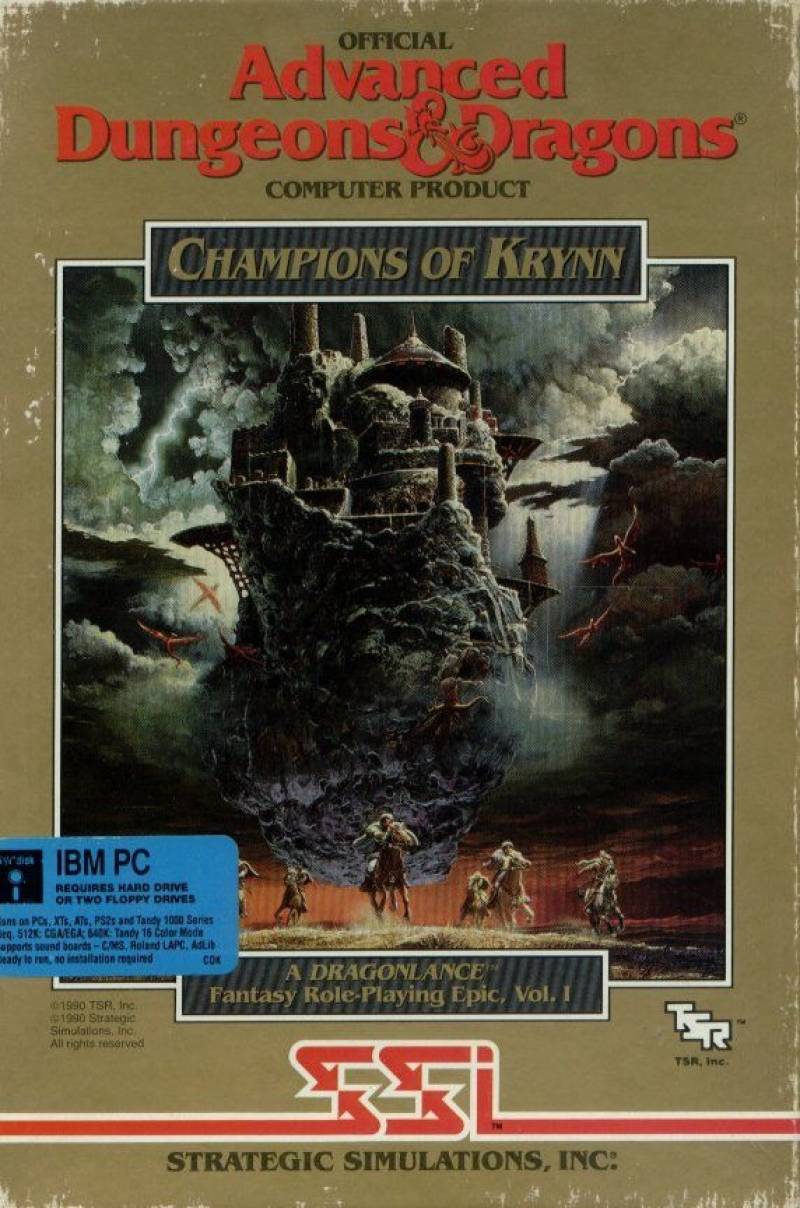
CHAMPIONS OF KRYNN is published by Strategic Simulations, Inc. and distributed by Electronic Arts.


