Net Yaroze For Linux
Setting Up GCC For Net Yaroze Development Under Linux
16 February 2000


Copyright (c) 1999, 2000 Christian Bauer
Permission is granted to make and distribute verbatim copies of this manual provided the copy-right notice and this permission notice are preserved on all copies.
Permission is granted to copy and distribute modified versions of this manual under the condi- tions for verbatim copying, provided that the entire resulting derived work is distributed under the terms of a permission notice identical to this one.
Table of Contents
Net Yaroze For Linux.
1 Introduction
2 Downloading the necessary software
3 Preparing for the installation
4 Setting up binutils
4.1 Unpacking binutils
4.2 Configuring binutils
4.3 Compiling binutils
4.4 Installing binutils
5 Setting up GCC
5.1 Unpacking GCC
5.2 Configuring GCC
5.3 Compiling GCC
5.4 Installing GCC
5.5 Final touches
6 A little example
6.1 Setting up the sources
6.2 Compiling the sample program
6.3 Running the sample program
Appendix A Advanced topic: modifying ‘libps.a’
Appendix B Using C++
Net Yaroze For Linux
This is a tutorial that explains how to set up GCC 2.95 as a cross-compiler for the "Net Yaroze" PlayStation development environment under Linux.
Written by Christian Bauer Christian.Bauer@uni-mainz.de.
1 Introduction
This document is a step-by-step explanation of how to set up GCC 2.95 as a cross-compiler under Linux for developing software for the "Net Yaroze" PlayStation development environment. The installation of the gdb debugger and graphics/sound conversion utilities are not covered.
We assume that you are familiar with the Linux shell and have some experience in developing software using GCC. No previous knowledge of installing GCC is required.
The examples in this tutorial were tested on a RedHat 6.1 system running on Intel hardware. They should, however, work on any Linux distribution that has the necessary tools for native software development installed (C compiler, headers/libraries, bison/flex etc.). This tutorial should also be applicable to other Unix systems, but the location of some files may differ from Linux.
2 Downloading the necessary software
First we have to download the source archives of the software we are going to install. We will need two packages from the GNU software collection:
- binutils 2.9.1: This package contains the assembler, the linker, and additional utilities to handle binary files.
- GCC 2.95.2: This package contains the C/C++ compiler (and actually other compilers as well, like Fortran and Java, but we are not going to install these).
The versions indicated are the latest versions available at the time of writing of this tutorial. Other versions have not been tested are not guaranteed to work.
binutils and GCC should be available from any GNU FTP mirror, for example ‘ftp.gnu.org’. Download these two files:
- ftp://ftp.gnu.org/gnu/binutils/binutils-2.9.1.tar.gz
- ftp://ftp.gnu.org/gnu/gcc/gcc-core-2.95.2.tar.gz
If you want to program in C++ (this is a bit complicated on the Net Yaroze (see Appendix B) so if you are a beginner you better stick with plain C), you have to get one more file:
- ftp://ftp.gnu.org/gnu/gcc/gcc-g++-2.95.2.tar.gz
3 Preparing for the installation
Now there are some preparations we have to make before actually installing the GNU software we just downloaded.
First of all, we have to decide on the directory in which the software is going to be installed. This is called the PREFIX because the path of this directory is prefixed to the paths of every component to be installed to yield the path of the installed file. For example, if our PREFIX is ‘/usr/local’, the file ‘bin/cpp’ would end up being installed in ‘/usr/local/bin/cpp’. A whole directory hierarchy is going to be created in the PREFIX directory, containing subdirectories like ‘bin’, ‘include’, ‘lib’, etc.
I suggest that you choose ‘/usr/local’ as your PREFIX because most Linux systems are set up to automatically recognize stuff (binaries, includes, man pages etc.) that is put there. If you would like to keep the cross-development tools separated you may choose a different PREFIX, such as ‘/usr/local/yaroze’, but you will then have to manually add the path to the installed binaries to your $PATH environment variable (not to speak of paths for man pages and info files).
Also, we are going to create a subdirectory called ‘yaroze’ in our home directory as a working directory for unpacking and compiling the sources.
So let’s get going:
 $ cd
 $ mkdir yaroze
Now, we have to install the Net Yaroze header files and library in a place where binutils and GCC are able to find them during installation. This place has to be a directory called ‘mipsel-ecoff’ (for reasons that will become appearent shortly) inside the PREFIX directory:
 $ su
 (enter root password)
 # cd /usr/local
 # mkdir mipsel-ecoff
 # cd mipsel-ecoff
 # mkdir include lib
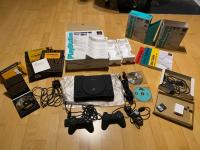
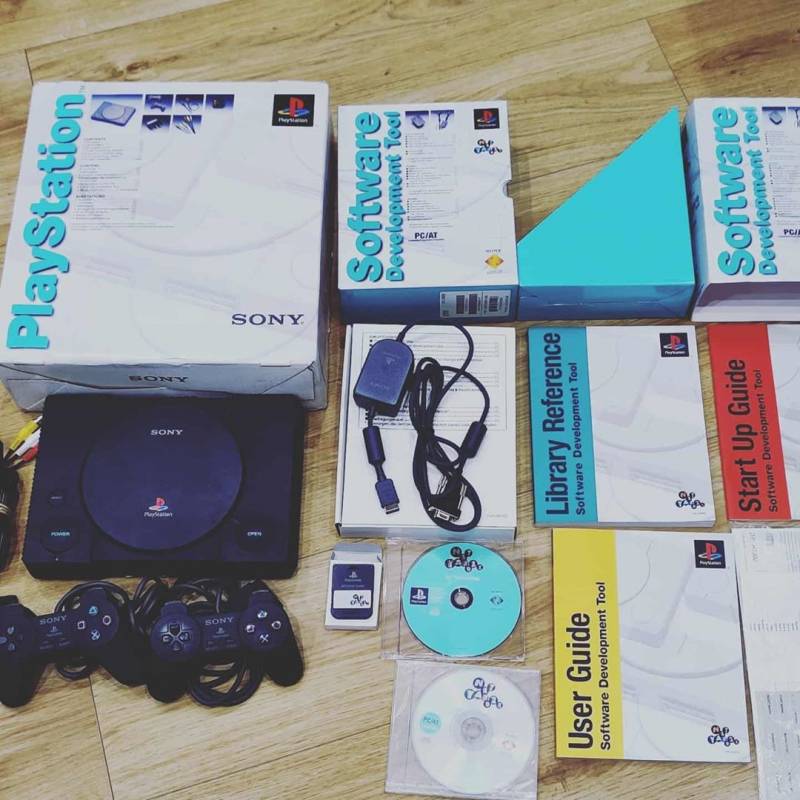
We will copy the headers and library from the "software development disc" CD-ROM that comes with the Net Yaroze package (the silver one, not the blue-green PlayStation boot disc). The headers will be put in the ‘include’ directory, the library (‘libps.a’) in the ‘lib’ directory:
 (put CD in drive)
 # mount /mnt/cdrom
 # cp -R /mnt/cdrom/psx/include/* include
 # cp /mnt/cdrom/psx/lib/libps.a lib
 # ls -R
 .:
 include  lib

 include:
 abs.h     convert.h   libps.h   memory.h  rand.h    stddef.h  string.h
 asm.h     ctype.h    limits.h   qsort.h   setjmp.h  stdio.h   strings.h
 assert.h  fs.h       malloc.h   r3000.h   stdarg.h  stdlib.h  sys

 include/sys:
 errno.h  fcntl.h  file.h  ioctl.h  types.h

 lib:
 libps.a
Fine. Now the header files are formatted for MS-DOS which uses CR-LF to terminate lines, not a single LF as Linux does. This is generally not a problem but reading the headers is easier when the extra CR characters are removed so we are going to strip them:
 # cd include
 # for i in *.h sys/*.h; do tr -d ’\r’ <$i >/tmp/tr$$; mv /tmp/tr$$ $i; done
 (you may now be asked a lot of questions like "mv: overwrite ‘abs.h’?";
 answer ‘y’ to all of them.)
You don’t have to understand how the last command works but if you typed it exactly as displayed, all headers should now be converted to Linux format.
Now we are going to fix two problems which would appear later when compiling GCC. First, it expects a header file ‘unistd.h’ which is not there. Fortunately it’s sufficient to create an empty file with that name. Second, the file ‘stddef.h’ defines some types that conflict with GCC-defined types during the GCC compilation, so we "protect" them with an #ifndef statement. In this tutorial, we will do this change with the "ed" text editor:
 # touch unistd.h
 # ed stddef.h
 963
 /_UCHAR_T/i
 #ifndef IN_GCC
 .
 /u_long/a
 #endif
 .
 w
 985
 q
 # ls
 abs.h      ctype.h   malloc.h  rand.h    stdio.h    sys
 asm.h      fs.h      memory.h  setjmp.h  stdlib.h   unistd.h
 assert.h   libps.h   qsort.h   stdarg.h  string.h
 convert.h  limits.h  r3000.h   stddef.h  strings.h
If you are afraid of using ed, you may of course use any other text editor you like. Just insert a line
#ifndef IN_GCC
before the line #ifndef _UCHAR_T and a line
#endif
before the line #ifndef WEOF.
Ok, the headers are prepared. Now the last thing we are going to do is to extract one object file from the ‘libps.a’ library that contains the startup code for PlayStation programs:
 # cd ../lib
 # ar x libps.a startup.o
 # ls
 libps.a  startup.o
 # exit
Phew. We are done with the preparations and can now begin installing the GNU software. Don’t worry, things are becoming easier now.
4 Setting up binutils
This chapter explains how to compile and install the GNU binutils package to create the MIPS assembler, linker, and other utilities for handling object files produced by GCC.
4.1 Unpacking binutils
Unpacking the sources from the ‘.tar.gz’ archive is simple. We are doing it in our ‘yaroze’ directory:
 $ cd ~/yaroze
 $ tar xfz ../binutils-2.9.1.tar.gz (or wherever you put the archive)
 $ ls
 binutils-2.9.1
The next step will be to configure the package for our desired target.
4.2 Configuring binutils
As with any GNU software, binutils has to be configured before compilation. This is done via a shell script called ‘configure’ that figures out various details about the system it’s running on, all by itself. This allows GNU software to be compiled on a variety of operating systems.
There are only two bits of information we have to supply to ‘configure’. The name of our PREFIX directory, and the desired target system (because we are building cross-development tools). In our case, the specification for the target system is ‘mipsel-ecoff’ (which means "little-endian MIPS processor using the COFF object file format"). Now you know why we were putting the Net Yaroze headers and library in a directory called ‘mipsel-ecoff’: this is the default place in which compilers and linkers configured for ‘mipsel-ecoff’ targets will look for them.
So let’s configure binutils:
$ cd binutils-2.9.1
 $ ./configure --prefix=/usr/local --target=mipsel-ecoff
 (lots of output)
(We could actually have left out the ‘--prefix=/usr/local’ argument because that is the default, but if you are using a different PREFIX you now know how to specify it.)
4.3 Compiling binutils
Now that binutils is configured, we can compile it:
 $ make
 (lots of output)
This will take a few minutes.
4.4 Installing binutils
If the compilation succeeded, we can now install the utilities. This will put everything in place in the PREFIX directory:
 $ su
 (enter root password)
 # make install
(lots of output)
# exit
$ ls /usr/local/bin/mipsel*
/usr/local/bin/mipsel-ecoff-addr2line  /usr/local/bin/mipsel-ecoff-objcopy
/usr/local/bin/mipsel-ecoff-ar         /usr/local/bin/mipsel-ecoff-objdump
/usr/local/bin/mipsel-ecoff-as         /usr/local/bin/mipsel-ecoff-ranlib
/usr/local/bin/mipsel-ecoff-c++filt    /usr/local/bin/mipsel-ecoff-size
/usr/local/bin/mipsel-ecoff-gasp       /usr/local/bin/mipsel-ecoff-strings
/usr/local/bin/mipsel-ecoff-ld         /usr/local/bin/mipsel-ecoff-strip
/usr/local/bin/mipsel-ecoff-nm
$ cd ..
All these utilities have now been installed (along with man pages in ‘/usr/local/man/man1’ and some libraries in ‘/usr/local/lib’). Note that all programs have ‘mipsel-ecoff’ in front of their name. That is to tell them apart from the native tools with the same name which are already installed on your system. So, for example, as is still the native assembler, but mipsel- ecoff-as is the MIPS assembler. (If you are curious, some of these programs have also been installed in ‘/usr/local/mipsel-ecoff/bin’, but without the ‘mipsel-ecoff’ prefix. These are the actual programs that the compiler will use).
In theory, we could now start developing PlayStation software in assembly language. But it’s easier in a higher-level language like C, so we are going to install GCC next (even for assembly- language programming GCC is a nice front-end to conveniently call the assembler and linker with nearly all the needed parameters).
Before proceeding, you should check that the utilities we just built are in the shell command search path because they will be needed by the GCC installation:
 $ which mipsel-ecoff-as
 /usr/local/bin/mipsel-ecoff-as
If you get a message like ‘which: no mipsel-ecoff-as in in (...)’ instead, you have to add the ‘PREFIX/bin’ directory to the search path:
$ PATH=$PATH:/usr/local/bin
5 Setting up GCC
This chapter explains how to compile and install the GNU Compiler Collection (GCC) to create a C compiler that is capable of producing MIPS output for the PlayStation. It is assumed that the binutils for the ‘mipsel-ecoff’ target have already been built and installed as described in the last chapter.
5.1 Unpacking GCC
As with binutils, we first unpack the source archive:
 $ cd ~/yaroze
 $ tar xfz ../gcc-core-2.95.2.tar.gz (or wherever you put the archive)
 $ tar xfz ../gcc-g++-2.95.2.tar.gz  (only if you downloaded this one)
 $ ls
 binutils-2.9.1  gcc-2.95.2
5.2 Configuring GCC
GCC is configured by exactly the same method as binutils (that’s one of the nice things about GNU software: everything adheres to certain standards).
However, we are going to do it a little different now: we are setting up a separate directory for compilation. The binutils were configured and compiled in the same directory where the sources were unpacked. But the programmers of GCC recommend that it be built in a separate directory, so we follow their advice. We will create a new directory ‘gcc-build’ and configure GCC there:
 $ mkdir gcc-build
 $ ls
 binutils-2.9.1  gcc-2.95.2  gcc-build
 $ cd gcc-build
 $ ../gcc-2.95.2/configure --prefix=/usr/local --target=mipsel-ecoff \
 --with-gnu-as --with-gnu-ld --disable-nls --disable-multilib \
 --enable-languages=c
 (lots of output)
That’s a lot more arguments than we needed for binutils! We already know about ‘--prefix’ and ‘--target’. ‘--with-gnu-as’ and ‘--with-gnu-ld’ specify that the assembler and linker used by the compiler front-end are the corresponding utilities from the GNU binutils package (in this case, GCC is able to use the special features of the GNU utilities). ‘--disable-nls’ and ‘--disable-multilib’ disable the native language support and the building of multiple versions of certain compiler-supplied libraries, because this will speed up the building process. Likewise, ‘--enable-languages=c’ specifies that only the C compiler will be built. There are also com- pilers for Java, Fortran and Objective-C in the GCC package but a plain C compiler is probably all that you will need (if you also want a C++ compiler, specify ‘--enable-languages=c,c++’).
The ‘configure’ script will have produced some files and directories:
 $ ls
 Makefile      config.status  gcc        mipsel-ecoff
 config.cache  etc            libiberty  texinfo
Before compiling GCC, we will edit the ‘Makefile’ to prevent the building of GCC-supplied libraries like ‘libio’ because compilation of these requires things that the Net Yaroze environ- ment doesn’t provide, and ‘libps.a’ and ‘libgcc.a’ (which will be built) will be anything we need for PlayStation programming anyway.
So do this:
$ ed Makefile
 56122
 /^ALL_TARGET_MODULES/s//#&/
 /^INSTALL_TARGET_MODULES/s//#&/
 w
 56124
 q
(If you want to use a different text editor, that’s fine. Just put a # in front of the lines ALL_ TARGET_MODULES = \ and INSTALL_TARGET_MODULES = \ in the ‘Makefile’.)
[Note: there is probably a way to do this with certain arguments passed to ‘configure’ instead of editing the ‘Makefile’, but I have not figured out how. If you know how to do it, please send me an email. Thanks.]
5.3 Compiling GCC
Now everything is prepared for compiling GCC:
 $ make
 (tons of output)
This will take quite a while. I suggest that you have a cup of coffee in the meantime. There is one part in the compilation where it appears to build the same thing over and over again (when it outputs lines like ‘_muldi3’). But don’t worry, it doesn’t hang. It’s just making lots of different versions of the ‘libgcc.a’ library for different MIPS architectures.
5.4 Installing GCC
If the compilation went without errors, GCC can now be installed. As with binutils, this will copy everything that is needed to the PREFIX directory:
$ su
(enter root password)
# make install
(lots of output)
# exit
$ ls /usr/local/bin/mipsel*
/usr/local/bin/mipsel-ecoff-ar        /usr/local/bin/mipsel-ecoff-objdump
/usr/local/bin/mipsel-ecoff-as        /usr/local/bin/mipsel-ecoff-protoize
/usr/local/bin/mipsel-ecoff-c++filt   /usr/local/bin/mipsel-ecoff-ranlib
/usr/local/bin/mipsel-ecoff-gasp      /usr/local/bin/mipsel-ecoff-size
/usr/local/bin/mipsel-ecoff-gcc       /usr/local/bin/mipsel-ecoff-strings
/usr/local/bin/mipsel-ecoff-ld        /usr/local/bin/mipsel-ecoff-strip
/usr/local/bin/mipsel-ecoff-nm        /usr/local/bin/mipsel-ecoff-unprotoize
If you compare this with the listing we got after installing binutils you will notice that there are now some new programs which also have the ‘mipsel-ecoff’ prefix, the most important of which is mipsel-ecoff-gcc. That is the GCC compiler front-end that knows how to run the actual C preprocessor, compiler, assembler and linker to produce a MIPS binary for the PlayStation. Of course, man pages and info files for all programs will also have been installed.
Let’s explore some more:
 $ cd /usr/local/lib/gcc-lib
 $ ls
 mipsel-ecoff
 $ cd mipsel-ecoff; ls
 2.95.2
 $ cd 2.95.2; ls
 SYSCALLS.c.X  collect2  eb       libgcc.a  single      specs
 cc1           cpp       include  mips3     soft-float
This is where the actual C preprocessor (‘cpp’) and compiler (‘cc1’) are located that get executed by the mipsel-ecoff-gcc front-end. The ‘libgcc.a’ library contains software replacements for operations which are not directly supported by the MIPS processor. The ‘specs’ file can be thought of as the configuration file for the GCC compiler. It contains the command line arguments with which the tools (preprocessor, compiler, aseembler, linker) will be called, as well as the names of standard libraries and predefined macros.
5.5 Final touches
As the last step of our GCC installation, we will make some small changes to the ‘specs’ file.
 $ pwd
 /usr/local/lib/gcc-lib/mipsel-ecoff/2.95.2
 $ su
 (enter root password)
 # ed specs
 5919
 /-lc/s//-lps/
 /startfile/+1c
 /usr/local/mipsel-ecoff/lib/startup.o
 .
 /-DR3000/s/$/ -Dpsx -Dunix/
 w
 5971
 q
 # exit
(If you are using a different text editor: change ‘-lc’ to ‘-lps’ in the line following ‘*lib:’, change the first empty line after the line ‘*startfile:’ to ‘/usr/local/mipsel-ecoff/startup.o’ (Caution: The number of lines in the file may not change. You really have to change the first empty line, not to insert a line), and add ‘-Dpsx -Dunix’ to the list of predefined macros in the ‘*predefines:’ section.)
This will tell GCC that the library that every program gets linked against is called ‘libps.a’ (instead of ‘libc.a’), that the code in the ‘startup.o’ file which we extracted from ‘libps.a’ at the beginning of this tutorial will be put at the start of all programs, and that the macros ‘psx’ and ‘unix’ will be predefined.
Congratulations! You now have a working Linux cross-compiler for developing programs for your Net Yaroze system.
6 A little example
Now that the compiler is installed, let’s try compiling a little sample program to see if it every- thing works.
6.1 Setting up the sources
We will use one of the sample programs that come on the Net Yaroze software development CD-ROM:
 $ cd ~/yaroze
 $ mkdir sample
 $ cd sample
 $ cp /mnt/cdrom/psx/sample/check/* .
 $ ls
 auto  balltex.h  gdb.ini  main.c  main_j.c  makefile  pad.h
As was the case with the header files, all these files have MS-DOS-style line endings, which we will strip:
$ for i in *; do tr -d ’\r’ <$i >/tmp/tr$$; mv /tmp/tr$$ $i; done
If you are using a PAL display for your PlayStation you will probably also want to edit ‘main.c’ to uncomment the SetVideoMode( MODE_NTSC ); line and activate the SetVideoMode( MODE_ PAL ); line instead.
Next, edit the ‘makefile’ so it looks like this:
 CC      = mipsel-ecoff-gcc
 CFLAGS  = -g -O2 -msoft-float
 LDFLAGS = -Wl,-Ttext,0x80140000,-e,_start -msoft-float

 PROG    = main
 OBJS    = main.o

 all: $(PROG)

 $(PROG): $(OBJS)
 $(CC) $(LDFLAGS) -o $@ $(OBJS)

 %.o: %.c
 $(CC) -c $(CFLAGS) -o $@ $<

 clean:
 rm -f $(PROG) $(OBJS)
This makes the ‘makefile’ a bit more Unix-like and also utilizes some of the new features of
GCC and the make utility.
Caution: The indentations in the ‘makefile’ have to be real ⟨TAB⟩ characters, not 8 spaces. It it’s done with spaces, it won’t work.
The first line specifies the compiler being used. We will of course use our freshly-created MIPS cross-compiler ‘mipsel-ecoff-gcc’. The ‘-msoft-float’ flag in ‘CFLAGS’ instructs the compiler that the Net Yaroze doesn’t have an FPU (Floating Point Unit). If you are using the data types float or double in your programs without specifying ‘-msoft-float’, they will crash. The little sample program doesn’t use floating point variables but I nevertheless put the ‘-msoft-float’ in there for instructive purposes. The ‘LDFLAGS’ line specifies flags for the linker: the start address of the program (‘0x80140000’) and the name of the entry point at which program execution will start (‘_start’, a symbol defined in the ‘startup.o’ file). The C main() function will be called from the code in ‘startup.o’. Finally, ‘LDFLAGS’ also has to contain the ‘-msoft-float’ option so the program will get linked against the right version of ‘libgcc.a’.
6.2 Compiling the sample program
Now we can compile the sample program:
 $ make
 mipsel-ecoff-gcc -c -g -O2 -msoft-float -o main.o main.c
 mipsel-ecoff-gcc -Wl,-Ttext,0x80140000,-e,_start -msoft-float -o main main.o
 $ ls
 auto  balltex.h  gdb.ini  main  main.c  main.o  main_j.c  makefile  pad.h
 $ file main
 main: MIPSEL-LE COFF executable (paged) not stripped - version 2.11
 $ ./main
 bash: ./main: cannot execute binary file
Wow. We have created a program that contains MIPS code for the PlayStation. This program will of course not run on our Linux system.
Note that you will have to use the new "mipsel-ecoff" commands for manipulating MIPS object files and executables:
 $ objdump -h main
 objdump: main: File format not recognized
 $ mipsel-ecoff-objdump -h main


 main:        file format ecoff-littlemips


 Sections:
 Idx Name     Size      VMA       LMA       File off  Algn
 0 .text      00000af0  80140000  80140000  00001000  2**4
       CONTENTS, ALLOC, LOAD, CODE
 1 .rdata     00000120  80140af0  80140af0  00001af0  2**4
       CONTENTS, ALLOC, LOAD, READONLY, DATA
 2 .data      00000670  80140c10  80140c10  00001c10  2**4
       CONTENTS, ALLOC, LOAD, DATA
 3 .sdata     00000080  80141280  80141280  00002280  2**4
       CONTENTS, ALLOC, LOAD, DATA
 4 .sbss      00000010  80141300  80141300  00000000  2**4
       ALLOC
 5 .bss       0001ec70  80141310  80141310  00000000  2**4
       ALLOC
The output shows where in the PlayStation memory the different parts of our program will be loaded to. The ‘.bss’ section is where global variables are stored. It is not actually part of the ‘main’ executable file but a part of PlayStation RAM cleared to zero right after the program has been uploaded and started (some code in ‘startup.o’ is doing this). This saves space in the executable file and keeps the uploading time down.
If you want to look what the compiled code looks like you can disassemble the program with the command ‘mipsel-ecoff-objdump -d main’. You can also get a nice mixed display of C source and compiled code with ‘mipsel-ecoff-objdump -S main’.
The next section will explain how to upload this program to the PlayStation.
6.3 Running the sample program
Under MS-DOS, uploading programs and data to the Net Yaroze PlayStation is done via the program siocons. There is also a Unix version of siocons available (your can get it from http://orion.identicalsoftware.com/yaroze/siocons.tgz). Unfortunately, this program doesn’t seem to work well and produces a lot of transmission errors (at least on my system, Your Mileage May Vary). There is, however, an alternative called "hssutils". Download this file:
http://www.netyaroze-europe.com/~byz00002/unix/hssutils-0.1.2.tar.gz
The hssutils package contains a program called psxfer that you can use to upload and start
your programs on the Yaroze PlayStation. First, unpack the archive in your ‘yaroze’ directory:
 $ cd ~/yaroze
 $ tar xfz ../hssutils-0.1.2.tar.gz       (or wherever you put the archive)
 $ ls
 binutils-2.9.1  gcc-2.95.2  gcc-build  hssutils-0.1.2  sample
‘hssutils’ is configured like binutils and GCC:
$ cd hssutils-0.1.2
 $ ./configure --prefix=/usr/local --enable-siodev=/dev/ttyS1 \
 --enable-siospeed=115200
 (some output)
The parameter given to ‘--enable-siodev’ is the Unix device name of the serial port the Net Yaroze communications cable is plugged into. On my system, I use ‘/dev/ttyS1’ which is the second serial port because the first serial port (‘/dev/ttyS0’) is connected to my modem. ‘--enable-siospeed’ is used to set the default baud rate for communication with the PlaySta- tion. It should be set to the same value that your Net Yaroze PlayStation displays after booting from the Net Yaroze boot CD-ROM (a message like ‘TERMINAL SPEED xxx BPS’). The default is 9600 baud and your Net Yaroze User’s Manual explains how to set the PlayStation to a higher rate (= higher speed). I have set my PlayStation to 115200 before, so I specify this value to ‘configure’.
Both the serial device and baud rate you specify here can be overridden later with command line arguments to the psxfer program (‘-p device’ and ‘-B baud’).
Note that we didn’t specify ‘--target=mipsel-ecoff’ because we are building a plain Linux program here.
Unfortunately, we now have to fix a small bug in the hssutils sources that prevents compiling them under Linux as they are. The file ‘hss/errlog.h’ defines an errlog structure that contains an errno member. This is however not allowed because errno is a global system variable that is defined in a very special way under Linux and you can’t have a variable in your own programs with the same name. So we replace all instances of errno in the sources by err:
 $ cd hss
 $ chmod 644 *.c *.h
 $ ed errlog.h
 761
 /errno/s//err/
 w
 759
 q
 $ ed errlog.c
 2738
 /errno/+1
 #if HAVE_MEMORY_H
 g/errno/s//err/g
 w
 2718
 q
 $ cd ..
(Note that the first instance of errno in ‘errlog.c’ is the line #include <errno.h> which must not be changed.)
Now we can compile hssutils:
 $ make
 (some output)
And we install it in out PREFIX directory like the binutils and GCC:
$ su
 (enter root password)
 # make install
 (some output)
 # exit
This will install the program psxfer in ‘/usr/local/bin’.
Now we are ready to upload our sample program to the PlayStation and run it. First, boot your PlayStation with the blue-green Net Yaroze boot CD-ROM and wait until it has started up (the brick wall screen appears and the message ‘TERMINAL SPEED xxx BPS’ is displayed). Then enter this on your Linux system:
 $ cd ~/yaroze/sample
 $ psxfer main -g
 entry: 80140000
 gp: 801492a0
 .text: 80140000..80140b10
 .rdata: 80140b10..80140c30
 .data: 80140c30..801412a0
 .sdata: 801412a0..80141320
 .sbss: 80141320..80141330
 .bss: 80141330..8015ffa0
 main: 80141320 done
 ResetGraph:jtb=8004829c,env=800482e4
The ‘-g’ ("go") flag tells psxfer to not only upload the program but also immediately start it. It will take a few moments to establish the communication with the PlayStation and to upload the program. psxfer also displays a list of where the different program parts get loaded to.
After the program starts, you should see a screen with one bouncing ball on the display connected to your PlayStation and hear a music track. To end the program, press the ‘Select’ button on the PlayStation controller. psxfer will then display the message ‘program terminated. sigval=5 SIGTRAP(Bp)’ and exit.
Congratulations! You have reached the end of this little tutorial. I hope that it has been helpful to you. Happy programming!
Appendix A Advanced topic: modifying ‘libps.a’
After completing this tutorial you have a compiler that will handle most of your PlayStation programming needs. But if you are using float, double or long long data types or program- ming in C++, you are probably going to run into trouble. Consider the following small program (which is just an illustration and serves no real purpose):
 #include <libps.h>

 int main(void)
 {
 printf2("%f\n", sin(VSync(0)));
 return 0;
 }
Compiling this program gives a linker error:
$ mipsel-ecoff-gcc -Wl,-Ttext,0x80090000,-e,_start -msoft-float \
 -o test test.c
 /usr/local/mipsel-ecoff/lib/libps.a(symusr.o)(*ABS*+0x8003f108): multiple \
 definition of ‘__negdf2’
 /usr/local/lib/gcc-lib/mipsel-ecoff/2.95.2/soft-float/libgcc.a(dp-bit.o) \
 (.text+0x12ac):/home/cebix/yaroze/gcc-build/gcc/dp-bit.c: first defined \
 here
This is because the Net Yaroze library ‘libps.a’ contains functions that are also in the GCC support library ‘libgcc.a’ which we have built. Technically, ‘libps.a’ only contains the ad- dresses of functions in the "System Area" of the PlayStation RAM, not the functions themselves (which are in the file ‘mon/libps.exe’ on the blue-green Net Yaroze boot disc), but this makes little difference for us here.
We cannot drop ‘libps.a’ because it contains all the standard C and PlayStation-specific func- tions, and we don’t want to drop ‘libgcc.a’ because it contains compiler-specific support func- tions that are necessary for certain data types or operations (like the int-to-float conversion above) to work (and if you are programming in C++, ‘libgcc.a’ is absolutely required).
So what we are going to do now is to modify ‘libps.a’ to remove the definition of ‘__negdf2’ from it. This will cause the linker to use the one from ‘libgcc.a’ instead, which is fine. This is going to make the resulting program slightly larger (because more functions from ‘libgcc.a’ will get linked into the program) but we’ll have to live with that.
If the source of ‘libps.a’ were available modifying it would be very easy, but unfortunately it isn’t so we are going to decompile the library into its pieces, recreate the source for the "defective" part, and reassemble a new library. This is as complicated as it sounds, so you should not do this if you’re a complete beginner.
Ok, let’s start by breaking libps.a to pieces:
$ su
(enter root password)
# cd /usr/local/mipsel-ecoff/lib
# ls
ldscripts  libps.a  startup.o
# mipsel-ecoff-ar x libps.a
# ls

EQSF2.O     FLTSISF.O  LTSF2.O   krom2tm2.o  startup.o  stdef4.o  stdef8.o
FIXSFSI.O   GESF2.O    NEGSF2.O  ldscripts   stdef1.o   stdef5.o  symusr.o
FIXUDFSI.O  GTSF2.O    NESF2.O   libps.a     stdef2.o   stdef6.o  video.o
FIXUSFSI.O  LESF2.O    SUBSF3.O  puts.o      stdef3.o   stdef7.o
These are all the object files contained in ‘libps.a’. We are now going to remove the ones that are actually unusable for our cross-compiler and rename the original ‘libps.a’ so we can restore it if something bad happens during our re-creation process.
 # rm *.O puts.o
 (probably lots of questions like "rm: remove ‘EQSF2.O’?"; answer ‘y’
 to all of them.)
 # mv libps.a libps.a.old
 # ls
 krom2tm2.o  libps.a.old  stdef1.o  stdef3.o  stdef5.o  stdef7.o  symusr.o
 ldscripts   startup.o    stdef2.o  stdef4.o  stdef6.o  stdef8.o  video.o
It’s a little more clearly arranged now. The who defines ‘__negdf2’ is ‘symusr.o’. This file contains no code but only symbol definitions.
 # mipsel-ecoff-nm symusr.o | grep ’__negdf2’
 8003f108 A __negdf2
We are now going to recreate an assembler source file for ‘symusr.o’:
# mipsel-ecoff-nm symusr.o | \
 sed -e ’s/\(.*\) A \(.*\)/\2 = 0x\1; .global \2/’ >symusr.s
 # ls
 krom2tm2.o   startup.o  stdef3.o  stdef6.o  symusr.o
 ldscripts    stdef1.o   stdef4.o  stdef7.o  symusr.s
 libps.a.old  stdef2.o   stdef5.o  stdef8.o  video.o
 # head symusr.s
 ApplyMatrix = 0x8002d4d8; .global ApplyMatrix
 ApplyMatrixLV = 0x8002cde0; .global ApplyMatrixLV
 ApplyMatrixSV = 0x8002d528; .global ApplyMatrixSV
 CLIP2 = 0x80063f9c; .global CLIP2
 CdPlay = 0x8003c388; .global CdPlay
 CdRead = 0x8003bf60; .global CdRead
 CdReadExec = 0x8003c2b4; .global CdReadExec
 CdReadFile = 0x8003c14c; .global CdReadFile
 CdReadSync = 0x8003c068; .global CdReadSync
 CdSearchFile = 0x8003b198; .global CdSearchFile
Isn’t Unix wonderful? We only need a Makefile for assembling the new library (remember to use ⟨TAB⟩ characters for the indentations):
OBJS = symusr.o stdef1.o stdef2.o stdef3.o stdef4.o \
 stdef5.o stdef6.o stdef7.o stdef8.o krom2tm2.o video.o

 libps.a: $(OBJS)
 mipsel-ecoff-ar r $@ $?
 mipsel-ecoff-ranlib $@

 %.o: %.s
 mipsel-ecoff-as -o $@ $<
As a little test we will first create a new ‘libps.a’ without making any changes:
# make
 mipsel-ecoff-as -o symusr.o symusr.s
 mipsel-ecoff-ar r libps.a symusr.o stdef1.o stdef2.o stdef3.o stdef4.o \
 stdef5.o stdef6.o stdef7.o stdef8.o krom2tm2.o video.o
 mipsel-ecoff-ranlib libps.a
 # ls -l lib*
 -rw-rw-r--   1 root     root        26626 Feb 16 23:25 libps.a
 -r-xr-xr-x   1 root     root        40216 Feb  5 21:34 libps.a.old
You will notice that the library got smaller. Now we can remove the ‘__negdf2’ definition from ‘symusr.s’ and reassemble the library.
 # ed symusr.s
 11216
 /__negdf2/d
 w
 11176
 q
 # make
 mipsel-ecoff-as -o symusr.o symusr.s
 mipsel-ecoff-ar r libps.a symusr.o
 mipsel-ecoff-ranlib libps.a
And we are done. We have an updated ‘libps.a’ that the sample program from above can be linked with. If you encounter more "multiple definition" problems in the future, you now know how to deal with them.
Appendix B Using C++
In this appendix I will talk about some of the pitfalls you will encounter when using C++ code on the Net Yaroze. I didn’t do extensive tests with advanced C++ features like exceptions, templates and streams, but basic things like classes, new and delete, and virtual functions will work. For brevity, this appendix is not written in the step-by-step tutorial style of the rest of this article.
The first problem you will encounter is that not all of the Net Yaroze header files are C++ compliant. For example, ‘libps.h’ is missing an extern "C" { ... } statement around its function definitions (strangely enough all the other header files have it), and it declares a function delete() which is a reserved keyword in C++ (I choose to rename that to delete_file()). Also, you might want to add const qualifiers to some of the char * arguments of the functions in the standard C header files to avoid getting lots of compiler warnings (C++ is much more strict with respect to const-ness than plain C). If in doubt, consult Unix man pages about these functions.
But wait, there’s more! Consider the following program:
 #include <stdio.h>
 class hello {
 public:
 hello(const char *name) : answer(42)
 {
 printf("Constructor of (%s) was called\n", name);
 }

 void print()
 {
 printf("The answer is %d.\n", answer);
 }

 private:
 int answer;
 };

 static hello global_hello("global_hello");

 int main(void)
 {
 global_hello.print();
 hello local_hello("local_hello");
 local_hello.print();
 hello *dynamic_hello = new hello("dynamic_hello");
 dynamic_hello->print();
 delete dynamic_hello;
 return 0;
 }
If you compile this, you will get lots of linker errors about the function abort() being missing. Uhm, but we are not calling abort() anywhere in our program!? Right, but we are using new, and if new fails it will throw an exception, and uncatched exceptions will abort the program using the function abort() (this is all done by code in ‘libgcc.a’). But abort() is defined neither in ‘libgcc.a’ nor in ‘libps.a’, so we have to roll our own. Insert this in the program code:
 extern "C" void abort()
 {
 printf("aborted\n");
 exit(1);
 }
The program will now compile. However, if you run it you will see this output from ‘psxfer’:
 The answer is 0.
 Constructor of (local_hello) was called
 The answer is 42.
 Constructor of (dynamic_hello) was called
 The answer is 42.
 program terminated. sigval=5 SIGTRAP(Bp)
Obviously, the constructor of global_hello is not being called. In fact, no constructors of any static objects are being called. This would be the job of a function called __main() in the libraries which gets called before main(). Unfortunately, the definition of __main() in ‘libps.a’ is an empty function (‘libps.a’ was written with plain C in mind), so no constructors get called. A working version of __main() is instead provided by ‘libgcc.a’.
The easiest way (although a bit of a hack) to deactivate the bogus __main() in ‘startup.o’ is to patch the object file to rename the symbol to something else:
 # cd /usr/local/mipsel-ecoff/lib
 # sed -e ’s/__main/__xxxx/g’ startup.o >startup.o.new
 # mv startup.o.new startup.o
It’s important that the number of characters in the symbol is not changed.
The sample program will now run correctly but ‘mipsel-ecoff-objdump -h’ will show you that it has grown to over 16K of code, mostly exception-handling stuff from ‘libgcc.a’, so if you are concerned about code size, you should use plain C instead of C++.