The QB Times issue 2

Contents:
- Introduction
- Feedback
- Errors in the last issue
- Shorts
- Projects
- Joystick Usage in QB
- ASM in QBasic
- Program (P)reviews
- DarkAges II (Preview)
- RPGEngine (Preview)
- JumP (Preview)
- DarkAges II (Preview)
- Ramblings of a crazed programmer: Plot Design
- 3D in QB
- Blast!, Dash and DirectQB compared
- SoundCard Special
- Programming the SoundBlaster
- Programming the Gravis Ultrasound
- The .WAV File format
- The .VOC File format
- The .MID File format
- The .MOD File format
- Programming the SoundBlaster
- Closing Words
- Credits
Introduction
Well, here we are, the second issue of The QB Times! I had some great responses on issue one as you can read below. There are no site review because Viper is really busy in RealLife... Also I decided to push the scripting article to next issue 'cause due lack of time I could get a big enough article.. Next time will be a real good one!! I promise! For now, enjoy issue #2!!!!!
Feedback
Here are some letters I received about The QB Times issue #1.
I was really surprised after reading your QB mag, it was really good, I do have a couple of problems with it (nothing is ever perfect).With your C/C++ code, use the ANSI standards for variable definitions BYTE, WORD and DWORD are just typedefs of unsigned char, unsigned int, unsigned long, and are not in the ANSI standard. It's a small thing, but it makes a difference, because some compilers have headers that define it (mostly windows ones) but some don't.
Your RPG scripting article was good, RPG scripts are cool to make, if you want some help on writing some more on it or converting it to C/C++ code, I'd be happy to help.
Keep up the good work!
leroy.
Hi!
First, I hope you like issue #2 even better than issue #1! =) Ok, first about the C/C++ code, I didn't write it myself, the document was found on the internet and I just formatted it. I don't know C or C++ myself so I can't really change it. Sorry!
Yes, RPG scripts are very cool to make and useful! I hope everybody understanded the article well, so they can add scripting to their RPG!
And yes, you may port the code to C/C++, as long as you write somewhere: Original QBasic code by Nightwolf (http://nwep.hypermart.net)
For other people wanting to port my code, please ask my permission first!
Nightwolf
Your magazine looks a lot like QB:TM as far as content goes. Both mags have an article about asm in QB, a place to mention projects (most projects are the same too), scripting, etc.
Why don't you both just join together to make an even better magazine? Currently, QB:TM has some good stuff, but for many people (me), most of it isn't that interesting (I don't feel like learning asm now, or how to make MIDIs).
Just my thoughts.
-Entropy
Hi!
Well, as for now I don't want to join together and I don't think QB:TM wants that also. For this issue and future issues I will try to have articles on a wide range of things, so that everybody can make use of it!
Nightwolf
Errors in the last issue
- Enchanted Creations should be Enhanced Creations, I wrote this wrong in shorts.
- NemChat is only made by Marcade and NOT by Viper. Viper is making NemIRC.
- Viper said that Future Software' navigation bar was taken from IFace. This is not true! Only the buttons on the navigation bar were taken from IFace (with permission).
Shorts
Future Software buys www.qb45.com
After www.qbasic.com and www.quickbasic.com, www.qb45.com is now bought! Jorden Chamid of Future Software bought www.qb45.com about two weeks ago. Future Software is on www.qb45.com and Nightwolf Productions is also going to move to www.qb45.com/nwep!
B-Czar floods qbasic.com forum
On the 10th of April, B-Czar flooded the qbasic.com forum with a program he has made. He has made this program in Visual Basic and it can automatically spam 20 pages of almost any forum.
Projects
- Guerilla Software is working on a RPG called Reign of Annihilation.
Anthracks does the programming, scripting, and design, Lord Noremac does art, music, and design and ColdMouse does writing, and design.
It uses DQB to get fast pixel by tile scrolling, multi layered maps (like bridges you can walk both on top of and under), day/night rotation, an original soundtrack, very long gameplay. They hope to have an original, engaging story.
Some form of demo should be out by the end of April.
More info? Check out http://roa.hypermart.net - Matthias-Emanuel Thoemmes(actlab) is working on THE CURSE of Elaine's Castle. It's an adventure game and is last updated in March 99.
Features of the game are DirectQB, MIDI, using the Keyboard, many locations, Script-based Engine.
More info? Check http://www.actlab.de - Rems and a friend of his are working on an RPG called Search For Souls. Right now he's working on the utilities that will be required to make the game:
Character Profile Editor, Enemy Editor, Item Editor, Spell Editor,Tile Editor, Map Editor, Story Editor, Etc. - The Brain is working on a project which now has as codename: "wb2". It's a sidescroller and The Brain says it will be completely different from any game made in QBasic. There is a demo of wb1 on his page (sorry don't know an address) but the final version will look completely different because he's recoding the engine, redoing the graphics. He says it just a completely different project. It will not be using typical tiles or anything like that... Actually, it will be using a technique, that nobody has ever attempted before in QB... He hasn't really started yet, but he has all of the ideas written down. There won't be any demos out for quite a while, because the engine for it is going to take quite a lot of planning before it will work.
- DigitalDude is working on a SVGA RPG called Kalderan. It uses pixel-by-pixel scrolling not that cheesy pixle-by-tile-by-pixel-by-tile stuff. It has "time elements".(e.g. It switches from day to night) It also has an advanced scripting system, FF-style battle engine, and an epic story.
The story is generally done. The engine still needs collision detection and NPCs. And the development tools are still being work on. You can get the latest information at http://www.bizzarecreations.com and download a demo. - Tal Bereznitskey is working on a project without a name =) but it will be an RPG. It's in a 640x480 resolution, mouse controlled, animation parts and it'll be very funny! Main game engine and the talking engine are done. Tal is looking for an artist, so I've you want to draw tiles for him, contact him.
- Majiko is working on Story of Muai, an RPG. It has pretty nice graphics, MIDI music, walking NPCs!, DirectQB 1.31, Pixel-by-Pixel Scrolling, EngineZero v1 and Map Scripting. A demo will come some time in the future!
- DeVo is working on a complete 3D Rpg using Polygon Graphics, Cutscenes with Camera effect, 3D characters, more than one on screen at a time, the others follow the main character. Midi's and Wavs. Here's a list on what's going on with the project:
- 3D engine is Completed
- Translation routine is being "translated" into Asm.
- Currently finishing Camera routines such as tilt, 3D rotate was just finished.
- Next step is the 3D objects engine based on wire frame.
- Once the engine has been completed, I then have some friends who enjoy hacking Snes RPG roms, and they are quite good at plot, I also know some photoshop artist :P.
- Expect plot and game development to take at least 1 year.
He's currently using the Tri's from the Dqb Lib, but he's planning to have his own that support Vesa graphics, for more the 256 color, more than likely it'll be 16 bit, not 24.
- Ryan Limbag (Magic Wand President) is working on a game called Sector-Z You're an alien(Lork - a native Basendian) trapped on the planet Timba, in a prison called Sector-Z. It's an action/adventure, with an overhead view. It'll have 4 or 8 levels, that hasn't been decide yet. It will have either MIDI or MOD music, 3 different laser levels and more items, page by page scrolling. It uses Dash and the graphics are made with PP256
- The Collector is working on Aliens!-X which is a two-sided starfighter game (full roaming... vaguely resembles SaR2) where you play as a human pilot or an alien pilot, to win the war and discover the secrets of the Galaxy. A crude, and very buggy version of the flight engine is done, but is unsuitable for public release. It will contain over 30 different guns, missiles, and bombs; an user friendly interface; realtime lighting & translucency effects, MOD-based music, sounds; 2-player co-op/battle mode; and maybe a random mission generator.
- Future Software is currently adding SVGA subs to their Future Library. They are really good!
- After the release of 3DES Designer v0.43b, BlackBird put it on hold for a while so he can concentrate on his other projects.
- BlackBird is making a platform game, JumP, it has multiple layered, paralax scrolling backgrounds, a 3D rendered character and a real fast graphics engine. Read the Preview below!
- leroy is making King Of Men. It's an RPG, and it features a really cool scripting engine 640x480x8bit graphics, Digital Sound FX (SB compat, ESS Audiodrive, SoundScape), MIDI music (Adlib, MPU-401) and a multibranching pathway story.
Although the game is being written in C, consider it mostly BASIC orientated simply because the scripting language is as close to basic as leroy could make it. - Zack Friedrich is working on a graphics utility without a name. It uses DQB so you can load PCX and BMP, and implemented BSV (bsave), and will probably support other formats from other graphics utilities. You can copy/paste between pictures, same or different format, same or different palette (!) You can resize, blend, blur, zoom, rotate, flip, fade, and even change your cursor color =) An important feature of the program is the Undo option. You can convert pictures to any palette you wish, and it will usually still look good :) ..a not-yet-slated feature, which should be very big, might be implemented, and there is much more!!
- Marius is working on a point and click adventure like the Lucas Arts games, the engine is running an the storyboard stands, It's finished for about 30%, At the moment the name of the game is: Kings Quark 7 part 2 - Celine Dion is a stupid bitch
- .Scapegoat Software is working on a hunting game, similar to the original Deer Hunter. It is about 40-50% complete, and features sound effects, mouse support, scrolling, and cheat codes. We may add music, but probably only at title screens, help screens, and ending screens. Since we're still in high school, we have very little time to work on the game. I am doing and any music for the game, as well as some sounds and graphics. The other guy
- Gamkiller and TomteFan are new basic programmers so this project kind of sucks...(This were Gamkiller's own words!) It's called "Chip-the game" and it features 320*240 res, 2 player support, no sound, pinball mode, and in a while you will actually be able to SHOOT!
Joystick Usage in QB
Hi and welcome to my tutorial on Joystick usage in QB. This requires a knowledge of bits so if you are not to sure check out the BIT tutor.
Now the purpose of this tutorial basically is to allow you to write joystick routines without having to resort to QB's crappy STRIG routines which are annoyingly bad and can be sometimes confusing!
So without further delay lets get started.
The Joystick basicaly has a value in which all the status is stored. This value is read from PORT &H201 (Joy% = INP(&H201)). The data uses BITS to show which part of the joystick is in use and where the joystick is currently at.
Here is a little diagram of the BIT usage in the Value:
| BIT 7 | BIT 6 | BIT 5 | BIT 4 | BIT 3 | BIT 2 | BIT 1 | BIT 0 |
| Button 2 Joystick B | Button 1 Joystick A | Button 2 Joystick A | Button 1 Joystick B | Y Axis Joystick B | X axis Joystick A | Y axis Joystick A | X axis Joystick B |
Now reading the status of the buttons is straight forward, Just read the bit (be it 7, 6, 5 or 4) and if it = 0 then the button is being pressed! Wasn't that simple?
As for the reading of the sticks position, well that is not as simple as the buttons. First you must send out a dummy byte to the Joystick port. Just out any old value to port &H201, eg: OUT &H201, anyvalue%. This in effect will set the axis bits to 1. Then you must time how long it takes for the bit to return to 0. This is roughly proportional to the position of the stick.
This sounds complex but it can be done! I assure you. The values should be around as follows:
- Minimum: 8
- Maximum: 990
- Centered: 330
So, I hope this has give you enough insight to write your joystick routine! All you must do is wait for the bit to return and record the duration. Easy!
This article was written by Greg McAusland (Maz)
ASM in QBasic
Lesson no.3 More ASM commands
Now we've went through some very fundamental commands but these are not enough for us to do jack sqaut. ; ) We need to learn how to make use of our computer's I/O abilities! What use is calculations were you can't see the results let alone interact with them? Not much.
Some of you would have look at the famous mouse.bas asm code. Somewhere along the line, you'd see this:
mov ax,1
int 33h
retf
What was that you asked?
It's very simple think of a INT command as a secretary. You give this beautiful blonde a piece of paper outlining thing to do (the input). She then goes off mysteriously on her own doing what she was trained to. At a later time you get back a piece of paper back with feedback on what she has done (output). Some times the jobs you ask her are too simple for feedback so she gives you none.
On to the point now (enough fun) INTs are basically QB's equivalent of SUBs. Now heres that code again with a little explanation:
mov ax,1        ;gives AX a value of 1
int 33h         ;does an int 33, this will
                ;basiclly call the mouse
                ;function. Because AX's value
                ;is 1, that function acts by
                ;showing the mouse.
retf            ;Returns
Ok, INT 33 takes input from AX.If ax is 1 then the int show the mouse
If ax is 2 then the int hides the mouse
If ax is 3 then the int gives info on the mouse at AX, BX and CX.
Aha! So all the code up there just show the mouse! Handy eh?
Lesson no.4 Procedures
Have you noticed the retf up there? Well that's just a return from a call.
Here's an example of a procedure:
1E7D:0100       CALL 200
RETF

1E7D:0200     MOV AX,1
INT 33h
RETN
Hmmm ... first the program does a near call (A near call is a call to a procedure from a procedure from the same segment e.g 1E7D) to 200. After reaching 200 the program shows the mouse then returns from the near call.
After that retf actually exits the program and returns back to the OS.
Well that sums it up for this issue, next issue we are going to actually do something useful with ints. Be sure to pick it up. = )
This article was written by abionnnn
Program (P)Reviews
DarkAges II Preview
I am sure that all of you reading this will have heard of Dark Ages 2 the RPG - If not then where have you been since October? Right now, the official name is "Dark Ages 2: Taftkraftengel".
The engine is being written in SVGA with a movement system like none ever before, a mouse movement system. No cursor keys anymore...no more chr$ anymore...a sure improvement? Well in some ways yes and in others, no. Sure, the mouse makes movement faster but at what cost? Right now it is very hard to be critical as the mouse system is far from completion and has many bugs. I think it may be a bit tedious clicking the TALK button every few minutes then clicking WALK to continue on.
I asked DarkAges what was new and exciting about DA2 and this is what he replyed - First, the story is non-linear. It has the same beginning and same ending always, but the in between changes based on player actions. Sometimes, player's choices may actually change the world. The next time you play, you may do something different and see a whole different set of subquests never possible in the first time through.
Now, if that doesn't get an award for making you play it more than once, I don't know what will.
The world of DA2 is entirely in the same perspective...there is no "walking into towns", the whole map is on one level. An improvement surely (less loading). One of the best parts of Dark Ages 2 must be the graphics which are very impressive in my opinion. Gavan has really gone all out to make some very clean and easily tiled images that you don't notice as being one tiny image repeated over and over again. The little shadows under the characters and the way that roofs disappear when you go into a building are nice, but very subtle things that make the game slightly better than so many others.
Cutscenes will be in there, but only to move along the plot. The emphasis is going to be on the game play. Cutscenes will be as few as possible. Only 15-20 throughout the whole game. No cutscenes are being produced as yet, as Enigma has alot on his plate...he still has Bubble Fighters to finish. :)
Another thing that I asked DarkAges was about the scripting Engine. He says - Scripting takes two forms, conversation and object. Between the two they change all the variables in the game. The alteration of these variables is what moves the plot along. To put it simply, you win the game by successfully altering all the necessary people and objects in the game. After much thought, anyone who tries another procedure is either doing something amazing or just making the job difficult.
In this second demo there are 314 tiles already...how many tiles are there going to be in the real game? Well i asked that too...Originallt, there was to be 500 sprites and 500 tiles but already there is 500 tiles and 100 sprites produced. DarkAges thinks that there will be around 1200 tiles and 800 sprites in the finished game. All of the tile are originally produced in bitmap format and converted to Bsaves. The next demo should be out at around 11-18th of April. I can assure you that I am looking forward to it.
As there is not alot more left to say about this demo, as it is only a demo with not much to show for itself game-wise, I will leave you with this thought...in 1994 we had text based RPG's with line numbers and goto...in 1999 we have mouse driven SVGA RPG's...what will we see in another 5 years?
Dark Ages 2 - http://www.tcnj.edu/~hoopman2
This article was written by Gza[wu]

RPGEngine Preview
This is ceratinly a different way to go...Writing an engine for an RPG (or similar type of) game with which you can use the code of as long as you talk to the engine authors about it. A fair trade? Let us review the evidence.
This project has been around for about 3-4 months now, started by QBprogger and Necrolyte. They are telling people that this is not just another "Tile Engine 3" (something which is greatly overrated) as it is a public viewing of their own project.
The engine is sadly a tile based movement system which is growing to be rather old hat nowadays. The animation of water and the map scrolling is superb, although the jerky character movement and walking animation when stationary seem to let the engine down...something which I am sure is to be addressed in future builds. The engine is real time from what I can gather as there is no "wait for a key" style coding involved. Sadly this trade-off has seemed to leave the keyboard handler somewhere low on priorities as it feels like inkey$ (select case ucase$(key$) is what is actually used alot).
The font, the menu system, EMS memory routines and the transparency effects make up for alot. The screensaver is still buggy however, as some pixels get trapped and do not move. For all these bugs, I am sure there will be fixes as the team are only at build 20 so far and havre progressed a long way from where their engine began. If pixel scrolling was implemented and some careless coding sorted then we will have a winnner on our hands that may help you to make DA3.
8 coders on the team including such people as Entropy and Pasco can ensure that the project is not going downhill. I can also assure you that when more RPGEngine news appears, The QB Times will have it.
RPGEngine - http://qbprogger.cjb.net
Gza_wu (Christopher Neill) - Exposed Dreams '99 (http://www.gza-wu.freeserve.co.uk)
JumP Preview
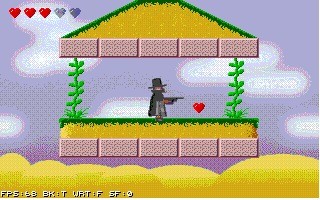
JumP is a new platform game created by BlackBird. It uses BlackBird's own ASM routines, which are faster than DirectQB's!!! It looks really nice. It uses a 3D rendered character made by BlackBird's brother.
In the newest version he added painfull spikes, an animated character (see the screenshot), he fixed the keyboard handler bug, translucency and some speed increases.
It runs really fast, on my P133 it runs with and average of 70 FPS. Which is really good as compared to other programs I've seen. The graphics are also looking good, I don't know who made them but he's really a great artist.
The QB Times will keep you informed of updates on JumP!
Want more info and a download? Go to B.A.T Software.

Ramblings of a Crazed RPG Programmer: Plot Design
Yes! Another plot article to add to your collection - with one small twist...come in close...got your eyeballs right on the screen now? good, I just wanted you to know, THIS ARTICLE IS USEFUL!!!! I mean it, I'm only letting my ego in a little on this one. Honestly now, you play a lot of the amateur RPGs and think to yourself, "This is horrible. The story is dumb, I don't know what I'm doing, and none of it makes sense!" Well, that's probably because the plot was never formally formulated (hehehe...pun intended - you'll have to deal with it, I still have the rest of the article to go!)
Ok, obscure misleading intro out of the way, I'll start writing well again. The most important aspect of any plot is a concrete, structured theme. Let me repeat that: a concrete, structured theme. What this means is you set a timeperiod, a place, a mood, and you develop the entire plot around that. Perhaps some examples will help. If you've ever played the Ultima series, you will notice that the original theme was based upon the British Midieval period in the height of feudalism. By Ultima 4, the theme followed history and developed into a large medieval country, similar to the chronicals of King Arthur. Everything follows from that!!! You have your set of heroes and heroines (like the Knights of the Round), you have your medieval weapons, armor, and transportation. You fight dozens of mythical creatures like dragons, hydras, orcs, etc. And you follow a main quest from Lord British (parallel for King Arthur) which may divide itself into several subquests along the way which you are obligated to play because your character follows the Virtues of the land. In other words you must complete these quests just like a Knight of the Round would in order to follow the Code of Chivalry. Following this? The parallels are rather blatant, but the series is making its 9th game now! It's that good, it has that concrete, structured theme that makes the world so realistic and the game so much fun.
Now, that is a game series that is probably older than most of you (Ultima I was originally on an apple way back in 1979), so don't think you have to make a series as great as Ultima. Rather, just take the concepts it presents to make a good game. It doesn't have to be medieval; many futuristic and space RPGs exist. Also Square's Final Fantasy series has moved over the years to encompass a technologically advanced era with a midieval feel. The original was purely midieval, Final Fantasy III (US release), was medieval with technology mixed in, and by VII the medieval aspects were almost non-existant. They were able to do it by developing a concrete theme of an evolving world in which each game is only a chapter in the whole story, never putting too much evolution in at one time.
Ok, I've filled you with all sorts of ideas - now what to do with them. Well, let's take just a standard pirate theme. This means that no matter how much you want there to be a nuclear sub that you use to blow ships out of the water, you can't put it in the game. You must also remember that you've now confined yourself to a post renaissance era - no mythical beasts, no magic. Your technology is swords, cannons, and muskets. Your boats are small, 15 man ships, to huge 200 man galleons. You're probably thinking: what fun is the story now? Well, remember that there will be people who won't want to play a pirate theme, but there are more who would if you do it right!
What makes piracy so much fun? The adventure, the thievery, raiding, cannons, secret romances, corrupt provincial governors, and of course, yelling "AAARRRR!" You have your wonderful theme right in front of you, now use your imagination!!! Think of one great, all-encompassing purpose for your game. How about destroying the corrupt armada of the bad guy? Here's where your background information comes in. There is a corrupt official who using his military prowress in the water has subdued and captured 75% of the coastal towns in the game and is using this to control all the trading in the seas. As one of the citizens of the few remaining free towns, the only way you can survive in your trade is through piracy - sinking the bad guy's ships, raiding his towns, sailing in his waters, etc. Your ultimate goal would be to kill this individual and free all the towns under his command. Ahh, but how can one small man do such a thing? You obviously need to go on several subquests building your own group of followers, wealth, and armada.
If your following this, we've now tackled two things: a concrete, structured theme and a main quest. Now comes the easy part, the subquests. Remember that they also must follow the theme. Let's start with an easy one. If you've read up on piracy, many pirates were English noblemen. Since your character is a good one, from a free town, you could make him a nobleman and perfect gentleman. That way, winning the heart of some important woman in one of captured towns wouldn't be a problem. After sinking or stealing 12 ships from the bad guy, you return to a free city for repairs where a mysterious note had been deliverd while you were at sea. It is from the daughter of one of the governors in a captured town. She has been betrothed to a local captain, an evil and disgusting man. Having heard of your great valor and deeds in helping free the towns, she has determined you to be her savior, someone who could steal her away from her troubles. Naturally, you now go out to sneak into the town under the cover of darkness, kill the guards in her mansion and sneak out under a full moon with her. Yes, I know it sounds a bit cheezy, but think of your theme! It fits right in and people who play it will know it. You could add many, many more subquests, like gathering the pieces of a treasure map, freeing local towns, raiding a galleon at port, sinking the ship of a rival pirate, capturing a government official and holding him for ransom, etc. Just don't add any sea serpents or jet bombers...
That about covers it, you should be set. Remember your theme could be something as ridiculous as space invaders. Just remember to develop your game around little green men with lazer guns. The quests should follow the theme and they don't have to be elaborate, just as long as they fit within the world you have created. Good luck!
3D in QB
Hi folks! It's me, your all-nutcase, 100% freaked out programmer, BlackBird. Nightwolf asked me to write an article about 3D techniques for his online magazine, the QB Times, and that's what you're reading right now. I originally shoud have written this for issue #1 but, as always, I was late. Nevertheless, it's here now, and it will be better then ever! (er... that shouldn't be too hard for a first time I guess)
Since I have been working on a 3D modeller (or editor, or drawing program, whatever), called 3DES Designer (or 3DES for short) for quite some time now, I figured it would be nice to combine the 3D tutorial with a 3DES tutorial, also because I have since received many emails regaring the use of the models created in 3DES. Soon I will release a 3DES SDK (or Software Development Kit) for use with your own programs.
As you might have noticed, the 3DES zipfile came with a small program called LOAD3DP.BAS which explained the 3DP file format that 3DES uses to store it's models. However, this is not sufficent for most users and therefore I will try to explain a little about the 3DES models in this article.
But first you'll have to understand the basics of 3D graphics, so here we go... Firstly, three dimensional objects consist of points in a 3D space, and for the totally braindead among us, three dimensional points have three coordinates: the X, Y and Z coordinates.
In maths classes at school (at least mine) they teach you Z is the horizontal axis and Y is the axis that points into the depth... bummer for them, 'cause I hereby treat Z as the 'depth' axis, and X and Y as the 2D axis that lie on your computer screen... let's use a nice ASCII drawing to support that:
(just imagine that the drawing is 3D and that the Z-axis points into the depth)
 o--------> x-axis
 |\
 | \
 |  \ z-axis
 |
 \/  y-axis
Mind that 3D coordinates are notated in the following order: X,Y,Z
Also, the arrows in the drawing above point to the positive values relative to the center of the cooridinate system (being o in the drawing), eg: negative Z values lie in front of the center, positive Z values behind it.
Got that? good. Now how do you display those points? Well, since your screen is only 2D, you can't just plot a pixel at, say 10,4,12... (or PSET (10,4,12),15) you could try... but it definitively won't work.
So what you need to do is 'convert' the 3D coordinates to 2D ones that fit onto your screen (this process is called translation).
But how? It's quite simple, just follow this formula:
FlatX = X * 256 / Z
FlatY = Y * 256 / Z
Where FlatX and FlatY are the 2D coordinates that you can plot to the screen right away. Noticed the number 256 in there? Right, now that is the value that controls one of the most important things in the world of 3D graphics, perspective (meaning things get smaller the further they are away from the viewer). The larger the value, the less perspective in your object, keep that in mind. 256 is a pretty good 'default' value. You don't need to change it unless your model's perspective looks exaggerated or something.
Okay, so we've gotten quite far now. You now ought to know how to draw a 3D object consisting of points on a 2D screen...
if that is still unclear, let me clarify it for you, here's a little source code to get you started:
-------------8<-------------8<-------------8<-------------8<-------------

'// Ajust this value to load larger models or save memory
CONST numberOfPoints = 100
'// Ajust this value to zoom in or out on the object
CONST zoomLevel = 0

TYPE ThreeDeePoint
	X AS SINGLE
	Y AS SINGLE
	Z AS SINGLE
END TYPE

'// Set up an array of 3D points
DIM MyArray(1 TO numberOfPoints) AS ThreeDeePoint

'// Load a model into the array


'// Draw all the points
FOR pointIdx = 1 TO numberOfPoints
	'// Do not draw points that are behind the screen
	IF MyArray(pointIdx).Z + zoomLevel > 0 THEN
		'// Translate points
		flatX = MyArray(pointIdx).X * 256 / (MyArray(pointIdx).Z + zoomLevel)
		flatY = MyArray(pointIdx).Y * 256 / (MyArray(pointIdx).Z + zoomLevel)
		'// Plot a white dot at the point's translated coordinates
		PSET (flatX, flatX), 15
	END IF
NEXT

-------------8<-------------8<-------------8<-------------8<-------------
And voila! your model is here! Offcourse it still looks like shit, since you only used dots to draw the points.
Most 3D games and applications, like 3DES for example, use face-based models. A face consist of 3 or more points, and when linked together, they form a polygon. Here's another one of my beautiful ASCII drawings to clarify that:
              o - point 1
             / \
            /   \
 point 4 - o     \
            \     \
   point 3 - o-----o - point 2
The drawing above is a face consisting of four points, to draw it, just translate all four points to 2D, draw a line from point 1 to 2, 2 to 3, 3 to 4 and from 4 back to 1, and hey presto! A face!
Offcourse it's still a wireframe representation, not a solid face, but that's yet another chapter, drawing a filled polygon, and I'm not going to explain that here.
So, with a little creativity, you can apply the face-technique to the sourcecode above, making it a so-called wireframe 3D engine. Hurray!
Still, we are missing the main part of a true 3D engine... manipulation of the model. It's very nice and all, a still of a 3D model, but it's much more fun when the thing actually rotates around it's axis.
3D rotation is basically not very different from 2D rotation, not to say exactly the same.
The only thing you need to do is rotate each point three times, one time for each axis (X,Y and Z).
Rotating a 2D point can be accomplished by using this formula:
newX = COS(degrees) * X - SIN(degrees) * Y
newY = SIN(degrees) * X + COS(degrees) * Y
To translate a 3D point, you'll have to treat the rotation around each axis (3 in total) as a 2D rotation using the remaining two coordinates.
For example, to rotate around the X-axis, treat the Y,Z coordinates as if they were 2D coordinates in 2D space.
Assuming you put the above rotation function in a SUBroutine defined like this: SUB rotatePoint (X, Y, newX, newY, degrees), the correct code to rotate a point around the axis would be:
-------------8<-------------8<-------------8<-------------8<-------------

'// around X-axis
CALL rotatePoint (Z, Y, newZ, newY, degrees)

'// around Y-axis
CALL rotatePoint (X, Z, newX, newZ, degrees)

'// around Z-axis
CALL rotatePoint (Y, X, newY, newX, degrees)

-------------8<-------------8<-------------8<-------------8<-------------
Then all you have to do is just rotate all points like in the example above, then translate them and then draw the bloody thing =)
Well folks, that is the end of part 1, this series will be continued in future issues of the QB Times, see yers!
This article was written by BlackBird
Dash, Blast! and DirectQB Compared!
There is a lot of dispute and rivalry as to which is the best graphics library for QB. As a means to determine who is the king of graphics libs, I benchmarked 10 different functions of 3 different libraries, and compared them against each other, and Qbasic's own built in graphics functions. I compared DirectQB by Angelo Motola, http://echome.hypermart.net, DASH by Danny Gump, http://www.gnt.net/~gump, and finally Blast! by Andrew L. Ayers. Although Blast! is rather old, I decided to put it in anyway to see how it held its own against DirectQB and DASH. In order to be able to compare the library's speeds against QB's own statements I only used these functions (though in the actual libraries, they have different names):
- PSET
- LINE
- CIRCLE
- CLS
- GET
- PUT
- Buffer-Screen Copy
- Buffer-Buffer Copy
- Screen Scrolling
I was actually very surprised at the results. See for yourself below:
| Function (or equivalent) | DirectQB | DASH | Blast! | Built-in QB Graphics |
| PSET | 19243 | 16863 | 15617 | 17239 |
| LINE | 11837 | 9876 | 0* | 10984 |
| CIRCLE | 16947 | 0** | 0** | 11090 |
| CLS | 606 | 0** | 597 | 63 |
| GET | 11343 | 8385 | 3927 | 3728 |
| PUT | 18107 | 13386 | 11706 | 3014 |
| 11028 | 6392 | 1407 | 20 | |
| Buffer-Screen Copy | 745 | 746 | 386 | 138 |
| Buffer-Buffer Copy | 1534 | 2844 | 697 | 138 |
| Screen Scrolling | 18 | 0** | 0** | 0** |
*Blast! Contains a line sub, but it gives an error.
** Function isn't available.
All figures are in Amount/Sec, or basically, how many times the library did that function per second. This was tested on a P2 300. Secondly I rated each library on a scale from 1-10 on:
- Ease of use
- Stability (10 - however many times it crashed)
- Speed
- Variety of functions
Here are those figures:
| Category | DirectQB | DASH | Blast! | Built-in QB Graphics |
| Ease of use | 9 | 6 | 7 | 10 |
| Stability | 10 | 8 | 9 | 10 |
| Speed | 10 | 8 | 6 | 4 |
| Variety | 10 | 7 | 4 | 2 |
| Power | 10 | 10 | 7 | 3 |
| Documentation | 10 | 6 | 4 | 8 |
| TOTAL: | 9.83 | 7.5 | 6.5 | 6.17 |
DirectQB
I will now explain my reasoning for giving these scores. First of all let us start with DirectQB. It is extremely easy to use, since it uses EMS layers that you refer to as 1,2,3 etc. etc., instead of having to use buffers, VARSEG (buffer1(0)), VARPTR (buffer1(0)). This makes life much easier when using DirectQB. As for stability, DQB did not crash once when I was testing it, thus the score of 10. As you can see from the figures, DQB is a very very fast library, which is why it got the score of 10. As for variety, DQB has tons and tons of different functions, way more than any of the other libraries. I haven't even used all of them yet. It also has very good sound capabilities and many other non-graphics related functions, making it not only a graphics lib, but also a sound lib and a disk handling lib, and a bit manipulation lib. As for power, DQB is very powerful; not only in speed, but also in the effects it can create. DQB also supports multiple joysticks, mouse, has its own keyboard handling routine which is far far superior than using INKEY$. DirectQB's documentation is top of the line, it has 130 pages of documentation, with examples, known bugs, what the author's goals are for it. It just goes on and on. If you don't like the idea of having to waste valuable program space to make buffers (DIM buffer1 (15999)), and don't mind the minimal speed loss involved with EMS, and want an fast, entire game programming library, then DQB is your obvious choice.
DASH
Now I will go on and explain my reasoning for giving DASH the scores I did. First of all, DASH is not an easy thing to use. It uses the conventional buffer system; not nice EMS pages like DQB does. I couldn't get some of the functions to work for very odd reasons sometimes. As for stability, it is not very stable, it fatally crashed my machine twice, made my monitor go haywire and report frequency of out range erro r multiple times. While it is not nearly as fast as DQB is some areas, and gets beaten out by QB itself sometimes, it does beat DQB in copying buffers to the screen, and copying from buffer to buffer, most likely because DQB uses EMS and conventional memory is faster than EMS. DASH doesn't have too many functions, and they are mostly all graphical, with some mouse and bit manipulation routines, so that is why it got a variety score of 7. As for power, DASH is a very powerful library; it can create spectacular effects. Finally, the DASH documentation is rather weak, short, with no examples, and leaves a lot of questions unanswered. In conclusion, I would recommend DASH to experienced QB programmers, who only want a graphics library and don't mind using program space for graphics buffers. It is rather obvious DASH is copying off of DirectQB, because shortly after every release of DQB, DASH comes out with some the same routines as DQB. But if you want some of the unique features DASH has, such as specific routine for palette rotation and others, then DASH is what you want, although you will need additional libraries for sound and such.
Blast!
Actually, I was rather disappointed with Blast's performance. I thought it would be speedier than either DQB or DASH, but no. Since I shouldn't take up too much room with this article, I won't explain why I gave it the scores, but only my conclusion about Blast! It is an older library, the version I tried was from 1997, but it can do very cool things. I have seen several RPG's coded in Blast!, and they rock, but unless Blast! gets an update sometime, it is not a very smart idea to make a game in Blast!, when you have these 2 other very good libraries with many features.
Conclusion
After reviewing these different libraries, I think I see an obvious winner. And the library is: DirectQB!
After getting such good benchmark scores, and being so easy to use and so complete, it does not come as a surprise to me that DirectQB is the best library. I'm sure many people have different opinions on the Ease of use, variety, documentation and such scores, but it is very obvious that DQB is the fastest. No one can deny that after looking at those numbers. Well, all I know is that I will be using DirectQB a lot in the future, because it is an obvious winner. No offense to the makers of DASH and Blast, but the numbers don't lie. DQB is nearly twice as fast as DASH in some areas, and is twice as fast as Blast in most areas. For now, in my opinion, DQB is the undisputed champ. Until someone comes out with an even faster and better library, maybe even the next release of DASH will be a whole lot better than DQB. Who knows_.
This article was written by Yoda
Soundcard Special
In this SoundCard special I'll include on how to program different SoundCards and on how to use many sound formats! Note: The documents were not written by me nor any of the other The QB Times writers. They were found over the internet!
Programming the SoundBlaster
Overview
Two of the most popular sound cards for the IBM-PC, the AdLib and the Sound Blaster, suffer from a real dearth of clear documentation for programmers. AdLib Inc. and Creative Labs, Inc. both sell developers' kits for their sound cards, but these are expensive, and (in the case of the Sound Blaster developers' kit) can be extremely cryptic.
This document is intended to provide programmers with a FREE source of information about the programming of these sound cards.
The information contained in this document is a combination of information found in the Sound Blaster Software Developer's Kit, and that learned by painful experience. Some of the information may not be valid for AdLib cards; if this is so, I apologize in advance.
Please note that numbers will be given in hexadecimal, unless otherwise indicated. If a number is written out longhand (sixteen instead of 16) it is in decimal.
Chapter One - Sound Card I/O
The sound card is programmed by sending data to its internal registers via its two I/O ports:
     0388 (hex) - Address/Status port  (R/W)
     0389 (hex) - Data port            (W/O)
The Sound Blaster Pro is capable of stereo FM music, which is accessed in exactly the same manner. Ports 0220 and 0221 (hex) are the address/ data ports for the left speaker, and ports 0222 and 0223 (hex) are the ports for the right speaker. Ports 0388 and 0389 (hex) will cause both speakers to output sound.
The sound card possesses an array of two hundred forty-four registers; to write to a particular register, send the register number (01-F5) to the address port, and the desired value to the data port.
After writing to the register port, you must wait twelve cycles before sending the data; after writing the data, eighty-four cycles must elapse before any other sound card operation may be performed.
The AdLib manual gives the wait times in microseconds: three point three (3.3) microseconds for the address, and twenty-three (23) microseconds for the data.
The most accurate method of producing the delay is to read the register port six times after writing to the register port, and read the register port thirty-five times after writing to the data port.
The sound card registers are write-only.
The address port also functions as a sound card status byte. To retrieve the sound card's status, simply read port 388. The status byte has the following structure:
              7      6      5      4      3      2      1      0
          +------+------+------+------+------+------+------+------+
          | both | tmr  | tmr  |              unused              |
          | tmrs |  1   |  2   |                                  |
          +------+------+------+------+------+------+------+------+

          Bit 7 - set if either timer has expired.
              6 - set if timer 1 has expired.
              5 - set if timer 2 has expired.
Chapter Two - The Registers
The following table shows the function of each register in the sound card. Registers will be explained in detail after the table. Registers not listed are unused.
| Address | Function |
| 01 | Test LSI / Enable waveform control |
| 02 | Timer 1 data |
| 03 | Timer 2 data |
| 04 | Timer control flags |
| 08 | Speech synthesis mode / Keyboard split note select |
| 20..35 | Amp Mod / Vibrato / EG type / Key Scaling / Multiple |
| 40..55 | Key scaling level / Operator output level |
| 60..75 | Attack Rate / Decay Rate |
| 80..95 | Sustain Level / Release Rate |
| A0..A8 | Frequency (low 8 bits) |
| B0..B8 | Key On / Octave / Frequency (high 2 bits) |
| BD | AM depth / Vibrato depth / Rhythm control |
| C0..C8 | Feedback strength / Connection type |
| E0..F5 | Wave Select |
The groupings of twenty-two registers (20-35, 40-55, etc.) have an odd order due to the use of two operators for each FM voice. The following table shows the offsets within each group of registers for each operator.
Channel        1   2   3   4   5   6   7   8   9
Operator 1    00  01  02  08  09  0A  10  11  12
Operator 2    03  04  05  0B  0C  0D  13  14  15
Thus, the addresses of the attack/decay bytes for channel 3 are 62 for the first operator, and 65 for the second. (The address of the second operator is always the address of the first operator plus three).
To further illustrate the relationship, the addresses needed to control channel 5 are:
    29 - Operator 1  AM/VIB/EG/KSR/Multiplier
    2C - Operator 2  AM/VIB/EG/KSR/Multiplier
    49 - Operator 1  KSL/Output Level
    4C - Operator 2  KSL/Output Level
    69 - Operator 1  Attack/Decay
    6C - Operator 2  Attack/Decay
    89 - Operator 1  Sustain/Release
    8C - Operator 2  Sustain/Release
    A4 -             Frequency (low 8 bits)
    B4 -             Key On/Octave/Frequency (high 2 bits)
    C4 -             Feedback/Connection Type
    E9 - Operator 1  Waveform
    EC - Operator 2  Waveform
Explanations of Registers
Byte 01 - This byte is normally used to test the LSI device.  All bits
          should normally be zero.  Bit 5, if enabled, allows the FM
          chips to control the waveform of each operator.

             7     6     5     4     3     2     1     0
          +-----+-----+-----+-----+-----+-----+-----+-----+
          |   unused  | WS  |            unused           |
          +-----+-----+-----+-----+-----+-----+-----+-----+


Byte 02 - Timer 1 Data.  If Timer 1 is enabled, the value in this
          register will be incremented until it overflows.  Upon
          overflow, the sound card will signal a TIMER interrupt
          (INT 08) and set bits 7 and 6 in its status byte.  The
          value for this timer is incremented every eighty (80)
          microseconds.


Byte 03 - Timer 2 Data.  If Timer 2 is enabled, the value in this
          register will be incremented until it overflows.  Upon
          overflow, the sound card will signal a TIMER interrupt
          (INT 08) and set bits 7 and 5 in its status byte.  The
          value for this timer is incremented every three hundred
          twenty (320) microseconds.


Byte 04 - Timer Control Byte

        7     6     5     4     3     2     1     0
     +-----+-----+-----+-----+-----+-----+-----+-----+
     | IRQ | T1  | T2  |     unused      | T2  | T1  |
     | RST | MSK | MSK |                 | CTL | CTL |
     +-----+-----+-----+-----+-----+-----+-----+-----+

          bit 7 - Resets the flags for timers 1 & 2.  If set,
                  all other bits are ignored.
          bit 6 - Masks Timer 1.  If set, bit 0 is ignored.
          bit 5 - Masks Timer 2.  If set, bit 1 is ignored.
          bit 1 - When clear, Timer 2 does not operate.
                  When set, the value from byte 03 is loaded into
                  Timer 2, and incrementation begins.
          bit 0 - When clear, Timer 1 does not operate.
                  When set, the value from byte 02 is loaded into
                  Timer 1, and incrementation begins.


Byte 08 - CSM Mode / Keyboard Split.

        7     6     5     4     3     2     1     0
     +-----+-----+-----+-----+-----+-----+-----+-----+
     | CSM | Key |              unused               |
     | sel | Spl |                                   |
     +-----+-----+-----+-----+-----+-----+-----+-----+

          bit 7 - When set, selects composite sine-wave speech synthesis
                  mode (all KEY-ON bits must be clear).  When clear,
                  selects FM music mode.

          bit 6 - Selects the keyboard split point (in conjunction with
                  the F-Number data).  The documentation in the Sound
                  Blaster manual is utterly incomprehensible on this;
                  I can't reproduce it without violating their copyright.


Bytes 20-35 - Amplitude Modulation / Vibrato / Envelope Generator Type /
              Keyboard Scaling Rate / Modulator Frequency Multiple

        7     6     5     4     3     2     1     0
     +-----+-----+-----+-----+-----+-----+-----+-----+
     | Amp | Vib | EG  | KSR |  Modulator Frequency  |
     | Mod |     | Typ |     |       Multiple        |
     +-----+-----+-----+-----+-----+-----+-----+-----+

          bit 7 - Apply amplitude modulation when set; AM depth is
                  controlled by the AM-Depth flag in address BD.
          bit 6 - Apply vibrato when set;  vibrato depth is controlled
                  by the Vib-Depth flag in address BD.
          bit 5 - When set, the sustain level of the voice is maintained
                  until released; when clear, the sound begins to decay
                  immediately after hitting the SUSTAIN phase.
          bit 4 - Keyboard scaling rate.  This is another incomprehensible
                  bit in the Sound Blaster manual.  From experience, if
                  this bit is set, the sound's envelope is foreshortened as
                  it rises in pitch.
          bits 3-0 - These bits indicate which harmonic the operator will
                  produce sound (or modulation) in relation to the voice's
                  specified frequency:

                      0 - one octave below
                      1 - at the voice's specified frequency
                      2 - one octave above
                      3 - an octave and a fifth above
                      4 - two octaves above
                      5 - two octaves and a major third above
                      6 - two octaves and a fifth above
                      7 - two octaves and a minor seventh above
                      8 - three octaves above
                      9 - three octaves and a major second above
                      A - three octaves and a major third above
                      B -  "       "     "  "   "     "     "
                      C - three octaves and a fifth above
                      D -   "      "     "  "   "     "
                      E - three octaves and a major seventh above
                      F -   "      "     "  "   "      "      "


Bytes 40-55 - Level Key Scaling / Total Level

        7     6     5     4     3     2     1     0
     +-----+-----+-----+-----+-----+-----+-----+-----+
     |  Scaling  |             Total Level           |
     |   Level   | 24    12     6     3    1.5   .75 | <-- dB
     +-----+-----+-----+-----+-----+-----+-----+-----+

          bits 7-6 - causes output levels to decrease as the frequency
                     rises:

                          00   -  no change
                          10   -  1.5 dB/8ve
                          01   -  3 dB/8ve
                          11   -  6 dB/8ve

          bits 5-0 - controls the total output level of the operator.
                     all bits CLEAR is loudest; all bits SET is the
                     softest.  Don't ask me why.


Bytes 60-75 - Attack Rate / Decay Rate

        7     6     5     4     3     2     1     0
     +-----+-----+-----+-----+-----+-----+-----+-----+
     |         Attack        |          Decay        |
     |          Rate         |          Rate         |
     +-----+-----+-----+-----+-----+-----+-----+-----+

          bits 7-4 - Attack rate.  0 is the slowest, F is the fastest.
          bits 3-0 - Decay rate.  0 is the slowest, F is the fastest.


Bytes 80-95 - Sustain Level / Release Rate

        7     6     5     4     3     2     1     0
     +-----+-----+-----+-----+-----+-----+-----+-----+
     |     Sustain Level     |         Release       |
     | 24    12     6     3  |          Rate         |
     +-----+-----+-----+-----+-----+-----+-----+-----+

          bits 7-4 - Sustain Level.  0 is the loudest, F is the softest.
          bits 3-0 - Release Rate.  0 is the slowest, F is the fastest.


Bytes A0-B8 - Octave / F-Number / Key-On

        7     6     5     4     3     2     1     0
     +-----+-----+-----+-----+-----+-----+-----+-----+
     |        F-Number (least significant byte)      |  (A0-A8)
     |                                               |
     +-----+-----+-----+-----+-----+-----+-----+-----+

        7     6     5     4     3     2     1     0
     +-----+-----+-----+-----+-----+-----+-----+-----+
     |  Unused   | Key |    Octave       | F-Number  |  (B0-B8)
     |           | On  |                 | most sig. |
     +-----+-----+-----+-----+-----+-----+-----+-----+

          bit   5  - Channel is voiced when set, silent when clear.
          bits 4-2 - Octave (0-7).  0 is lowest, 7 is highest.
          bits 1-0 - Most significant bits of F-number.

     In octave 4, the F-number values for the chromatic scale and their
     corresponding frequencies would be:

        F Number     Frequency     Note
           16B          277.2       C#
           181          293.7       D
           198          311.1       D#
           1B0          329.6       E
           1CA          349.2       F
           1E5          370.0       F#
           202          392.0       G
           220          415.3       G#
           241          440.0       A
           263          466.2       A#
           287          493.9       B
           2AE          523.3       C


Bytes C0-C8 - Feedback / Algorithm

        7     6     5     4     3     2     1     0
     +-----+-----+-----+-----+-----+-----+-----+-----+
     |         unused        |    Feedback     | Alg |
     |                       |                 |     |
     +-----+-----+-----+-----+-----+-----+-----+-----+

          bits 3-1 - Feedback strength.  If all three bits are set to
                     zero, no feedback is present.  With values 1-7,
                     operator 1 will send a portion of its output back
                     into itself.  1 is the least amount of feedback,
                     7 is the most.
          bit 0    - If set to 0, operator 1 modulates operator 2.  In this
                     case, operator 2 is the only one producing sound.
                     If set to 1, both operators produce sound directly.
                     Complex sounds are more easily created if the algorithm
                     is set to 0.


Byte BD - Amplitude Modulation Depth / Vibrato Depth / Rhythm

        7     6     5     4     3     2     1     0
     +-----+-----+-----+-----+-----+-----+-----+-----+
     | AM  | Vib | Rhy | BD  | SD  | TOM | Top | HH  |
     | Dep | Dep | Ena |     |     |     | Cym |     |
     +-----+-----+-----+-----+-----+-----+-----+-----+

          bit 7 - Set:    AM depth is 4.8dB
                  Clear:  AM depth is 1 dB
          bit 6 - Set:    Vibrato depth is 14 cent
                  Clear:  Vibrato depth is 7 cent
          bit 5 - Set:    Rhythm enabled  (6 melodic voices)
                  Clear:  Rhythm disabled (9 melodic voices)
          bit 4 - Bass drum on/off
          bit 3 - Snare drum on/off
          bit 2 - Tom tom on/off
          bit 1 - Cymbal on/off
          bit 0 - Hi Hat on/off

          Note:  KEY-ON registers for channels 06, 07, and 08 must be OFF
                 in order to use the rhythm section.  Other parameters
                 such as attack/decay/sustain/release must also be set
                 appropriately.


Bytes E0-F5 - Waveform Select

        7     6     5     4     3     2     1     0
     +-----+-----+-----+-----+-----+-----+-----+-----+
     |               unused              |  Waveform |
     |                                   |  Select   |
     +-----+-----+-----+-----+-----+-----+-----+-----+

          bits 1-0 - When bit 5 of address 01 is set, the output waveform
                     will be distorted according to the waveform indicated
                     by these two bits.  I'll try to diagram them here,
                     but this medium is fairly restrictive.

         ___              ___            ___    ___       _      _
        /   \            /   \          /   \  /   \     / |    / |
       /_____\_______   /_____\_____   /_____\/_____\   /__|___/__|___
              \     /
               \___/

            00              01               10               11
Detecting a Sound Card
According to the AdLib manual, the 'official' method of checking for a sound card is as follows:
- Reset both timers by writing 60h to register 4.
- Enable the interrupts by writing 80h to register 4. NOTE: this must be a separate step from number 1.
- Read the status register (port 388h). Store the result.
- Write FFh to register 2 (Timer 1).
- Start timer 1 by writing 21h to register 4.
- Delay for at least 80 microseconds.
- Read the status register (port 388h). Store the result.
- Reset both timers and interrupts (see steps 1 and 2).
- Test the stored results of steps 3 and 7 by ANDing them with E0h. The result of step 3 should be 00h, and the result of step 7 should be C0h. If both are correct, an AdLib-compatible board is installed in the computer.
Making a Sound
Many people have asked me, upon reading this document, what the proper register values should be to make a simple sound. Well, here they are.
First, clear out all of the registers by setting all of them to zero. This is the quick-and-dirty method of resetting the sound card, but it works. Note that if you wish to use different waveforms, you must then turn on bit 5 of register 1. (This reset need be done only once, at the start of the program, and optionally when the program exits, just to make sure that your program doesn't leave any notes on when it exits.)
Now, set the following registers to the indicated value:
| REGISTER | VALUE | DESCRIPTION |
| 20 | 01 | Set the modulator's multiple to 1 |
| 40 | 10 | Set the modulator's level to about 40 dB |
| 60 | F0 | Modulator attack: quick; decay: long |
| 80 | 77 | Modulator sustain: medium; release: medium |
| A0 | 98 | Set voice frequency's LSB (it'll be a D#) |
| 23 | 01 | Set the carrier's multiple to 1 |
| 43 | 00 | Set the carrier to maximum volume (about 47 dB) |
| 63 | F0 | Carrier attack: quick; decay: long |
| 83 | 77 | Carrier sustain: medium; release: medium |
| B0 | 31 | Turn the voice on; set the octave and freq MSB |
To turn the voice off, set register B0h to 11h (or, in fact, any value which leaves bit 5 clear). It's generally preferable, of course, to induce a delay before doing so.
Programming the Gravis UltraSound
THE OFFICAL GRAVIS ULTRASOUND PROGRAMMERS ENCYCLOPEDIA ( G.U.P.E ) v 0.1
Written by Mark Dixon.
INTRODUCTION
The Gravis Ultrasound is by far the best & easiest sound card to program. Why? Because the card does all the hard stuff for you, leaving you and the CPU to do other things! This reference will document some (but not all) of the Gravis Ultrasound's hardware functions, allowing you to play music & sound effects on your GUS.
We will not be going into great detail as to the theory behind everything - if you want to get technical information then read the GUS SDK. We will be merely providing you with the routines necessary to play samples on the GUS, and a basic explanation of how they work.
This document will NOT go into DMA transfer or MIDI specifications. If someone knows something about them, and would like to write some info on them, we would appreciate it very much.
All source code is in Pascal (tested under Turbo Pascal v7.0, but should work with TP 6.0 and possibly older versions). This document will assume reasonable knowledge of programming, and some knowledge of soundcards & music.
INITIALISATION & AUTODETECTION
Since we are not using DMA, we only need to find the GUS's I/O port, which can be done from the DOS environment space, or preferably from a routine that will scan all possible I/O ports until it finds a GUS.
The theory behind the detection routine is to store some values into GUS memory, and then read them back. If we have the I/O port correct, we will read back exactly what we wrote. So first, we need a routine that will write data to the memory of the GUS :
  Function  GUSPeek(Loc : Longint) : Byte;

  { Read a value from GUS memory }

  Var
    B : Byte;
    AddLo : Word;
    AddHi : Byte;
  Begin
    AddLo := Loc AND $FFFF;
    AddHi := LongInt(Loc AND $FF0000) SHR 16;

    Port [Base+$103] := $43;
    Portw[Base+$104] := AddLo;
    Port [Base+$103] := $44;
    Port [Base+$105] := AddHi;

    B := Port[Base+$107];
    GUSPeek := B;
  End;


  Procedure GUSPoke(Loc : Longint; B : Byte);

  { Write a value into GUS memory }

  Var
    AddLo : Word;
    AddHi : Byte;
  Begin
    AddLo := Loc AND $FFFF;
    AddHi := LongInt(Loc AND $FF0000) SHR 16;
    Port [Base+$103] := $43;
    Portw[Base+$104] := AddLo;
    Port [Base+$103] := $44;
    Port [Base+$105] := AddHi;
    Port [Base+$107] := B;
  End;
Since the GUS can have up to 1meg of memory, we need to use a 32bit word to address all possible memory locations. However, the hardware of the GUS will only accept a 24bit word, which means we have to change the 32bit address into a 24bit address. The first two lines of each procedure does exactly that.
The rest of the procedures simply send commands and data out through the GUS I/O port defined by the variable BASE (A word). So to test for the presence of the GUS, we simply write a routine to read/write memory for all possible values of BASE:
  Function GUSProbe : Boolean;

  { Returns TRUE if there is a GUS at I/O address BASE }

  Var
    B : Byte;
  Begin
    Port [Base+$103] := $4C;
    Port [Base+$105] := 0;
    GUSDelay;
    GUSDelay;
    Port [Base+$103] := $4C;
    Port [Base+$105] := 1;
    GUSPoke(0, $AA);
    GUSPoke($100, $55);
    B := GUSPeek(0);
    If B = $AA then GUSProbe := True else GUSProbe := False;
  End;


  Procedure GUSFind;

  { Search all possible I/O addresses for the GUS }

  Var
    I : Word;
  Begin
    for I := 1 to 8 do
    Begin
      Base := $200 + I*$10;
      If GUSProbe then I := 8;
    End;
    If Base < $280 then
      Write('Found your GUS at ', Base, ' ');
  End;
The above routines will obviously need to be customised for your own use - for example, setting a boolean flag to TRUE if you find a GUS, rather than just displaying a message.
It is also a good idea to find out exactly how much RAM is on the GUS, and this can be done in a similar process to the above routine. Since the memory can either be 256k, 512k, 768k or 1024k, all we have to do is to read/write values on the boundaries of these memory addresses. If we read the same value as we wrote, then we know exactly how much memory is available.
  Function  GUSFindMem : Longint;

  { Returns how much RAM is available on the GUS }

  Var
    I : Longint;
    B : Byte;
  Begin
    GUSPoke($40000, $AA);
    If GUSPeek($40000) <> $AA then I := $3FFFF
      else
    Begin
      GUSPoke($80000, $AA);
      If GUSPeek($80000) <> $AA then I := $8FFFF
        else
      Begin
        GUSPoke($C0000, $AA);
        If GUSPeek($C0000) <> $AA then I := $CFFFF
          else I := $FFFFF;
      End;
    End;
    GUSFindMem := I;
  End;
Now that we know where the GUS is, and how much memory it has, we need to initialise it for output. Unfortunately, the below routine is slightly buggy. If you run certain programs (I discovered this after running Second Reality demo) that use the GUS, and then your program using this init routine, it will not initialise the GUS correctly.
It appears that I am not doing everything that is necessary to initialise the GUS. However, I managed to correct the problem by either re-booting (not a brilliant solution) or running Dual Module Player, which seems to initialise it properly. If someone knows where i'm going wrong, please say so!
Anyway, the following routine should be called after you have found the GUS, and before you start doing anything else with the GUS.
  Procedure GUSDelay; Assembler;

  { Pause for approx. 7 cycles. }

  ASM
    mov   dx, 0300h
    in    al, dx
    in    al, dx
    in    al, dx
    in    al, dx
    in    al, dx
    in    al, dx
    in    al, dx
  End;


  Procedure GUSReset;

  { An incomplete routine to initialise the GUS for output. }

  Begin
    port [Base+$103]   := $4C;
    port [Base+$105] := 1;
    GUSDelay;
    port [Base+$103]   := $4C;
    port [Base+$105] := 7;
    port [Base+$103]   := $0E;
    port [Base+$105] := (14 OR $0C0);
  End;
Now you have all the routine necessary to find and initialise the GUS, let's see just what we can get the GUS to do!
MAKING SOUNDS
The GUS is unique in that it allows you to store the data to be played in it's onboard DRAM. To play the sample, you then tell it what frequency to play it at, what volume and pan position, and which sample to play. The GUS will then do everything in the background, it will interpolate the data to give an effective 44khz (or less, depending on how many active voices) sample. This means that an 8khz sample will sound better on the GUS than most other cards, since the GUS will play it at 44khz!
The GUS also has 32 separate digital channels (that are mixed by a processor on the GUS) which all have their own individual samples, frequencies, volumes and panning positions. For some reason, however, the GUS can only maintain 44khz output with 16 channels - the more channels, the lower the playback rate (which basically means, lower quality). If you are using all 32 channels (unlikely), then playback is reduced to 22khz.
Since you already know how to store samples in the GUS dram (simply use the GUSPoke routine to store the bytes) we will now look at various routines to change the way the gus plays a sample. The first routine we will look at will set the volume of an individual channel:
  Procedure GUSSetVolume( Voi : Byte; Vol : Word);

  { Set the volume of channel VOI to Vol, a 16bit logarithmic scale
    volume value -  0 is off, $ffff is full volume, $e0000 is half
    volume, etc }

  Begin
    Port [Base+$102] := Voi;
    Port [Base+$102] := Voi;
    Port [Base+$102] := Voi;
    Port [Base+$103] := 9;
    Portw[Base+$104] := Vol;  { 0-0ffffh, log scale not linear }
  End;
The volume (and pan position & frequency) can be changed at ANY time regardless of weather the GUS is allready playing the sample or not. This means that to fade out a sample, you simply make several calls to the GUSSetVolume routine with exponentially (to account for the logarithmic scale) decreasing values.
The next two routines will set the pan position (from 0 to 15, 0 being left, 15 right and 7 middle) and the frequency respectively :
  Procedure GUSSetBalance( V, B : Byte);
  Begin
    Port [Base+$102] := V;
    Port [Base+$102] := V;
    Port [Base+$102] := V;
    Port [Base+$103] := $C;
    Port [Base+$105] := B;
  End;

  Procedure GUSSetFreq( V : Byte; F : Word);
  Begin
    Port [Base+$102] := V;
    Port [Base+$102] := V;
    Port [Base+$102] := V;
    Port [Base+$103] := 1;
    Portw[Base+$104] := F;
  End;
I'm not sure the the value F in the set frequency procedure. The GUS SDK claims that it is the exact frequency at which the sample should be played.
When playing a sample, it is necessary to set the volume, position and frequency BEFORE playing the sample. In order to start playing a sample, you need to tell the GUS where abouts in memory the sample is stored, and how big the sample is :
  Procedure GUSPlayVoice( V, Mode : Byte;VBegin, VStart, VEnd : Longint);

  { This routine tells the GUS to play a sample commencing at VBegin,
    starting at location VStart, and stopping at VEnd }

  Var
    GUS_Register : Word;
  Begin
    Port [Base+$102] := V;
    Port [Base+$102] := V;
    Port [Base+$103] := $0A;
    Portw[Base+$104] := (VBegin SHR 7) AND 8191;
    Port [Base+$103] := $0B;
    Portw[Base+$104] := (VBegin AND $127) SHL 8;
    Port [Base+$103] := $02;
    Portw[Base+$104] := (VStart SHR 7) AND 8191;
    Port [Base+$103] := $03;
    Portw[Base+$104] := (VStart AND $127) SHL 8;
    Port [Base+$103] := $04;
    Portw[Base+$104] := ((VEnd)   SHR 7) AND 8191;
    Port [Base+$103] := $05;
    Portw[Base+$104] := ((VEnd)   AND $127) SHL 8;
    Port [Base+$103] := $0;
    Port [Base+$105] := Mode;

    { The below part isn't mentioned as necessary, but the card won't
      play anything without it! }

    Port[Base] := 1;
    Port[Base+$103] := $4C;
    Port[Base+$105] := 3;
  end;
There are a few important things to note about this routine. Firstly, the value VEnd refers to the location in memory, not the length of the sample. So if the sample commenced at location 1000, and was 5000 bytes long, the VEnd would be 6000 if you wanted the sample to play to the end. VBegin and VStart are two weird values, one of them defines the start of the sample, and the other defines where abouts to actually start playing. I'm not sure why both are needed, since I have allways set them to the same value.
Now that the gus is buisy playing a sample, the CPU is totally free to be doing other things. We might, for example, want to spy on the gus and see where it is currently up to in playing the sample :
  Function VoicePos( V : Byte) : Longint;
  Var
    P : Longint;
    Temp0, Temp1 : Word;
  Begin
    Port [Base+$102] := V;
    Port [Base+$102] := V;
    Port [Base+$102] := V;
    Port [Base+$103] := $8A;
    Temp0 := Portw[Base+$104];
    Port [Base+$103] := $8B;
    Temp1 := Portw[Base+$104];
    VoicePos := (Temp0 SHL 7)+ (Temp1 SHR 8);
  End;
This routine will return the memory location that the channel V is currently playing. If the GUS has reached the end of the sample, then the returned value will be VEnd. If you want to see what BYTE value is currently being played (for visual output of the sample's waveform), then you simply PEEK the location pointed to by this routine.
Finally, we might want to stop playing the sample before it has reached it's end - the following routine will halt the playback on channel V.
  Procedure GUSStopVoice( V : Byte);
  Var
    Temp : Byte;
  Begin
    Port [Base+$102] := V;
    Port [Base+$102] := V;
    Port [Base+$102] := V;
    Port [Base+$103] := $80;
    Temp := Port[Base+$105];
    Port [Base+$103] := 0;
    Port [Base+$105] := (Temp AND $df) OR 3;
    GUSDelay;
    Port [Base+$103] := 0;
    Port [Base+$105] := (Temp AND $df) OR 3;
  End;
SPECIAL EFFECTS
There are a few extra features of the GUS that are worthy of mention, the main one being hardware controlled sample looping. The GUS has a control byte for each of the 32 channels. This control byte consists of 8 flags that effect the way the sample is played, as follows: (The table is taken directly from the GUS Software Developers Kit)
           =================================
           | 7 | 6 | 5 | 4 | 3 | 2 | 1 | 0 |
           =================================
             |   |   |   |   |   |   |   |
             |   |   |   |   |   |   |   +---- Voice Stopped
             |   |   |   |   |   |   +-------- Stop Voice
             |   |   |   |   |   +------------ 16 bit data
             |   |   |   |   +---------------- Loop enable
             |   |   |   +-------------------- Bi-directional loop enable
             |   |   +------------------------ Wave table IRQ
             |   +---------------------------- Direction of movement
             +-------------------------------- IRQ pending
(*)Bit 0 = 1 : Voice is stopped. This gets set by hitting the end address (not looping) or by setting bit 1 in this reg. Bit 1 = 1 : Stop Voice. Manually force voice to stop. Bit 2 = 1 : 16 bit wave data, 0 = 8 bit data Bit 3 = 1 : Loop to begin address when it hits the end address. Bit 4 = 1 : Bi-directional looping enabled Bit 5 = 1 : Enable wavetable IRQ. Generate an irq when the voice hits the end address. Will generate irq even if looping is enabled. (*)Bit 6 = 1 - Decreasing addresses, 0 = increasing addresses. It is self-modifying because it might shift directions when it hits one of the loop boundaries and looping is enabled. (*)Bit 7 = 1 - Wavetable IRQ pending. If IRQ's are enabled and looping is NOT enabled, an IRQ will be constantly generated until voice is stopped. This means that you may get more than 1 IRQ if it isn't handled properly.
  Procedure GUSVoiceControl( V, B : Byte);
  Begin
    Port [Base+$102] := V;
    Port [Base+$102] := V;
    Port [Base+$103] := $0;
    Port [Base+$105] := B;
  End;
The above routine will set the Voice Control byte for the channel defined in V. For example, if you want channel 1 to play the sample in a continuous loop, you would use the procedure like this:
GUSVoiceControl( 1, $F ); { Bit 3 ON = $F }CONCLUSION
The above routines are all that is necessary to get the GUS to start playing music. To prove this, I have included my 669 player & source code in the package as a practical example. The GUSUnit contains all the routines discussed above. I won't go into the theory of the 669 player, but it is a good starting point if you want to learn about modplayers. The player is contained within the archive 669UNIT.ARJ
.VOC File Format
(byte numbers are hex!)
HEADER (bytes 00-19)
Series of DATA BLOCKS (bytes 1A+) [Must end w/ Terminator Block]
| byte # | Description |
| 00-12 | "Creative Voice File" |
| 13 | 1A (eof to abort printing of file) |
| 14-15 | Offset of first datablock in .voc file (std 1A 00 in Intel Notation) |
| 16-17 | Version number (minor,major) (VOC-HDR puts 0A 01) |
| 18-19 | 2's Comp of Ver. # + 1234h (VOC-HDR puts 29 11) |
DATA BLOCK:
Data Block: TYPE(1-byte), SIZE(3-bytes), INFO(0+ bytes) NOTE: Terminator Block is an exception -- it has only the TYPE byte.
| TYPE | Description | Size (3-byte int) | Info |
| 00 | Terminator | (NONE) | (NONE) |
| 01 | Sound data | 2+length of data | * |
| 02 | Sound continue | length of data | Voice Data |
| 03 | Silence | 3 | ** |
| 04 | Marker | 2 | Marker# (2 bytes) |
| 05 | ASCII | length of string | null terminated string |
| 06 | Repeat | 2 | Count# (2 bytes) |
| 07 | End repeat | 0 | (NONE) |
| 08 | Extended | 4 | *** |
      *Sound Info Format:       **Silence Info Format:
       ---------------------      ----------------------------
       00   Sample Rate           00-01  Length of silence - 1
       01   Compression Type      02     Sample Rate
       02+  Voice Data

    ***Extended Info Format:
       ---------------------
       00-01  Time Constant: Mono: 65536 - (256000000/sample_rate)
                             Stereo: 65536 - (25600000/(2*sample_rate))
       02     Pack
       03     Mode: 0 = mono
                    1 = stereo


  Marker#           -- Driver keeps the most recent marker in a status byte
  Count#            -- Number of repetitions + 1
                         Count# may be 1 to FFFE for 0 - FFFD repetitions
                         or FFFF for endless repetitions
  Sample Rate       -- SR byte = 256-(1000000/sample_rate)
  Length of silence -- in units of sampling cycle
  Compression Type  -- of voice data
                         8-bits    = 0
                         4-bits    = 1
                         2.6-bits  = 2
                         2-bits    = 3
                         Multi DAC = 3+(# of channels) [interesting--
                                       this isn't in the developer's manual]
.MID File Format
The standard MIDI file format is a very strange beast. When viewed as a whole, it can be quite overwhelming. Of course, no matter how you look at it, describing a piece of music in enough detail to be able to reproduce it accurately is no small task. So, while complicated, the structure of the midi file format is fairly intuitive when understood. I must insert a disclaimer here that I am by no means an expert with midi nor midi files. I recently obtained a Gravis UltraSound board for my PC, and upon hearing a few midi files (.MID) thought, "Gee, I'd like to be able to make my own .MID files." Well, many aggravating hours later, I discovered that this was no trivial task. But, I couldn't let a stupid file format stop me. (besides, I once told my wife that computers aren't really that hard to use, and I'd hate to be a hypocrite) So if any errors are found in this information, please let me know and I will fix it. Also, this document's scope does not extend to EVERY type of midi command and EVERY possible file configuration. It is a basic guide that should enable the reader (with a moderate investment in time) to generate a quality midi file.
1. Overview
A midi (.MID) file contains basically 2 things, Header chunks and Track chunks. Section 2 explains the header chunks, and Section 3 explains the track chunks. A midi file contains ONE header chunk describing the file format, etc., and any number of track chunks. A track may be thought of in the same way as a track on a multi-track tape deck. You may assign one track to each voice, each staff, each instrument or whatever you want. 2. Header Chunk
The header chunk appears at the beginning of the file, and describes the file in three ways. The header chunk always looks like:
4D 54 68 64 00 00 00 06 ff ff nn nn dd ddThe ascii equivalent of the first 4 bytes is MThd. After MThd comes the 4-byte size of the header. This will always be 00 00 00 06, because the actual header information will always be 6 bytes.
ff ff is the file format. There are 3 formats:
- 0 - single-track
- 1 - multiple tracks, synchronous
- 2 - multiple tracks, asynchronous
Single track is fairly self-explanatory - one track only. Synchronous multiple tracks means that the tracks will all be vertically synchronous, or in other words, they all start at the same time, and so can represent different parts in one song. Asynchronous multiple tracks do not necessarily start at the same time, and can be completely asynchronous.
nn nn is the number of tracks in the midi file.
dd dd is the number of delta-time ticks per quarter note. (More about this later)
3. Track Chunks
The remainder of the file after the header chunk consists of track chunks. Each track has one header and may contain as many midi commands as you like. The header for a track is very similar to the one for the file:
4D 54 72 6B xx xx xx xxAs with the header, the first 4 bytes has an ascii equivalent. This one is MTrk. The 4 bytes after MTrk give the length of the track (not including the track header) in bytes.
Following the header are midi events. These events are identical to the actual data sent and received by MIDI ports on a synth with one addition. A midi event is preceded by a delta-time. A delta time is the number of ticks after which the midi event is to be executed. The number of ticks per quarter note was defined previously in the file header chunk. This delta-time is a variable-length encoded value. This format, while confusing, allows large numbers to use as many bytes as they need, without requiring small numbers to waste bytes by filling with zeros. The number is converted into 7-bit bytes, and the most-significant bit of each byte is 1 except for the last byte of the number, which has a msb of 0. This allows the number to be read one byte at a time, and when you see a msb of 0, you know that it was the last (least significant) byte of the number. According to the MIDI spec, the entire delta- time should be at most 4 bytes long.
Following the delta-time is a midi event. Each midi event (except a running midi event) has a command byte which will always have a msb of 1 (the value will be >= 128). A list of most of these commands is in appendix A. Each command has different parameters and lengths, but the data that follows the command will have a msb of 0 (less than 128). The exception to this is a meta- event, which may contain data with a msb of 1. However, meta-events require a length parameter which alleviates confusion.
One subtlety which can cause confusion is running mode. This is where the actual midi command is omitted, and the last midi command issued is assumed. This means that the midi event will consist of a delta-time and the parameters that would go to the command if it were included. 4. Conclusion If this explanation has only served to confuse the issue more, the appendices contain examples which may help clarify the issue.
Appendix A
1. MIDI Event Commands
Each command byte has 2 parts. The left nybble (4 bits) contains the actual command, and the right nybble contains the midi channel number on which the command will be executed. There are 16 midi channels, and 8 midi commands (the command nybble must have a msb of 1). In the following table, x indicates the midi channel number. Note that all data bytes will be <128 (msb set to 0).
All meta-events start with FF followed by the command (xx), the length, or number of bytes that will contain data (nn), and the actual data (dd).
| Hex | Binary | Data | Description |
| 00 | 00000000 | nn ssss | Sets the track's sequence number. nn=02 (length of 2-byte sequence number) ssss=sequence number |
| 01 | 00000001 | nn tt .. | Text event- any text you want. nn=length in bytes of text tt=text characters |
| 02 | 00000010 | nn tt .. | Same as text event, but used for copyright info. nn tt=same as text event |
| 03 | 00000011 | nn tt .. | Sequence or Track name nn tt=same as text event |
| 04 | 00000100 | nn tt .. | Track instrument name nn tt=same as text event |
| 05 | 00000101 | nn tt .. | Lyric nn tt=same as text event |
| 06 | 00000110 | nn tt .. | Marker nn tt=same as text event |
| 07 | 00000111 | nn tt .. | Cue point nn tt=same as text event |
| 2F | 00101111 | 00 | This event must come at the end of each track |
| 51 | 01010001 | 03 tttttt | Set tempo tttttt=microseconds/quarter note |
| 58 | 01011000 | 04 nn dd ccbb | Time Signature nn=numerator of time sig. dd=denominator of time sig. 2=quarter 3=eighth, etc. cc=number of ticks in metronome click bb=number of 32nd notes to the quarter note |
| 59 | 01011001 | 02 sf mi | Key signature sf=sharps/flats (-7=7 flats, 0=key of C, 7=7 sharps) mi=major/minor (0=major, 1=minor) |
| 7F | 01111111 | xx dd .. | Sequencer specific information xx=number of bytes to be sent dd=data |
The following table lists system messages which control the entire system. These have no midi channel number. (these will generally only apply to controlling a midi keyboard, etc.)
| Hex | Binary | Data | Description |
| F8 | 11111000 | Timing clock used when synchronization is required. | |
| FA | 11111010 | Start current sequence | |
| FB | 11111011 | Continue a stopped sequence where left off | |
| FC | 11111100 | Stop a sequence |
The following table lists the numbers corresponding to notes for use in note on and note off commands.
| Octave # | Note Numbers | |||||||||||
| C | C# | D | D# | E | F | F# | G | G# | A | A# | B | |
| 0 | 0 | 1 | 2 | 3 | 4 | 5 | 6 | 7 | 8 | 9 | 10 | 11 |
| 1 | 12 | 13 | 14 | 15 | 16 | 17 | 18 | 19 | 20 | 21 | 22 | 23 |
| 2 | 24 | 25 | 26 | 27 | 28 | 29 | 30 | 31 | 32 | 33 | 34 | 35 |
| 3 | 36 | 37 | 38 | 39 | 40 | 41 | 42 | 43 | 44 | 45 | 46 | 47 |
| 4 | 48 | 49 | 50 | 51 | 52 | 53 | 54 | 55 | 56 | 57 | 58 | 59 |
| 5 | 60 | 61 | 62 | 63 | 64 | 65 | 66 | 67 | 68 | 69 | 70 | 71 |
| 6 | 72 | 73 | 74 | 75 | 76 | 77 | 78 | 79 | 80 | 81 | 82 | 83 |
| 7 | 84 | 85 | 86 | 87 | 88 | 89 | 90 | 91 | 92 | 93 | 94 | 95 |
| 8 | 96 | 97 | 98 | 99 | 100 | 101 | 102 | 103 | 104 | 105 | 106 | 107 |
| 9 | 108 | 109 | 110 | 111 | 112 | 113 | 114 | 115 | 116 | 117 | 118 | 119 |
| 10 | 120 | 121 | 122 | 123 | 124 | 125 | 126 | 127 | ||||
BIBLIOGRAPHY
"MIDI Systems and Control" Francis Rumsey 1990 Focal Press
"MIDI and Sound Book for the Atari ST" Bernd Enders and Wolfgang Klemme 1989 M&T Publishing, Inc.
MIDI file specs and general MIDI specs were also obtained by sending e-mail to LISTSERV@AUVM.AMERICAN.EDU with the phrase GET MIDISPEC PACKAGE in the message.
This article was written by Dustin Caldwell
.WAV File Format
Where's the article?
Because the .WAV article is really big (the size of The QB Times without the article!) I've decided to put it in a separate file. Go here if you want to read the .WAV article.
.MOD File Format
Offset  Bytes  Description
   0     20    Songname. Remember to put trailing null bytes at the end...

Information for sample 1-31:

Offset  Bytes  Description
  20     22    Samplename for sample 1. Pad with null bytes.
  42      2    Samplelength for sample 1. Stored as number of words.
               Multiply by two to get real sample length in bytes.
  44      1    Lower four bits are the finetune value, stored as a signed
               four bit number. The upper four bits are not used, and
               should be set to zero.
               Value:  Finetune:
                 0        0
                 1       +1
                 2       +2
                 3       +3
                 4       +4
                 5       +5
                 6       +6
                 7       +7
                 8       -8
                 9       -7
                 A       -6
                 B       -5
                 C       -4
                 D       -3
                 E       -2
                 F       -1

  45      1    Volume for sample 1. Range is $00-$40, or 0-64 decimal.
  46      2    Repeat point for sample 1. Stored as number of words offset
               from start of sample. Multiply by two to get offset in bytes.
  48      2    Repeat Length for sample 1. Stored as number of words in
               loop. Multiply by two to get replen in bytes.
Information for the next 30 samples starts here. It's just like the info for sample 1.
Offset  Bytes  Description
  50     30    Sample 2...
  80     30    Sample 3...
   .
   .
   .
 890     30    Sample 30...
 920     30    Sample 31...

Offset  Bytes  Description
 950      1    Songlength. Range is 1-128.
 951      1    Well... this little byte here is set to 127, so that old
               trackers will search through all patterns when loading.
               Noisetracker uses this byte for restart, but we don't.
 952    128    Song positions 0-127. Each hold a number from 0-63 that
               tells the tracker what pattern to play at that position.
1080      4    The four letters "M.K." - This is something Mahoney & Kaktus
               inserted when they increased the number of samples from
               15 to 31. If it's not there, the module/song uses 15 samples
               or the text has been removed to make the module harder to
               rip. Startrekker puts "FLT4" or "FLT8" there instead.

Offset  Bytes  Description
1084    1024   Data for pattern 00.
   .
   .
   .
xxxx  Number of patterns stored is equal to the highest patternnumber
      in the song position table (at offset 952-1079).
Each note is stored as 4 bytes, and all four notes at each position in the pattern are stored after each other.
00 -  chan1  chan2  chan3  chan4
01 -  chan1  chan2  chan3  chan4
02 -  chan1  chan2  chan3  chan4
etc.
Info for each note:
 _____byte 1_____   byte2_    _____byte 3_____   byte4_
/                 /        /                 /
0000          0000-00000000  0000          0000-00000000

Upper four    12 bits for    Lower four    Effect command.
bits of sam-  note period.   bits of sam-
ple number.                  ple number.

Periodtable for Tuning 0, Normal
  C-1 to B-1 : 856,808,762,720,678,640,604,570,538,508,480,453
  C-2 to B-2 : 428,404,381,360,339,320,302,285,269,254,240,226
  C-3 to B-3 : 214,202,190,180,170,160,151,143,135,127,120,113
To determine what note to show, scan through the table until you find the same period as the one stored in byte 1-2. Use the index to look up in a notenames table.
This is the data stored in a normal song. A packed song starts with the four letters "PACK", but i don't know how the song is packed: You can get the source code for the cruncher/decruncher from us if you need it, but I don't understand it; I've just ripped it from another tracker...
In a module, all the samples are stored right after the patterndata. To determine where a sample starts and stops, you use the sampleinfo structures in the beginning of the file (from offset 20). Take a look at the mt_init routine in the playroutine, and you'll see just how it is done.
EFFECT COMMANDS
Effect commands on protracker should be compatible with all other trackers.
 0 - None/Arpeggio     8 - * NOT USED *
 1 - Portamento Up     9 - SampleOffset
 2 - Portamento Down   A - VolumeSlide
 3 - TonePortamento    B - PositionJump
 4 - Vibrato           C - Set Volume
 5 - ToneP + VolSlide  D - PatternBreak
 6 - Vibra + VolSlide  E - Misc. Cmds
 7 - Tremolo           F - Set Speed
E - COMMANDS
The E command has been altered to contain more commands than one.
 E0- Filter On/Off     E8- * NOT USED *
 E1- Fineslide Up      E9- Retrig Note
 E2- Fineslide Down    EA- FineVol Up
 E3- Glissando Control EB- FineVol Down
 E4- Vibrato Control   EC- NoteCut
 E5- Set Finetune      ED- NoteDelay
 E6- Patternloop       EE- PatternDelay
 E7- Tremolo Control   EF- Invert Loop
Cmd 0. Arpeggio [Range:$0-$F/$0-$F]
Usage: $0 + 1st halfnote add + 2nd halfnote add Arpeggio is used to simulate chords. This is done by rapidly changing the pitch between 3(or 2) different notes. It sounds very noisy and grainy on most samples, but ok on monotone ones. Example: C-300047 C-major chord: (C+E+G or C+4+7 halfnotes) C-300037 C-minor chord: (C+D#+G or C+3+7 halfnotes)
Cmd 1. Portamento up [Speed:$00-$FF]
Usage: $1 + portamento speed Portamento up will simply slide the sample pitch up. You can NOT slide higher than B-3! (Period 113) Example: C-300103 1 is the command, 3 is the portamentospeed. NOTE: The portamento will be called as many times as the speed of the song. This means that you'll sometimes have trouble sliding accurately. If you change the speed without changing the sliderates, it will sound bad...
Cmd 2. Portamento down [Speed:$00-FF]
Usage: $2 + portamento speed Just like command 1, except that this one slides the pitch down instead. (Adds to the period). You can NOT slide lower than C-1! (Period 856) Example: C-300203 2 is the command, 3 is the portamentospeed.
Cmd 3. Tone-portamento [Speed:$00-$FF]
Usage: Dest-note + $3 + slidespeed This command will automatically slide from the old note to the new. You don't have to worry about which direction to slide, you need only set the slide speed. To keep on sliding, just select the command $3 + 00. Example: A-200000 First play a note. C-300305 C-3 is the note to slide to, 3 the command, and 5 the speed.
Cmd 4. Vibrato [Rate:$0-$F,Dpth:$0-$F]
Usage: $4 + vibratorate + vibratodepth Example: C-300481 4 is the command, 8 is the speed of the vibrato, and 1 is the depth of the vibrato. To keep on vibrating, just select the command $4 + 00. To change the vibrato, you can alter the rate, depth or both. Use command E4- to change the vibrato-waveform.
Cmd 5. ToneP + Volsl [Spd:$0-$F/$0-$F]
Usage: $5 + upspeed + downspeed This command will continue the current toneportamento and slide the volume at the same time. Stolen from NT2.0. Example: C-300503 3 is the speed to turn the volume down. C-300540 4 is the speed to slide it up.
Cmd 6. Vibra + Volsl [Spd:$0-$F/$0-$F]
Usage: $6 + upspeed + downspeed This command will continue the current vibrato and slide the volume at the same time. Stolen from NT2.0. Example: C-300605 5 is the speed to turn the volume down. C-300640 4 is the speed to slide it up.
Cmd 7. Tremolo [Rate:$0-$F,Dpth:$0-$F]
Usage: $7 + tremolorate + tremolodepth Tremolo vibrates the volume. Example: C-300794 7 is the command, 9 is the speed of the tremolo, and 4 is the depth of the tremolo. To keep on tremoling, just select the command $7 + 00. To change the tremolo, you can alter the rate, depth or both. Use command E7- to change the tremolo-waveform.
Cmd 9. Set SampleOffset [Offs:$00-$FF]
Usage: $9 + Sampleoffset This command will play from a chosen position in the sample, and not from the beginning. The two numbers equal the two first numbers in the length of the sample. Handy for speech- samples. Example: C-300923 Play sample from offset $2300.
Cmd A. Volumeslide [Speed:$0-$F/$0-$F]
Usage: $A + upspeed + downspeed Example: C-300A05 5 is the speed to turn the volume down. C-300A40 4 is the speed to slide it up. NOTE: The slide will be called as many times as the speed of the song. The slower the song, the more the volume will be changed on each note.
Cmd B. Position-jump [Pos:$00-$7F]
Usage: $B + position to continue at Example: C-300B01 B is the command, 1 is the position to restart the song at. This command will also perform a pattern-break (see 2 pages below). You can use this command instead of restart as on noisetracker, but you must enter the position in hex!
Cmd C. Set volume [Volume:$00-$40]
Usage: $C + new volume Well, this old familiar command will set the current volume to your own selected. The highest volume is $40. All volumes are represented in hex. (Programmers do it in hex, you know!) Example: C-300C10 C is the command, 10 is the volume (16 decimal).
Cmd D. Pattern-break [Pattern-pos:00-63, decimal]
Usage: $D + pattern-position This command just jumps to the next song-position, and continues play from the patternposition you specify. Example: C-300D00 Jump to the next song-position and continue play from patternposition 00. Or: C-300D32 Jump to the next song-position and continue play from patternposition 32 instead.
Cmd E0. Set filter [Range:$0-$1]
Usage: $E0 + filter-status This command jerks around with the sound-filter on some A500 + A2000. All other Amiga-users should keep out of playing around with it. Example: C-300E01 disconnects filter (turns power LED off) C-300E00 connects filter (turns power LED on)
Cmd E1. Fineslide up [Range:$0-$F]
Usage: $E1 + value This command works just like the normal portamento up, except that it only slides up once. It does not continue sliding during the length of the note. Example: C-300E11 Slide up 1 at the beginning of the note. (Great for creating chorus effects)
Cmd E2. Fineslide down [Range:$0-$F]
Usage: $E2 + value This command works just like the normal portamento down, except that it only slides down once. It does not continue sliding during the length of the note. Example: C-300E26 Slide up 6 at the beginning of the note.
Cmd E3. Glissando Ctrl [Range:$0-$1]
Usage: $E3 + Glissando-Status Glissando must be used with the tone- portamento command. When glissando is activated, toneportamento will slide a halfnote at a time, instead of a straight slide. Example: C-300E31 Turn Glissando on. C-300E30 Turn Glissando off.
Cmd E4. Set vibrato waveform [Range:$0-$3]
Usage: $E4 + vibrato-waveform Example: C-300E40 Set sine(default) E44 Don't retrig WF C-300E41 Set Ramp Down E45 Don't retrig WF C-300E42 Set Squarewave E46 Don't retrig WF C-300E43 Set Random E47 Don't retrig WF
Cmd E5. Set finetune [Range:$0-$F]
Usage: $E5 + finetune-value Example: C-300E51 Set finetune to 1. Use these tables to figure out the finetune-value. Finetune: +7 +6 +5 +4 +3 +2 +1 0 Value: 7 6 5 4 3 2 1 0 Finetune: -1 -2 -3 -4 -5 -6 -7 -8 Value: F E D C B A 9 8
Cmd E6. PatternLoop [Loops:$0-$F]
Usage: $E6 + number of loops This command will loop a part of a pattern. Example: C-300E60 Set loopstart. C-300E63 Jump to loop 3 times before playing on.
Cmd E7. Set tremolo waveform
[Range:$0-$3] Usage: $E7 + tremolo-waveform Example: C-300E70 Set sine(default) E74 Don't retrig WF C-300E71 Set Ramp Down E75 Don't retrig WF C-300E72 Set Squarewave E76 Don't retrig WF C-300E73 Set Random E77 Don't retrig WF
Cmd E9. Retrig note [Value:$0-$F]
Usage: $E9 + Tick to Retrig note at. This command will retrig the same note before playing the next. Where to retrig depends on the speed of the song. If you retrig with 1 in speed 6 that note will be trigged 6 times in one note slot. Retrig on hi-hats! Example: C-300F06 Set speed to 6. C-300E93 Retrig at tick 3 out of 6.
Cmd EA. FineVolsl up [Range:$0-$F]
Usage: $EA + value This command works just like the normal volumeslide up, except that it only slides up once. It does not continue sliding during the length of the note. Example: C-300EA3 Slide volume up 1 at the beginning of the note.
Cmd EB. FineVolsl down [Range:$0-$F]
Usage: $EB + value This command works just like the normal volumeslide down, except that it only slides down once. It does not continue sliding during the length of the note. Example: C-300EB6 Slide volume down 6 at the beginning of the note.
Cmd EC. Cut note [Value:$0-$F]
Usage: $EC + Tick to Cut note at. This command will cut the note at the selected tick, creating extremely short notes. Example: C-300F06 Set speed to 6. C-300EC3 Cut at tick 3 out of 6. Note that the note is not really cut, the volume is just turned down.
Cmd ED. NoteDelay [Value:$0-$F]
Usage: $ED + ticks to delay note. This command will delay the note to the selected tick. Example: C-300F06 Set speed to 6. C-300ED3 Play note at tick 3 out of 6.
Cmd EE. PatternDelay [Notes:$0-$F]
Usage: $EE + notes to delay pattern. This command will delay the pattern the selected numbers of notes. Example: C-300EE8 Delay pattern 8 notes before playing on. All other effects are still active when the pattern is being delayed.
Cmd EF. Invert Loop [Speed:$0-$F]
Usage: $EF + Invertspeed This command will need a short loop ($10,20,40,80 etc. bytes) to work. It will invert the loop byte by byte. Sounds better than funkrepeat... Example: C-300EF8 Set invspeed to 8. To turn off the inverting, set invspeed to 0, or press ctrl + Z.
Cmd F. Set speed [Speed:$00-$FF]
Usage: $F + speed This command will set the speed of the song. Note:
The 6 and 8 channel mod files differ from the normal mods in two ways:
- The signature string "M.K." at offset 1080 is either "6CHN" or "8CHN".
- The pattern data table starting at offset 1084 stores 6 or 8 notes for each pattern position position.
Closing words
That's it for issue #2! I'd like to thank you for reading trough all this! =) Again issue #3 should come in around 3 or 4 weeks. For now, I hope you enjoyed and don't forget to send me your feedback/articles/project updates!
Hasta luego!
-Nightwolf
Credits
| Editor: | Regular Writers: | Submissions: |
| Nightwolf | Masamune_Q Abionnnn BlackBird gza[wu] Nightwolf Viper DarkAges | Yoda leroy DeVo Rems Jorden Chamid B-Czar Entropy Anthracks actlab The Brain Digital Dude Majiko Tal Bereznitskey Ryan Limbag The Collector Zack Friedrich |
© Copyright Nightwolf Productions 1999