Copy Link
Add to Bookmark
Report
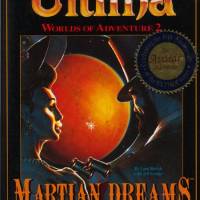
Worlds of Ultima: The Savage Empire

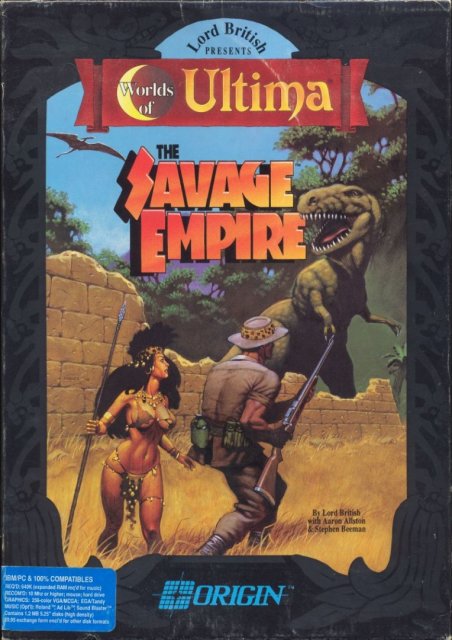
WORLDS OF ULTIMA: THE SAVAGE EMPIRE

 1 Introduction, Getting Around,
    Rafkin's Lab, Survival 101
 2 Getting Started, Pindiro and Barako,
    Disquiqui
 3 Urali, Darden, Aiela, Fabozz,
    Tichticatl
 4 Sakkhra and Barrab, Jukari and Haakur
 5 Hidden City, Call to Battle, Endgame


 WORLDS OF ULTIMA: THE SAVAGE EMPIRE
                Part 1

 INTRODUCTION

 You enter the Valley of Eodon rather by accident instead of by direct command
or intent. Troubled by dreams and requested by Lord British to investigate the
properties of the moonstones, you visit your friend Prof. Rafkin at the museum.
After prodding a flawed moonstone sent to him by a former student, Rafkin
accidentally opens a twisted black moongate that doesn't wait for you to come to
it: Instead, it sucks the entire lab with you, Rafkin, and ace reporter Jimmy
Malone through it, and deposits you in the strangest place you've ever been! All
you know is that you want to get your friends together and find your way home.
But what kind of game would that be?

 SKIPPING AROUND THE EMPIRE

 After a few hours of walking around, the novelty of the beautiful graphic
scenery wears off. You'll be glad the ancient race of the Kotl used
teleportation plates to shorten travel time. The "Terminal" is located in the
far northwestern end of the valley where the Sakkhra and Barrabs are placed.
Unfortunately, it is also uncomfortably close to a Myrmidex nest. However, it
isn't that hard to run to an adjacent plate and elude the critters. The terminal
is always active and will take you to seven locations around the valley. Each
location has a plate that will return you to the terminal. So, the trick is to
find the first plate, then you can skip around to your heart's content. Below is
a grid of the terminal with numbered plates and their approximate destinations.
Those Kotl traveled in style, eh?

 -------------------------
 !   ! 1 !   ! 2 !   !   !       1 - North of eastern Barako village
 -------------------------       2 - Not active -- mystery to me!
 !   !   !   !   !   ! 3 !       3 - Just S of Kurak/Pindiro/Yolaru fork
 -------------------------       4 - Due E of SE edge of Tichticatl
 ! 8 !   !   !   !   !   !       5 - NE of Juraki village
 -------------------------       6 - Just SW of fork leading to Disquiqui
 !   !   !   !   !   ! 4 !       7 - Directly W of Barrab plateau
 -------------------------       8 - On Sakkhra mesa, right near cave
 ! 7 !   !   !   !   !   !
 -------------------------
 !   !   ! 6 !   ! 5 !   !
 -------------------------

 RAFKIN'S LAB

 Probably the most important location in the early part of the game is Rafkin's
Lab. This is where you can get some modern items found nowhere else, something
crucial to your success. This is also where Rafkin must be to make the bamboo
rifle. There are at least three ways to reach it: near Yolaru, near Tichticatl,
and near the Kurak village. The Kurak path is probably easiest, and since you
start out in Kurak territory, it is the quickest.

 Find the hut south of the path going east from the village. Manuevering around
to the south bank, cross the river to the large island. Follow the forest to the
southeast, past the tar pits, and continue in a general southeasterly direction.
With luck, you should find it with little difficulty. The Myrmidex hang out to
the southwest of this island, so be cautious and steer clear.

 SURVIVAL 101

 The tribes of the valley are diverse in culture and technology, and have little
or no economic structure. What this means to you is that they don't buy and sell
much: You have to scavenge for materials and build the things you need, trade
for weapons, and sometimes outright steal (gasp!) certain things. However, for
those who want to keep their Avatarish virtues intact (although there seems to
be no penalty for theft), there are some alternatives.

 Emeralds may be traded in Tichticatl for weapons, armor, and arrows. There
doesn't seem to be any way to trade diamonds or rubies. Whenever you encounter a
flock of parrots, kill them all, then U)se your trusty Bowie knife (your only
possession at first, and very useful) on the bodies to get some feathers. Have
your Avatar present them to the weaver in Tichticatl who trades one emerald for
ten feathers. Have your Avatar only hold multiples of ten feathers (give the odd
ones to another party member), because the weaver will round the amount down --
five emeralds for 59 feathers -- and parrots are hard to find.

 When you do the Jukari mini-quest, you are permitted to take all the gems from
the cave. I also felt justified in raiding the palace for whatever I needed;
Moctapotl would understand, I think.

 Using your knife on cloth yields cloth strips which have several uses. When
tarred, they can be used on branches to make torches, or as part of a grenade.
Plain, they can be used on characters for bandages, healing a few points. Cloth
may be found in some huts (Rafkin's hut in the Yolaru village), but although
there are drop spindles in the game and you can get flax by using yucca plants,
I couldn't make cloth.

 If you find a digging stick (I found one in the Disquiqui village; I really
don't think they would even miss it), use it at any riverbank to get clay. Use
the clay to make a soft pot, then use any oven to fire it into a hard clay pot,
another part of the mighty grenade.

 There is an honest way to get pinde, chocalatl, and yopo. The shaman of the
Pindiro will trade five flax for one ingredient, but only with Triolo, your
shaman-in-training. U)se any flax plant: tedious, but honest!

 Food is easy, if you like fish. Borrow a pole (again, the Disquiqui village has
one). Although my game lasted one month and four days, I didn't run out of my
original supply, mostly because I hardly rested. Corn stalks may be used to get
corn, corn ground into flour, oven used on flour to make tortillas (don't hold
the corn meal when using oven; tortillas are eaten).

 Now, to mass destruction: rifles (bamboo flintlocks) and grenades! I only used
the modern rifle once to kill the gorilla, but the flintlock made quick work of
all of the bears on the way to the Urali. Gunpowder is made by dropping equal
amounts of charcoal, sulfur powder, and potassium nitrate on a grinding stone or
mortar, U)sing it, then L)ooking. There's enough of each ingredient in Rafkin's
lab to make about 30 parts gunpowder, but you will surely want more. Use a
firepit on a branch (use any tree) to get 10 parts charcoal. Get a wire screen
from the lab and use it near a sulfur pit to make 10 parts sulfur powder
(nearest pits are near the bamboo forest on the road east from Tichticatl).
Nearest source of saltpeter (potassium nitrate) is the second cave on the cliff
wall northwest of Tichticatl, but Rafkin must be in the party to identify the
crystals. Just U)se the crystal garden to yield 10 parts.

 Making the rifle and grenades is simple. Attack bamboo plants with any sharp
weapon and take the poles to the lab with Rafkin. Grenades: Use a tar pit on
cloth strip, use cloth strip on hard clay pot (see above) if you have at least
five parts gunpowder in your inventory. Either ready it and attack the target
for multiple hits, or U)se it, then D)rop it at the desired location (_even_ way
up on a ledge!)

 If you want to save trips to the tar pits (nearest one is on the way to
Rafkin's lab from Kurak village), just get an empty bucket from the lab and get
a supply of tar all at once.

 "Class Dismissed!"


 WORLDS OF ULTIMA: THE SAVAGE EMPIRE
                Part 2

 GETTING STARTED

 You wake up in Intanya's hut in the Kurak village. During your revival, Intanya
asks you questions that will determine your stats. I felt that strength was the
most important: It determines your carrying ability and seems to affect your hit
points. Intelligence is not important; you cannot be a shaman, and you can
increase your dexterity when you gain a level. The most levels you will gain
will be two, probably only one. You begin at level 6 (1,600 exp). If you do gain
a level, you will be asked (when you rest a full day or night) whether you
follow a bear, jaguar, or monkey. Choose jaguar to increase your dexterity.
Answer Intanya's questions, avoiding the answers that indicate compassion and
honesty, and you should end up with about 28 Strength, 18 Dexterity, and 21
Intelligence.

 After answering the question to check your memory (and documentation), you will
get a briefing on where everyone went to, and Intanya's shaman trainee (Triolo)
will join you. If you wish, talk to both of them (ask Triolo about Britannia);
then, if you want more ingredients for spells (Triolo has 10 of each), there are
20 more in Intanya's hut. Go outside, talk to Aloron the chieftain, and ask him
to UNITE. This is just to trip his mini-quest trigger and to get the story of
Oloru, who united the tribes in the past. Before you leave, grab two branches by
U)sing a nearby bush and make 20 parts charcoal by using the fire pit. You may
also be interested in the other huts: One has 100 cornmeal which you can use an
oven on to make 100 tortillas (drop corn meal first). Another hut has 15
emeralds.

 Now, let's go find the lab. Head east from the village to the path that goes
toward Yolaru. Turn south toward the hut with the fire in front, go around to
the south, and cross the river. Follow the edge of the woods in a southeasterly
direction and you should come to the tar pits. From there, proceed
south/southeast until you reach a more open area. The lab is located in this
area, to the southwest. Once there, take all the bottles, the empty bucket, the
rifle and pouch of bullets, the soft clay pot, the wire screen, steel hammer,
and the fire axe (ready it instead of your knife). Either take the fire
extinguisher now, or wait until you come back to make the rifles.

 The jars hold a total of 30 sulfur powder, 30 potassium nitrate, and 18
charcoal as well as some magnesium strips, useful later. Drop the sulfur,
saltpeter, and 30 charcoal (18 from the jar, plus the 12 of the 20 you made in
the Kurak village) on the mortar. U)se the mortar, L)ook and take the 30
gunpowder. Head back to the tar pits, U)se the bucket to get 10 pints of tar,
then go to Yolaru either through Kurak (where you can fire the soft clay pot
with their oven), or by heading toward the eastern bank of the island which
crosses over to the road just south of Yolaru.

 Once in Yolaru (you also may have heard the story of Oloru from the Yolaru
shaman's daughter, Sahree, if you got there via Kurak), you can talk to Apaton,
the chieftain (say UNITE) to get his mini-quest. Your main purpose at the
village is just to get the cloth in Rafkin's hut (under the bottle of liquor:
There was some at the lab, also...hm). Talk to Rafkin if you wish, he's full of
information, then U)se your knife on the cloth. Use the bucket of tar on the
resulting strips, and if you arrived in Yolaru via Kurak and fired your pot,
just use one of the tarred cloth strips on the pot, and voila! You've made your
first grenade!

 UNITING THE PINDIRO AND BARAKO

 Next, it's off to Pindiro and a reunion of sorts. The only real danger on the
way is the pterandon on the bridge across the canyon. On your way, you may want
to load Triolo up with flax by U)sing those orange yucca plants, because the
Pindiro shaman trades five flax for one spell ingredient. At Pindiro, you will
meet Dokray; talk to him, and ask him to JOIN. Ask Inara, leader of the tribe,
to UNITE. She will agree immediately (must be your good looks!). If you have
Dokray in your group, arm him with a regular axe and a shield you can find in a
hut. Go ahead and take his armor, you need it more than he does. The shaman here
will heal you; he's one of three (Inara of Kurak, and Balakai of the Barrabs)
who has that ability.

 Heading off to Barako, detour toward the far north after crossing the river,
and enter the cave. Fritaz, who came to Eodon with Prof. Spector, lives there
now. He has quite a story to tell, which will give you an idea of what's going
on. He also has more rifle bullets and a crystal brain, useful later. Leave him
(he's happy where he is) and head for Barako to find yet another familiar guy
named Shakuro. Talk to him, then ask him to JOIN.

 In Barako, you meet the distressed Halawa, shaman and leader of the tribe,
whose daughter Halisa has been kidnapped by the local equivalent of King Kong.
Ask her to UNITE, and she will ask you first to rescue Halisa. Here, you may
fire your pot if you haven't already, and use your tarred cloth strip to make
that mighty grenade. The gorilla is on a ledge which at first seems
inaccessible, but fear not!

 Take the path from Barako north to the river. Don't cross it; instead follow
the river northwest until you see the edge of the plateau. Follow the edge of
the plateau in a north/northwest direction, sticking close until you see that
impish ape. To save time, you can plug him now with a couple rifle shots, then
continue north to the cliff, and east to the waterfall. Yes, there is a hidden
cave behind the waterfall! There is also a convenient boulder at the top of the
opposite cliff. You might want to save the game here, as you only have one
grenade, and you need to drop it in the right spot. Now, either ready the
grenade and attack the spot of ground just behind the boulder, or U)se it and
D)rop it up there. Either way, down goes the boulder, blocking the waterfall and
revealing the cave. Enter it and follow it to where it exits on that elusive
ledge. Talking to Halisa, she'll challenge you to a race back home as soon as
you're out of eyesight. She must still be on her way, because I never saw here
back home.

 THE DISQUIQUI -- A COMEDIC QUEST

 (NOTE: Jimmy Malone adds tons of flavor to the dialogue, and his comments in
the conversations are great! I have outlined the shortest route to victory here,
but you may want to pick him up before the questing begins just for the
dialogue. Having him read his notebook [just say "NOTEBOOK"] before and after a
quest is also entertaining.)

 After Barako, head to the east half of their village across the river, then
head north to the transporter plate. When you ve at the terminal, step on plate
6, which puts you just southwest of the fork that leads north to the Disquiqui.
Don't worry what time you arrive; I don't think these party dudes ever sleep!

 Jimmy is being held "prisoner" in the small room in the chieftain's hut. Upon
opening the door, you automatically enter into conversation with him -- a nice
feature that occurs at a few key points in the game. Ask him to JOIN, and talk
to him. If you've talked to chieftains and done quests first, you'll fill him
in, and he'll jot it all down to read back to you when you ask.

 Exit the hut, and look for the chieftain. You can't miss him: He looks a lot
like a member of a great old comedy team that specialized in slapstick. Start
talking, and the fun begins! Don't mention UNITE until you've spoken with
Larrifin (the shaman), Lerei (a female Disquiqui), and Guoblum (Jimmy's intended
bride). Mention all the highlighted words (have "Help" on), and watch the
action. Then, mention UNITE to Chafblum, and have some more fun!

 Seems the Disquiqui only want you to "bell the T-rex" so they can hear him
coming and avoid being eaten. Be _sure_ to have several spaces open in your
inventory, or you will lose the bell and a jug of plachta (due to the little
inventory bug). Search the huts for a spear, then head south across the river.
It is a very good idea to save before the bell attempt, as Rex can kill with one
hit!

 Old Rex is found by following the bank to the east/northeast. As soon as you
spot him, put the Avatar into solo mode, and U)se the plachta on the spear to
create a "Spear of Shmap" (which to me was a distorted form of "Slap Stick").
Ready the spear, approach Rex, attack with the spear, then U)se the bell on him.
Turn around, and head for your group. Walk them out of range in solo mode, then
back to group mode and return to Disquiqui.

 Back at the Disquiqui village, talk again to Chafblum about UNITE, and find
Moctapotl, the Nahuatla chieftain in exile. He chose a heckuva place to spend
his exile, eh? There, you'll get more of the plot, and learn what's up in
Tichticatl. Ask him to UNITE to get your mini-quest.

 Before leaving the village, get four paddles (it's okay, ask Chafblum). There's
also a digging stick (to get clay), a fishing pole, and more cloth.


 WORLDS OF ULTIMA: THE SAVAGE EMPIRE
                Part 3

 THE HIDDEN URALI

 As you leave the merry Disquiqi, stop at the river bank on your way south, and
U)se the digging stick to get as much clay as you wish. U)se the clay to make
soft pots. Head to transporter plate 6, jump to the terminal, and go to plate 8.
You need to recover the exiled Urali shaman Topuru's mind, which was imprisoned
in a blue rock by the Barrab chieftain/shaman during a contest of magic -- or so
Topuru (who's a few cards short of a full deck) was led to believe. To get the
whole story, detour instead to Barrab via plate number 7, and talk to Balakai
about TOPURU. However, this walkthru is to show you the shortest path, so after
hitting plate 8, find any blue boulder in the Sakkhra territory and use your
steel hammer on it to chip off a piece. While you're there, find the Sakkhra
chieftain Sysskarr in the second cave from the left, and ask him to UNITE to
find out his quest.

 Jump back to the terminal via plate 8, step over plate 1, and head south to
Barako. Fire your pots in the village kiln and make at least one more grenade
for the Sakkhra T-Rex. Then, follow the small path west from the village to the
lake. Board the raft, making sure four members of your party each have a paddle
in their inventory, and head slightly northwest to Topuru's isle. To get the
whole story, just talk to him about URALI. Soon, the conversation will turn to
his mind, and he'll agree to tell you the way to the Urali if you return his
mind to him. Break off the conversation, and talk to him again. This time,
you'll return his mind (rock) to him, and he'll tell you the way to the Urali.
He won't be any better off, but what the heck?

 Now, I'm not even sure this part of the game was necessary, but as I didn't
check the cave that contains the hidden passage before returning Topuru's mind,
I can't guarantee it existed before. Also, it is a part of the story you don't
want to miss out on. One more thing: Topuru has a nice supply of spell
ingredients you could take, so just do it!

 DARDEN, AIELA, AND THE FABOZZ

 Now that you know how to reach the Urali, paddle back to Barako, head east then
north to plate 1, switch to plate 3 at the terminal, and head to Yolaru. You
want to pick up Rafkin, since he is the only one who can identify potassium
nitrate crystals in the cave on the way to the Urali. Unfortunately, if you have
four NPCs in your party (Triolo, Dokray, Shamuru, and Jimmy), he probably won't
join. So, ask Jimmy to LEAVE, but luckily, he will decide to wait in the Yolaru
village. Ask Rafkin to JOIN, then head sort of east/southeast to the second cave
in the cliff wall located northeast of Tichticatl.

 In the cave there are several crystal gardens. Just U)se one about 10 times to
gather 100 potassium nitrate (or more, if you want). Now, there are a lot of
bears on the way to the Urali, so you're best off just plugging them with your
modern rifle. You should still have 80 or more bullets if you went to the lab
and visited Fritaz. Alternatively, you could have Rafkin build some bamboo
flintlocks first. If so, read ahead to UNITING THE SAKKHRA AND BARRAB.

 Work your way east through the passages (it's pretty easy; just a couple side
passages). By the time you exit the other end, you may have enough experience
(3,200) to gain a level. If so, rest. You'll have a dream, and if you followed
my instructions for answering Intanya's questions, choose the jaguar to increase
your dexterity. If not, choose the bear for strength, or monkey for
intelligence, whichever stat you want to raise.

 Now, just follow the bridges east, walking by the T-Rex (thumb your nose at it;
it won't care). You'll meet the shaman of the Urali, who will let his true name
slip, giving you power over him (in his mind). Talk to him for a while, get the
whole scoop on the Fabozz and Darden, then ask him to UNITE. Carefully proceed
to the well in the center of town, and talk to the woman there for more info.

 You want to rescue the Fabozz first, then none of Darden's warriors will bother
you. So, head north along the shoreline, kill a few Urali to get some blowguns
and darts. Try to last long enough to get four blowguns and about 120 darts
(each Urali carries 30). Equip Triolo, Rafkin, and Shamuru with blowguns and set
them to Range, equip yourself with the fire axe, make sure everyone is cured and
reasonably whole, then enter the cave. Head northeast for a while, then east to
where Fabozz is guarded. Your men should be able to take the Urali; they're not
too tough (none of the battles in SAVAGE EMPIRE are very hard, the game is more
puzzle-oriented). Once the warriors are disposed of, just T)alk to the Fabozz.
"Light!" says he. So, U)se a magnesium strip that You picked up at the lab!
Presto, poof: You've rescued the Fabozz, and the Uralis (except Darden) are your
friends!

 After curing any poisoned people and receiving your adulation (don't forget to
collect the darts from the dead Urali), head back out of the cave and head south
to rescue the princess Aiela. Follow the cliff south, turn east, then cross the
river north to the cave. No one should bother you as you make your way through
the cave to the hut where Aiela is. Opening the door automatically starts the
sequence, complete with a scene of Aiela expressing her thanks. Then, Darden
attacks. He's a pretty easy fight; I had no real trouble, although I was
anticipating a tough opponent. Aiela joins your party. Go ahead and equip her
with the fourth blowgun and some darts. She's a pretty good NPC; besides, do you
really want to get rid of her?

 Head back to Yolaru the way you came (there shouldn't any bears left). Make
about 100 more charcoal by burning 10 more branches, then head towards Kurak to
speak to Aloron again, and have Intanya heal your party.

 TICHTICATL

 Go to transporter plate 3, switch at the terminal to plate 4, and enter the
prison of Tichticatl at the far west end of the city. Don't talk to any of the
guards unless you're prepared to fight. They're pretty easy, and each has bark
armor and an obsidian sword, good stuff for the NPCs. Talk to the imprisoned
shaman Oaxtapec in the northeast cell. He'll fill you in on more of the
situation. Don't talk to the other prisoner, Kipotli: He's crazy. He'll claim to
want to join you, and when you release him he'll turn on you.

 Next, head to the palace, the north central structure, and talk to Tiapactla,
cousin to the rightful ruler Moctapotl and wife of the usurper Huitlapacti.
She's in the northeastern part of the palace or wandering about. Also, enter the
throne room, where you'll automatically enter into conversation with Spector's
parrot Cleese, who overheard a lot of talk between Spector and Fritaz.

 In the throne room sits Huitlapacti and his new shaman, Zipactriotl. You may
talk to Zipactriotl, but even if he gives permission for you to speak to the
king, you can't without being attacked afterwards. I felt justified in raiding
the armory and the treasury, but your main objective is to get the golden head
in the treasury. No one will even care what you take, so let your conscience be
your guide. The weaver in the city trades one emerald for 10 parrot feathers,
and the weapon maker trades emeralds for her wares. Steal or trade to get 10
obsidian swords (plus some for your party) to deliver to Apoton of the Yolaru.


 WORLDS OF ULTIMA: THE SAVAGE EMPIRE
                Part 4

 UNITING THE SAKKHRA AND BARRAB

 From Tichticatl, take the path east to the bamboo forest. Along the way, stop
between the sulfur pits that lie along the path. Use the wire screen 10 times
(or more) to yield 100 units sulfur powder. Attack the bamboo plants to get as
many rods as you want rifles. Head back to transport square 4, transfer to
square 3, and go to Yolaru to deliver the obsidian swords to Apaton. Work your
way back to the lab. If you see Sahree (Aiela's friend) along the way, stop and
chat. At the lab, talk to Rafkin, say RIFLE, and he will convert all your rods
to flintlocks. If you've followed this far, you have the ingredients for at
least 100 more units gunpowder. Take the fire extinguisher if you haven't yet,
and leave the wire screen and steel hammer. This should be your last trip to the
lab.

 Head back to Yolaru to trade Rafkin for Jimmy (you like his style, don't you?),
stopping to refill your bucket at the tar pits if necessary. Equip Jimmy with
the stuff Rafkin had. You may have to temporarily dismiss Aiela to get Jimmy to
join, then ask Aiela to rejoin.

 Now, go to teleport square 3 and save your position, because you're going to be
working near Myrmidex country. Enter square 3, and this time, stay at the
terminal. Head northwest along the cliff, then head northeast until you begin
seeing bones and green fruit. This is where those Sakkhra offered themselves as
lunch for Rex. Carefully, move northeast until you see the big lug himself, then
send a character with a grenade in solo mode past Rex until he can see the
boulder perched on the cliff above. Either attack the spot to the upper left of
the boulder with a readied grenade, or U)se one and D)rop it up there. Either
way, Rex is dead!

 Go back to the terminal and enter square 7. Climb up the Barrab mesa all the
way to the chieftain's hut where Balakai is caring for his sick son, Nakai. Talk
to him and say UNITE to get your quest. Climb back down and save again.

 Proceed north from the Barrab mesa to the small mesa. Myrmidex are probably
around and, if you're lucky, they and the pterandons that live up there will
kill each other. At any rate, climb up there and go to the tree at the northern
end of the mesa. One, maybe two hits of the fire axe will fell the tree,
creating a bridge to the great mesa. There are several pterandon nests around
that occasionally hatch babies, so you're likely to encounter their parents on
the way back.

 Cross the tree bridge, work your way up the mesa, and you will soon encounter a
carnivorous orchid (if its vines don't find you first). The combat strategy is
not to rush the center flower, but attack and kill the outlying vines one at a
time. Then, when the flower is gone, in its place will be a bulb: the medicine
for Balakai's son!

 There is one more task you can do while you're up here, and you needn't return.
If you've rescued Aiela, she has the great gem in her inventory (Darden gave it
to her, the sentimental mug!). Continue up the mesa to the north, proceed along
the long stretch to the gem holder. Place the gem in the holder (bronze claw) by
using it. Time suddenly passes, and at high noon the sun hits the gem, opening
the entrance to the Underground City far to the north! Leave the city and its
secrets alone for now, return to Balakai with the medicine, and say UNITE again.
He will agree, and with his shamanistic skills no longer needed for his son, he
is free to heal you and your party upon request.

 UNITING THE JUKARI AND HAAKUR

 Climb down from the Barrab mesa, enter transport square 7, switch at the
terminal to square 5, and you're in the hot, lava-strewn lands of the Jukari and
Haakur. Travel southwest around the cliff and in you're in the Jukari village.
The chieftain Jumu has just gained his position due to the recent death of the
old chieftain/shaman when the volcano erupted. This had the additional drawback
of cutting them off from their cave to the far east where they kept their sacred
hide, without which they can't do any shaman stuff.

 He'll agree to UNITE; all you have to do is walk across a river of lava and
return the sacred hide. Boy, you sure have a legend to live up to! Well, thanks
to the miracles of the 20th century (a handy CO2 fire extinguisher), you won't
disappoint the natives. Proceed east from the village and follow the cliffs
until you come to a north/south stream of lava that hits the cliff. Hit it with
a blast of CO2, step on the resulting frozen spot, and do it once more. Don't
sit around on the lava bragging; it won't stay solid forever!

 Continue following the cliff wall until you can travel northeast to the cave in
the far eastern wall. The hide is in there, along with emeralds which Jumu gives
you permission to take. Get the hide, head back the way you came (you have to
refreeze the lava), and talk again to Jumu, who will take the hide.

 Head north, then work your way northeast to the Haakur caves. In the cave, you
find a friend of Dokray's. They have a rather strange friendship: Dokray lets
the Neanderthal knock him around for fun. However, you're looking for the Haakur
chief Grugorr, who's a bit more intelligent than the rest of the tribe, which
makes him almost as bright as Dokray. Intelligence doesn't run in his family,
because his son, Krukk, perished while trying to wipe out a whole cave of giant
spiders by himself. Your quest (say UNITE to Grugorr) is to torch the webs of
the spiders, and retrieve Krukk's shield as proof. Among other things (like
indoor plumbing and furniture), the Haakur haven't mastered fire yet, so you'll
have to do the exterminating for them.

 There's a Myrmidex nest in there also (getting cold feet?), but the shield
isn't down inside it (on my first try I thought it was, so I went down and got
swarmed). Follow the eastern cliff wall south until you come to the spider cave.
Create a torch by U)sing a tarred cloth strip on a branch, or else you'll have
to bomb those webs. This is an easy quest, even though the Myrmidex is in the
cave close to the web-covered shield, because the nest is webbed over, which
impedes the mutant ants. In addition, before you enter their line of sight, the
spiders and Myrmidex fight one another (much better them than you!)

 Go right in; get the feel of arson by torching a few webs. Whatever is crawling
in a web gets toasted when you burn the web, a handy fact to know. There's still
the odd spider or drone that you have to fight, but no real threat. Head north,
burn the web blocking passage to the east, and work your way to the big webs in
the widened part of the cave. You may have to fight some Myrmidex that wriggled
out of their nest; then, torch the webs in the northwest area of the cavern
until you find the Krukk shield. Make sure it's the real thing -- not just "a
shield." Go ahead and torch the big web over the bug nest if you want, then head
back and talk to Grugorr. For some reason, if you talk to him after returning
the shield, he'll ask you again if you have the shield (short attention span, I
suppose).

 One more mini-quest left to do before you summon the tribes to battle: restore
Moctapotl to his rightful place as ruler of the Nahuatla. Zap back to the
terminal via plate 4 or plate 5, and prepare to enter the Kotl city.


 WORLDS OF ULTIMA: THE SAVAGE EMPIRE
                Part 5

 THE HIDDEN CITY

 If you've followed this walkthru, you've used the great gem that Aiela was
given by Darden to activate the ancient machinery of the Kotl, and opened the
entrance to the hidden city. This entrance is located just southeast of the main
transporter terminal. So, make sure you have the golden head from the Tichticatl
palace and the crystal brain from Fritaz's cave. Enter the stairs and have the
player with the head go into solo mode and stand next to the golden robot
Yunapotli, who was so cruelly beheaded and lobotomized by Dr. Spector. U)se the
head, and go back into party mode. Talk to the Kotl's humanoid automaton, who
can tell you much of the Kotl. Soon the conversation turns to his brain, which
you will gladly return to him if you have it. Then, he will divulge more
information about things the Kotl developed to combat their rebel Myrmidex
servants. Finally, mention DOOR to him, and he will open the door to the city.

 Just north of the door stands the central plaza, surrounded by transport
plates. The memory-figure of the Kotl hero, Katakatkotl, stands to the west.
Definitely talk to him; even though the walkthru will let you finish, he
completes the history. If you like, step on the eastern plate and go west, then
south to the room with the lava. Talk to Zipactriotl (Spector) if you want to
hear his master plan.

 The automatons roaming around are argent sergeants and robosauruses, and
they're pretty sturdy types. Also wandering are serpent women, but they are no
real threat. I suggest arming three or four NPCs with Urali blowguns, yourself
with the fire axe, and everyone else with obsidian swords. Don't fret about
Yunapotli; I think he's invulnerable.

 Before you go to see the crystal generators, you want to find as many Kotl
shields and black staffs as possible. Also, get a few gas canisters, healing
crystals, and -- most importantly -- the device to locate the huge moonstone
that supplies power to the Kotl generators, which in turn power the force
shields of the villains. So, explore over to the west, where it appears a great
battle took place. Following along the walls, you should find several green gas
grenades (the most abundant item in the city), two or three staffs, and at least
two shields.

 Head back to the central plaza and step on the south-central plate. Go west a
bit until you hit a building. At the southeast corner, enter the door, and step
on the transport plate, which should be just inside the door. This appears to
have been a palace or some important building. The fruit trees look familiar? Go
east and step on the southeast plate. This takes you behind a force field, where
you can get another shield, staff, and the device to locate the moonstone.

 Retrace your steps to the first building you entered, step out, and go slightly
southeast to a building with an entrance on the northwest side. There is a long,
twisting corridor that contains two or three staves and about six healing
crystals. By now, you should have at least three Kotl shields, six or seven
staves, several gas bombs, about six crystals, and the locator. That should be
overkill for the "final battle" (I used one bomb and no crystals at all);
however, you may want more if you're feeling like fighting more argent sergeants
and robosauruses. There's plenty of them on the way to the generators, I assure
you. Go back to the transport plate that brought you to this part of the city,
and get ready to head for the generators.

 Katakatkotl's directions to the generators are pretty clear: Head east all the
way from the transport plate, straight past a couple of rooms on your north and
south, until you hit a narrow north/south hall. Head south about as far as you
can, then east to a maze of corridors to the north. Try to hug the left wall as
best you can, and you should come to a plate through a door and to the left.
Save before the maze; it may be tricky, and my directions aren't that great.

 The transport plate dumps you approximately northwest of your goal: the control
panel for the generators. For greedy players, I believe there's a room to the
west with a couple more crystals and a gas bomb. When you find the control
panel, put Yunapotli into solo mode (after backing the rest of the party away),
and have him attack the panel until it blows. The city, deprived of power, will
begin to fall apart. Spector will return to sanity, and in a short graphic
interlude, repent and mourn as Yunapotli (and all the automatons) die.

 It's time to high-tail it out of the dying city! Spector is added to the party,
and will not leave if asked. Run directly north across the empty bridge, out the
north door. The transport plates are dead now, so hoof it west to the central
plaza and south to the door where you entered, then up the stairs and out, as
the city collapses behind you. Huitlapacti, deprived of his high-tech shield and
abandoned by Spector, will be assassinated, and Moctapotl is returned to the
throne. You're ready to call the tribes together and enter the endgame.

 THE CALL TO BATTLE AND ENDGAME

 From the destroyed Kotl city, go back to the transporter terminal. They must
draw their power from the stone, because they're still active. Step to plate 4,
and if you wish, visit Moctapotl in Tichticatl. Then, head north toward Yolaru,
grabbing a skin from any hut in Tichticatl first. The path has a branch to the
west just north of Tichticatl, so turn west and climb Drum Hill. The
shaman/drummaker is a little off base, but you can get him to make the Biggest
drum. Ready all the shields and staves you have, then U)se the drum. During
another brief graphic interlude, the tribes unite and smash the majority of the
Myrmidex, leaving you to defeat the queen and destroy the strange moonstone.
This was almost too easy; you're even transported into the caverns!

 There seemed to be very few Myrmidex drones left on the way to the queen;
however, it would have been much more difficult to find her without the locator
stone. It should be blinking northwest; just work your way in that direction.
There are a couple possible wrong turns, but it's not too tough. When the stone
indicates straight north, you're right on top of it. Talk to the queen just for
fun, then lob a gas grenade at her, followed by (at most) a couple whacks from
the staff. Trot on past, ready a couple handy bombs or your fire axe, and attack
that ugly, glowing moonstone. Bang, the endgame sequence starts!

 Everyone throws a big party, alliances are forged, but the next morning Lord
British opens a moongate for you and Jimmy to enter, destination unknown. You
bid your friends goodbye; Rafkin is staying behind. Where to next? Perhaps to
the next WORLDS OF ULTIMA scenario....

WORLDS OF ULTIMA: THE SAVAGE EMPIRE is published and distributed by Origin.


